
The Best Homemade Glazed Doughnuts
The Best Homemade Glazed Doughnuts
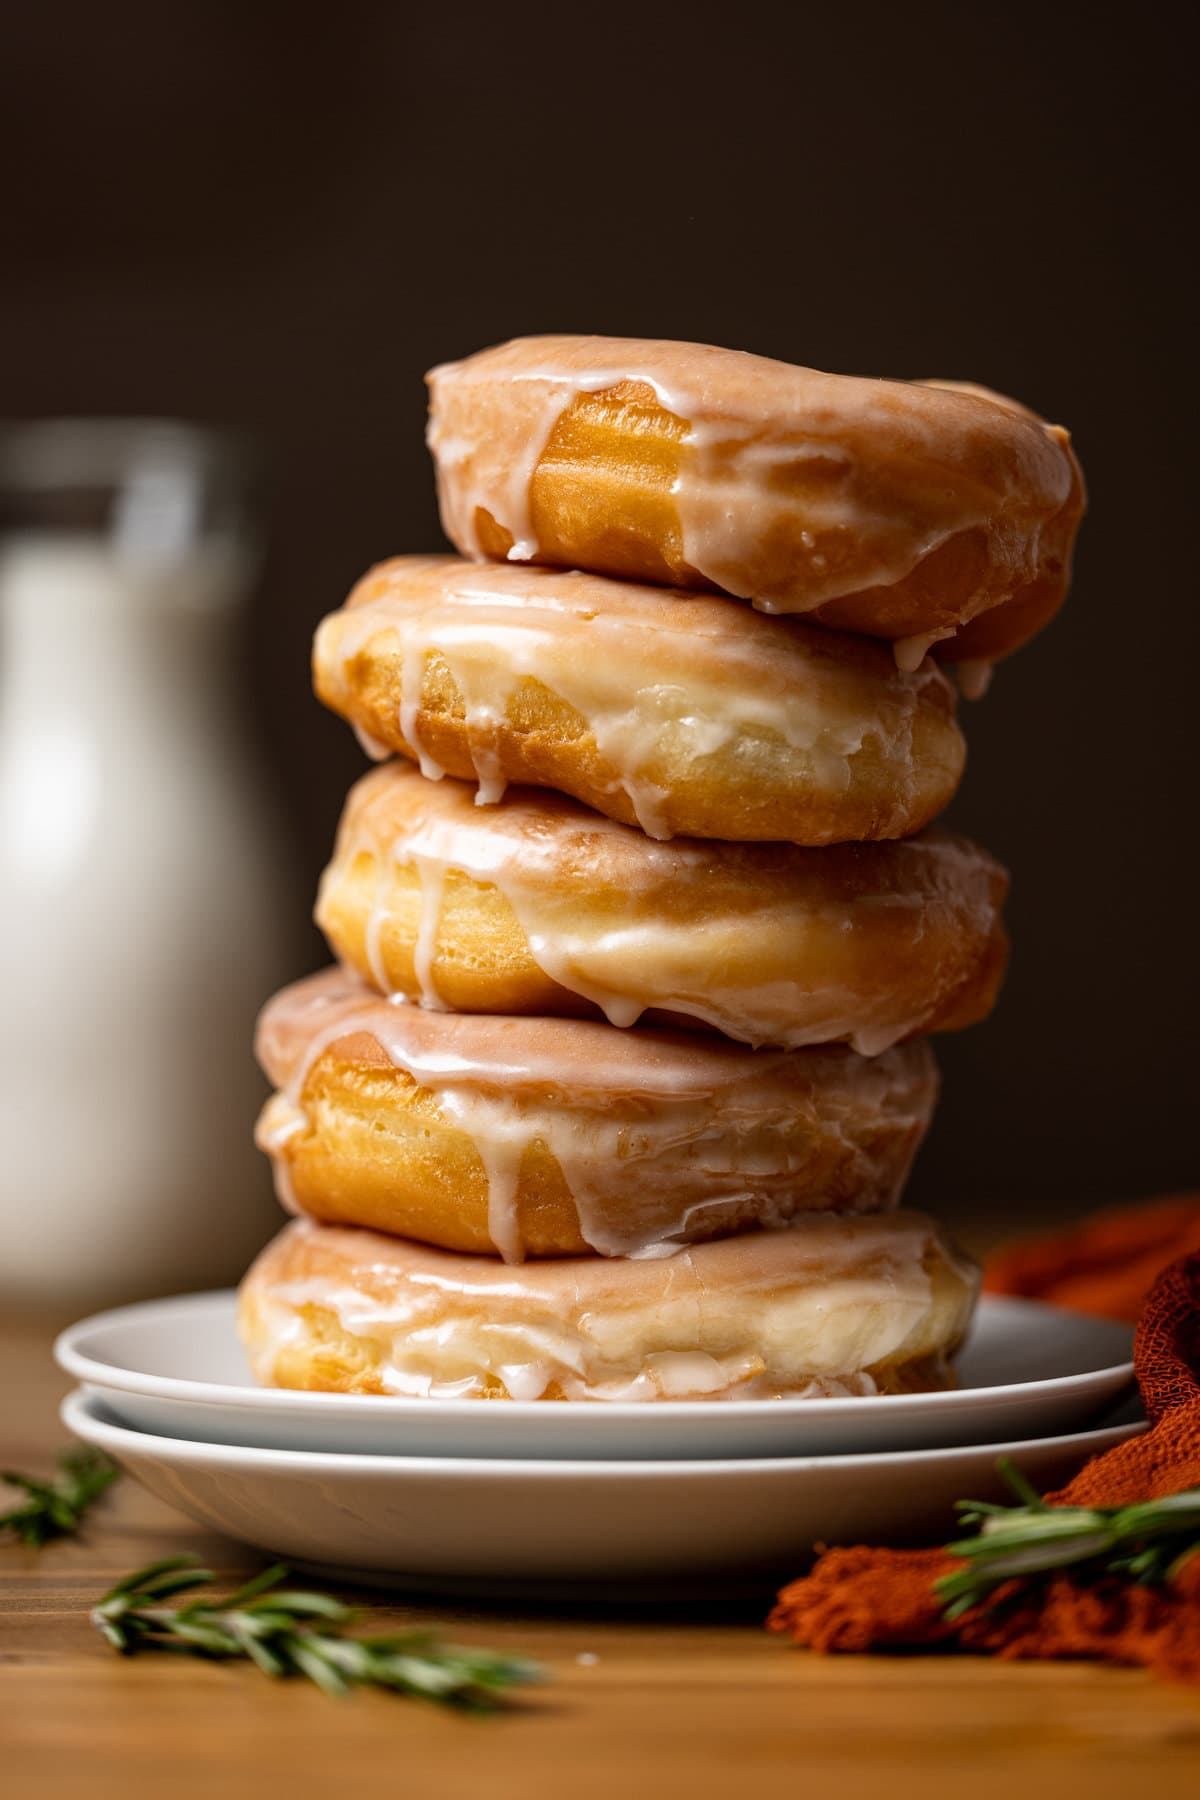
Get ready to make the ultimate sweet treat at home! The Best Homemade Glazed Doughnuts or donuts are a classic favorite that everyone loves, with a super airy, soft, and slightly crunchy texture that will satisfy your sweet tooth any time of the year. Packed with classic vanilla flavor and fried to perfection, these mouth-watering doughnuts are just like the ones from your favorite bakery.
With this doughnut/donut recipe, you'll be able to enjoy the same delicious taste that you love, but without having to leave the comfort of your home. This is truly the best fluffy doughnut recipe for one of the most popular sweet treats! Dairy-free + Air fryer options.
Disclaimer: This post contains affiliate links via Amazon for products that I wholeheartedly love.
Why Homemade Glazed Doughnuts?
These sweet treats are simply irresistible. While I usually prefer to bake my doughnuts, these Homemade Glazed Doughnuts are so good that I just had to fry them. Trust me, once you try these fluffy, airy, and vanilla-packed doughnuts/donuts, you won't regret it.
Glazed doughnuts have been my all-time favorite since I was a kid, and they still hold a special place in my heart. The burst of vanilla flavor and the flaky, airy texture are just unbeatable. And the fact that they are so easy to make and perfect for any occasion - breakfast, brunch, or dessert - is just a bonus.
But if you're looking for a healthier, dairy-free version of your childhood favorite treat, then you should definitely try my Vegan Glazed Donut Holes with Sprinkles recipe or my Vegan Chocolate Donut Holes. These two-bite snacks are packed with colorful rainbow sprinkles and a sweet vanilla/chocolate glaze, making them loved by kids and adults alike.
So whether you're craving the best doughnut ever or a healthier version, these easy doughnut recipes are sure to satisfy your sweet tooth.
Donut vs Doughnut
Donut vs doughnut - It's the spelling dilemma that has perplexed people for ages. Some say "donut" is easier to spell and faster to say, while others argue "doughnut" is the more proper and sophisticated way to spell it.
At the end of the day, no matter how you spell it, a fresh, warm donut/doughnut is always a welcome treat. So let's just enjoy the deliciousness and leave the spelling debates behind!
Jump to:
- Why Homemade Glazed Doughnuts?
- Donut vs Doughnut
- Baked vs Fried Doughnuts?
- How to Make Homemade Glazed Doughnuts
- Ingredients for Homemade Glazed Doughnuts
- Homemade Glazed Doughnuts Q + A's
- The Best Oil to Fry Your Glazed Doughnuts/Donuts
- Tips for Making The Best Homemade Glazed Doughnuts
- Can I Use Another Plant-Based Milk for The Best Homemade Glazed Doughnuts?
- Serving Suggestions for Homemade Glazed Doughnuts
- New To Making Your Own Doughnuts/Donuts? Try These Next!
- MADE OUR RECIPE(S)?
- The Best Classic Glazed Doughnuts
Baked vs Fried Doughnuts?
In case you are new to making your own doughnuts or you just didn't really understand the full difference between the two---I wanted to break down the real distinction between a baked doughnut or donut and a fried one. Granted, both types taste absolutely amazing; however, once you've tried both, you'll notice the difference while eating.
Baked Doughnuts: These types of fluffy doughnuts are generally whipped together in a bowl (generally without yeast) and are lighter in texture. They can also be "cakey" depending on the ingredients used.
Fried Doughnuts: These types of fluffy doughnuts are generally denser in texture and have a bit of a crunchiness (on the outside) from being deep-fried. They typically have a sweeter flavor and richer texture.
How to Make Homemade Glazed Doughnuts
These Fluffy Glazed Doughnuts come with two main components: the donuts themselves and the light vanilla glaze. Let's break down what you need to know to master both.
To start, you activate your yeast by mixing the warm melted butter, milk and a bit of sugar together and letting it sit for a few minutes until it "a foam-like layer is formed atop mixture".
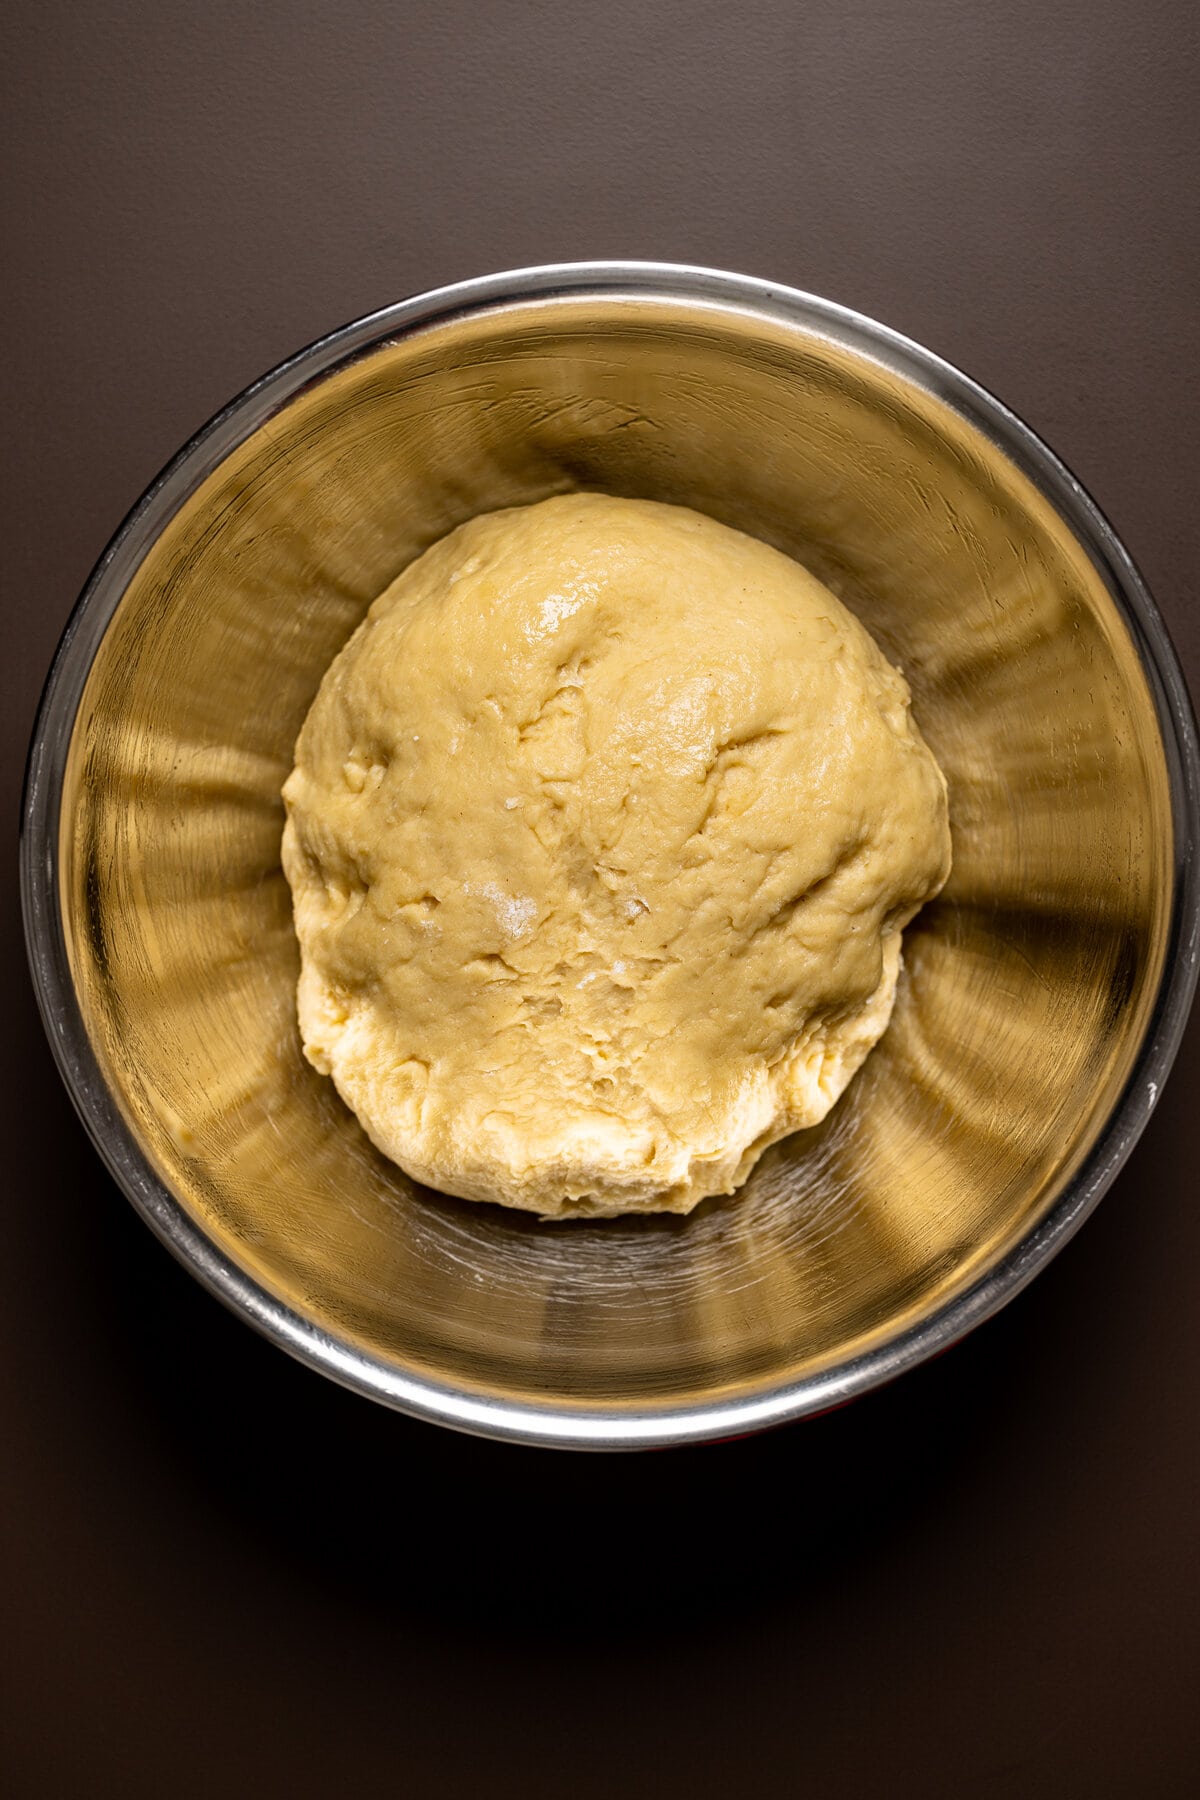
Then you whisk together all dry ingredients, add in the wet ingredients, and stir until combined. Knead the dough for a few minutes until it becomes "elastic-like" and then add it to a greased bowl and let it rise for 1 hour.
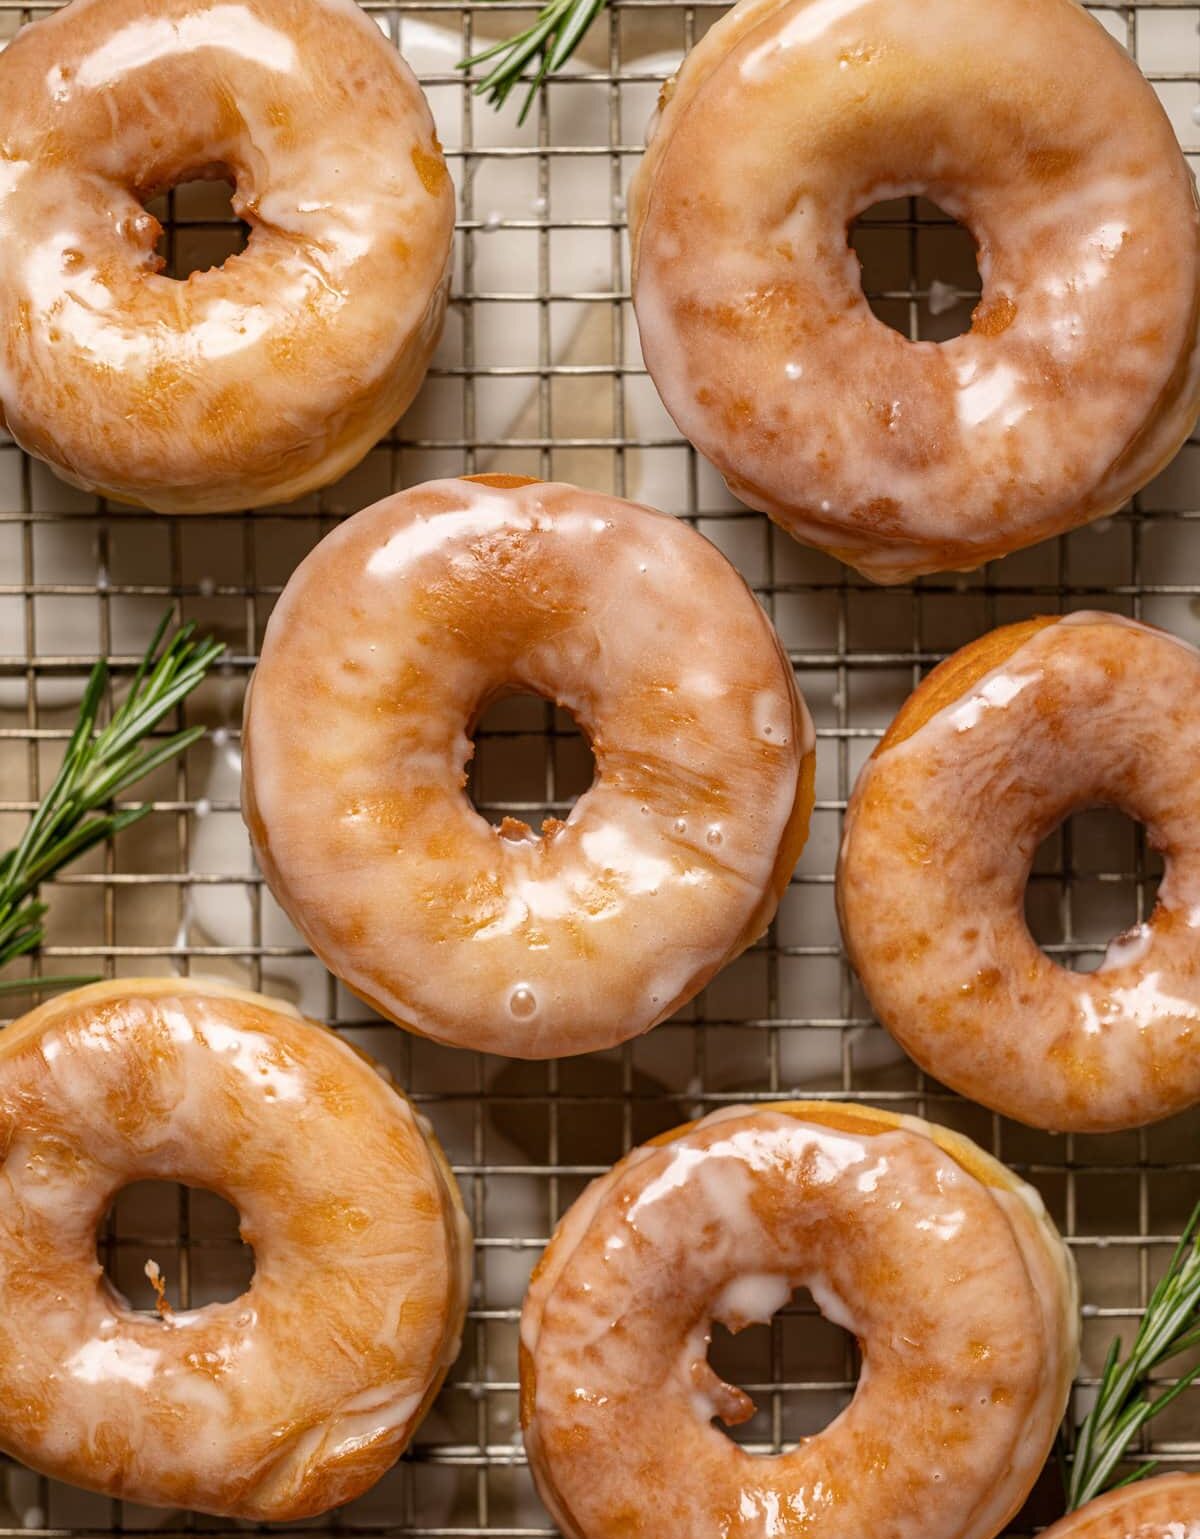
Roll out risen dough unto a floured surface, cut out doughnuts, fry them in heated oil, drain, and let slightly cool. Make the glaze, top warm doughnuts with glaze, let it set a bit, and enjoy!
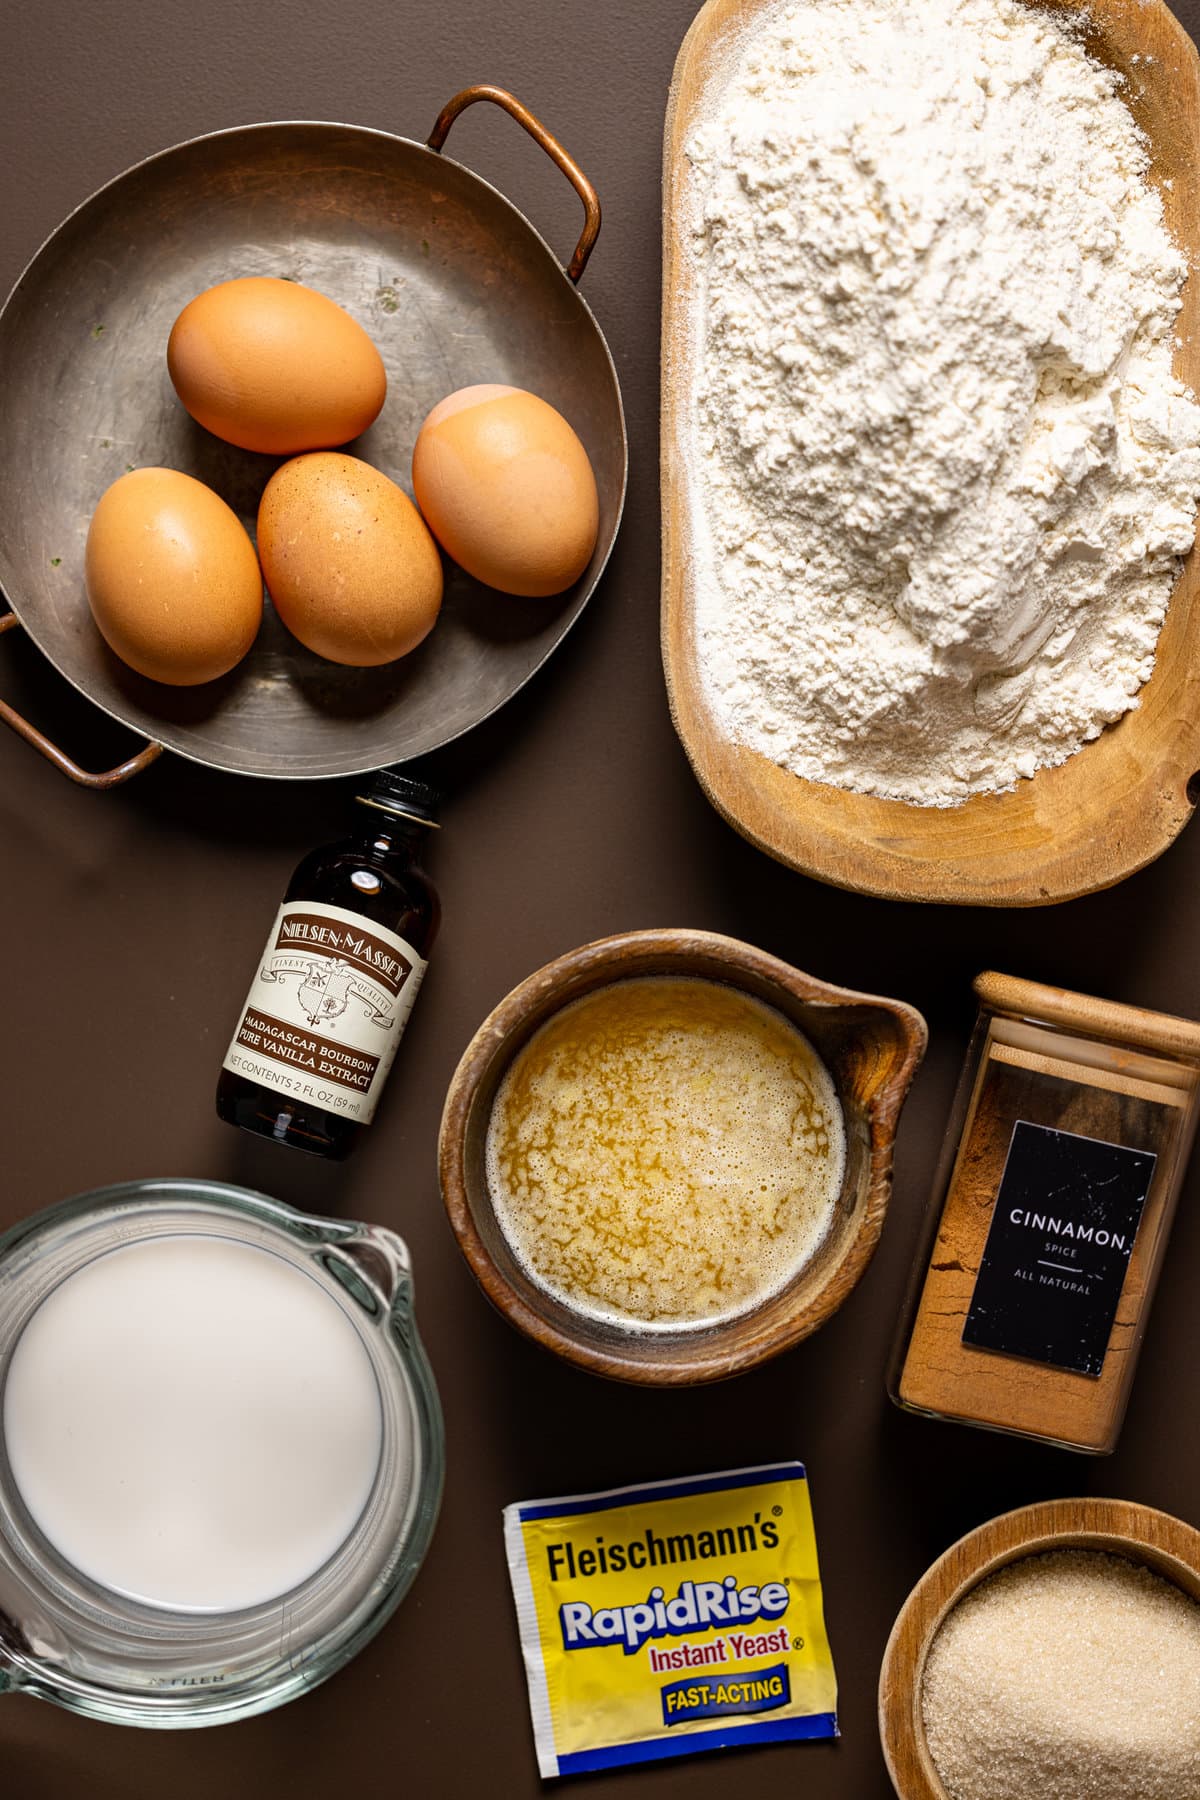
Ingredients for Homemade Glazed Doughnuts
Here's what you need for these airy Homemade Glazed Doughnuts:
- All-purpose flour. I use organic flour from Bob's Red Mill.
- Pastry flour. You can find this from Bob's Red Mill. It creates a lighter, airy texture when mixed with all-purpose flour.
- Cinnamon. For a bit of spice flavor. You'll need just a pinch!
- Cane sugar. You could also use coconut sugar.
- Instant yeast. Also called Rapid Rise Yeast.
- Salt. Helps to amplify sweet flavor.
- Eggs. These should be at room temperature for easy blending.
- Eggs yolk. This adds additional fat content to the donuts for extra rich-flavor.
- Almond milk. You can use regular milk, or any dairy-free milk you like. This is for both the dough + glaze!
- Butter. Use warm, unsalted melted butter---not hot!
- Vanilla extract. The pure vanilla is the best flavor.
- Powdered sugar. If you use granulated sugar, your frosting will have a gritty texture, so I highly recommend powdered sugar.
Homemade Glazed Doughnuts Q + A's
Not necessarily! Usually, I make these classic glazed doughnuts via my electric stand-mixer which has the appropriate attachments for the kneading process, however, there are plenty of times with these doughnuts, I have had the pleasure of doing this all by hand and it wasn't difficult.
It just requires a bit more arm work, that's all! Plus, there’s nothing that a light drizzle of flour can’t help, right?! You'll basically follow all steps for making the dough in a large bowl and once it begins to come together and can form a ball, then you'll begin working the dough in a front-to-back and folding motion a few times until you begin to feel the dough "soften" and become elastic-like. It took me about 5-6 minutes or so total. Not bad!
Pastry Flour vs. All-Purpose Flour.
When it comes to the main ingredient of this entire recipe—-the flour, I enjoy using Bob’s Red Mill Unbleached White All-Purpose Flour, which is ideal for all kinds of baking, including this one. However, I do occasionally use Pastry Flour which adds a nice airiness, "light" feel, and fluffiness to your donuts/doughnuts as well.
Yes, indeed! To make these Homemade Glazed Doughnuts entirely dairy-free, simply ensure that you use a plant-based milk as well vegan butter instead of unsalted.
RAPID (INSTANT) RISE YEAST VS. ACTIVE DRY YEAST
If you’re not using the Rapid Rise Yeast for this recipe, please know that the rise time will be twice as long (about 3 hours) since regular Active Yeast doesn’t work as quickly.
The doughnuts are best enjoyed the day they’re made. Leftovers can be stored in a tightly sealed container and best if placed in the refrigerator for up to 3 days for ultimate freshness.
For longer storage, freeze the donuts (uncoated) in an airtight container for up to three months. To serve, defrost the donuts on the counter for several hours. Add the sugar coating just before serving.
I don’t recommend baking this particular doughnut recipe. If you’d like to bake donuts, try my Baked Vegan Apple Cider Donuts recipe instead.
Yes, you can make the dough ahead of time and refrigerate it for up to 24 hours before frying. Allow the dough to come to room temperature before frying.
Absolutely! Just preheat your Air Fryer to 350 degrees Fahrenheit. Once preheated, place 3-4 donuts in the air fryer, ensuring that they don't touch and are about 1-inch or so apart. Spray the doughnuts with cooking spray and air fry until golden brown, about 4 minutes.
The Best Oil to Fry Your Glazed Doughnuts/Donuts
One of my biggest reasons for not often frying my doughnuts is the fact of having to do so in oil. Baked doughnuts skip that whole ordeal and helps you to keep things healthier instead. However, with these fluffy doughnuts, I chose to fry them in a healthier oil and it worked wonders. Instead of canola oil, you can use the following oils for frying doughnuts:
- Coconut oil
- Avocado oil
- Vegetable oil (I recommend at least using organic)
- Sunflower oil
- Sesame oil
EQUIPMENT FOR FRYING DONUTS
When it comes to making these classic glazed doughnuts, you'll only need a few pieces of equipment: Spider Skimmer, Doughnut Cutter, and a few others. If you’re a donut fan, I highly recommend adding these to your kitchen toolbox. You’ll never have to go out for donuts again, and you can always customize the ingredients, flavors, and decorations of your breakfast pastries!
The easiest way to fry doughnuts can be in a deep dutch oven or a medium-sized frying pan. Whichever you choose, it doesn't matter because either can get the job done.
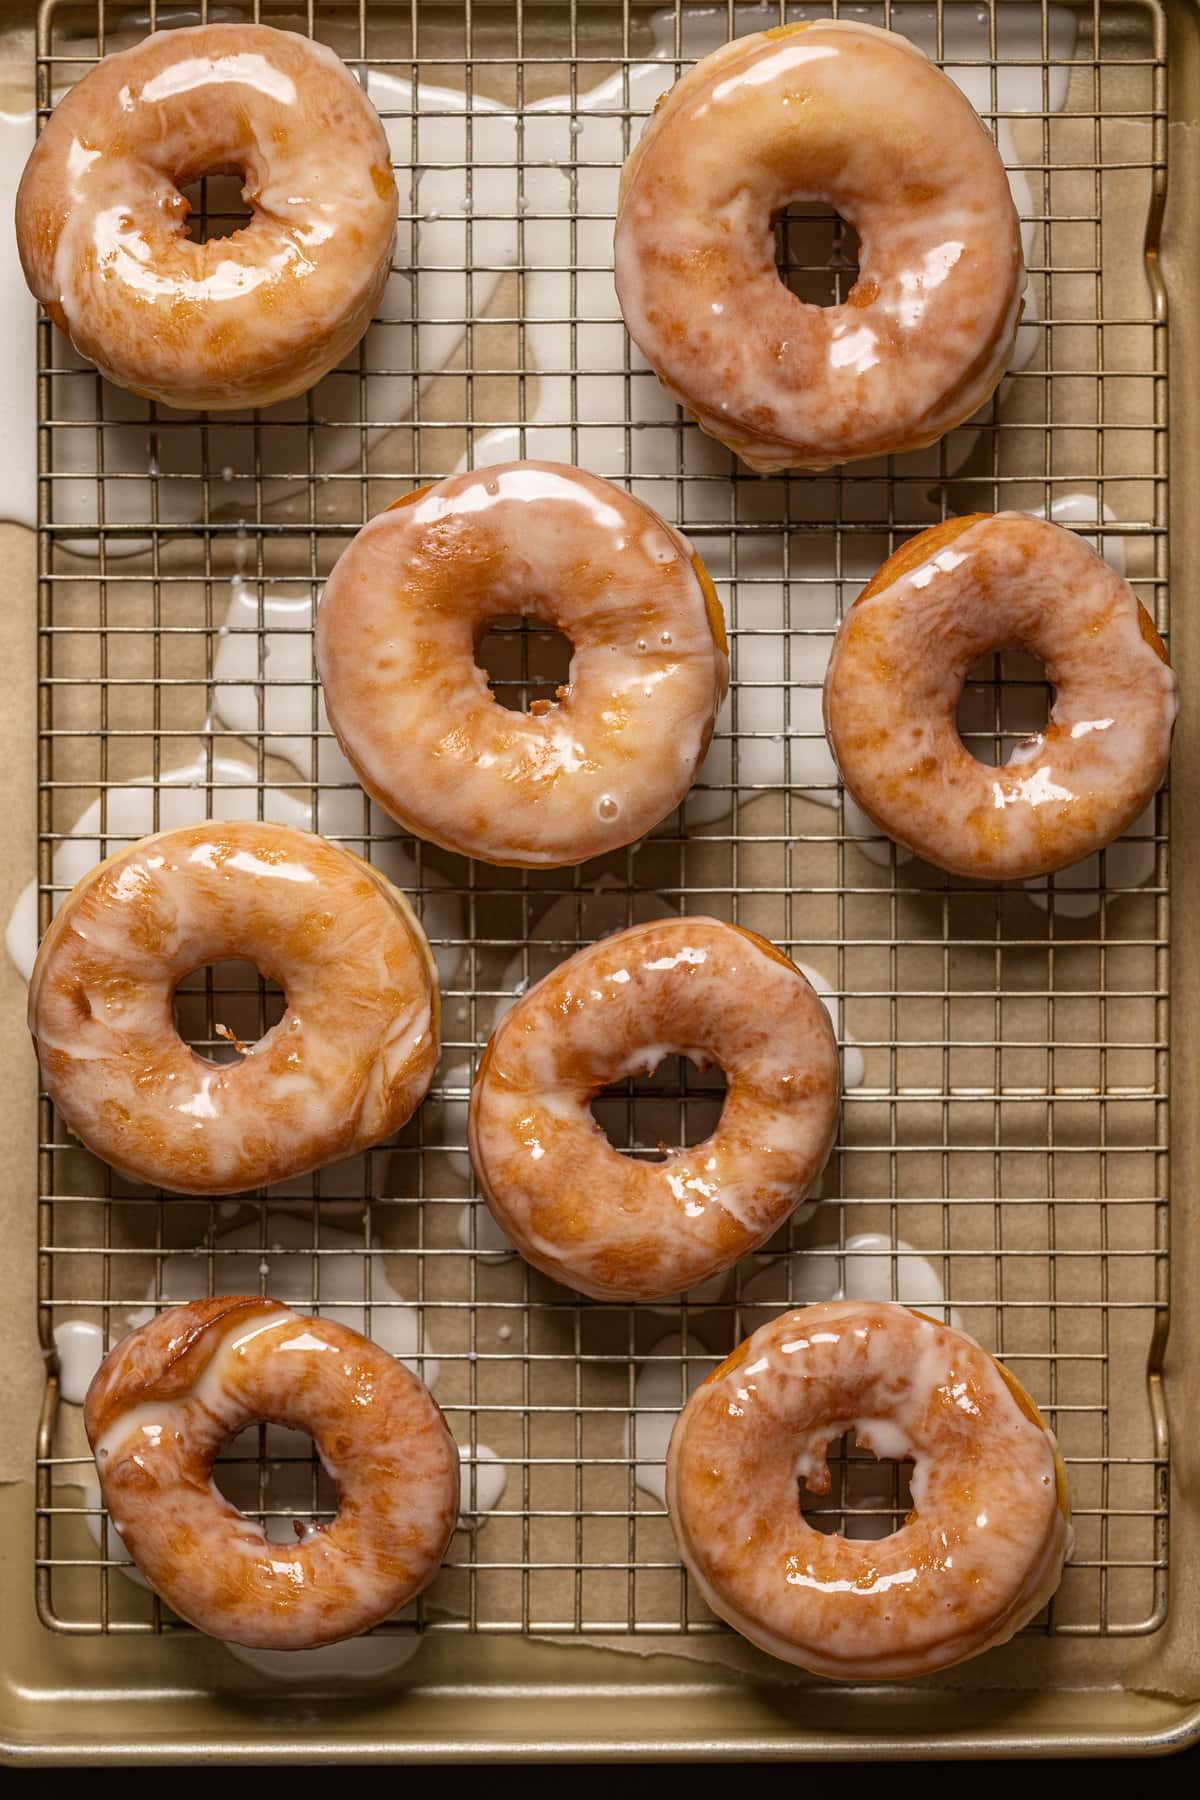
The last piece of equipment you’ll need is a wire cooling rack. Ensure your donuts are fully cooled before glazing them. Waiting for these treats to cool is the hardest part of the whole recipe!
SHOP MY FAVORITE BAKEWARE ITEMS AND ACCESSORIES!
Here, I’ve curated a list of bakeware essentials that I use to achieve my favorite baking treats, especially with this Homemade Glazed Doughnuts recipe. Everything from my fave baking sheets, parchment paper, mixing bowls, and more. SEE THEM HERE!
Tips for Making The Best Homemade Glazed Doughnuts
Due to many delicious attempts at perfecting this recipe, I have come across some very helpful tips that will ensure a perfectly fried and fluffy glazed doughnut.
NEVER OVERHEAT THE MILK!
It is so important that your milk is warm, but NOT hot! It should be warm to the touch. If you find that your milk has overheated, allow it to cool before adding the yeast. Milk that is too hot will kill the yeast and you won't get the big, fluffy rise in the dough. We want these doughnuts super fluffy, and that's only possible when the yeast is bloomed properly.
USE VERY WARM MELTED BUTTER.
Like in my first point, we need the melted butter to be warm NOT hot to ensure that the yeast is bloomed and activated properly.
DO NOT WORRY ABOUT OVER-MIXING!
I know it sounds weird, but hear me out. With cakes and cookies, you never want to overwork a dough because working develops the gluten in the flour. Gluten development leads to a chewy, unpleasant texture in cakes and cookies, making them dense and heavy.
Because these classic doughnuts use a yeast dough, it is required to develop the gluten in the dough. The yeast brings elasticity that lightens and fluffs the dough, much like bread dough. When making these doughnuts, keep on mixing even after you think you've mixed enough!
USE A PASTRY FLOUR MIX.
After much trial and tribulation, I have found that a mix of pastry flour and all-purpose flour is the perfect combination for these classic glazed doughnuts. The pastry flour gives a tender, airy, "light" texture that I think is perfect for these doughnuts.
INVEST IN THE RIGHT TOOLS!
For these easy doughnuts/donuts, you don't need a ton of tools to get the job done, however, you can definitely invest in a great doughnut cutter, skimmer for frying, and the usually things like a wire cooling rack, baking sheet, mixing bowls, etc. for the best doughnut making process.
Can I Use Another Plant-Based Milk for The Best Homemade Glazed Doughnuts?
Yes, you can use any dairy-free milk you like to make this homemade doughnut recipe. Here are some easy recipes to make your own dairy-free milk that’s cheaper and so easy!
- Almond Milk Without Soaking
- Quinoa Milk
- Creamy Vanilla Sesame Milk
- Coconut Milk
- Easy Homemade Creamy Cashew Milk
- How to Make Potato Milk
- Ultra Creamy Homemade Oat Milk
- Cauliflower Milk

Serving Suggestions for Homemade Glazed Doughnuts
Who doesn’t like to start their day with a homemade fluffy doughnut/donut, right? These easy glazed doughnuts are a perfect weekend breakfast treat or as a great dessert right after dinner.
Serve them with this easy Iced Chai Tea Latte or Ultimate Fall Spice Latte in the cooler months, or with refreshing Starbucks Copycat Iced Brown Sugar Shaken Espresso in warmer months, or this Vegan Gingerbread Latte in the winter!
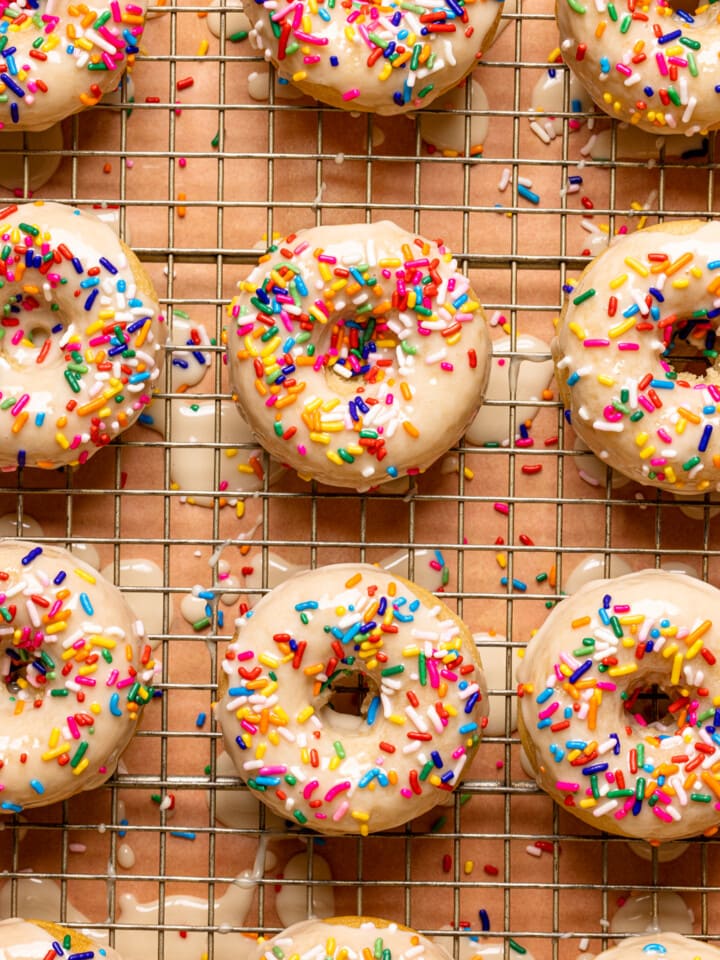
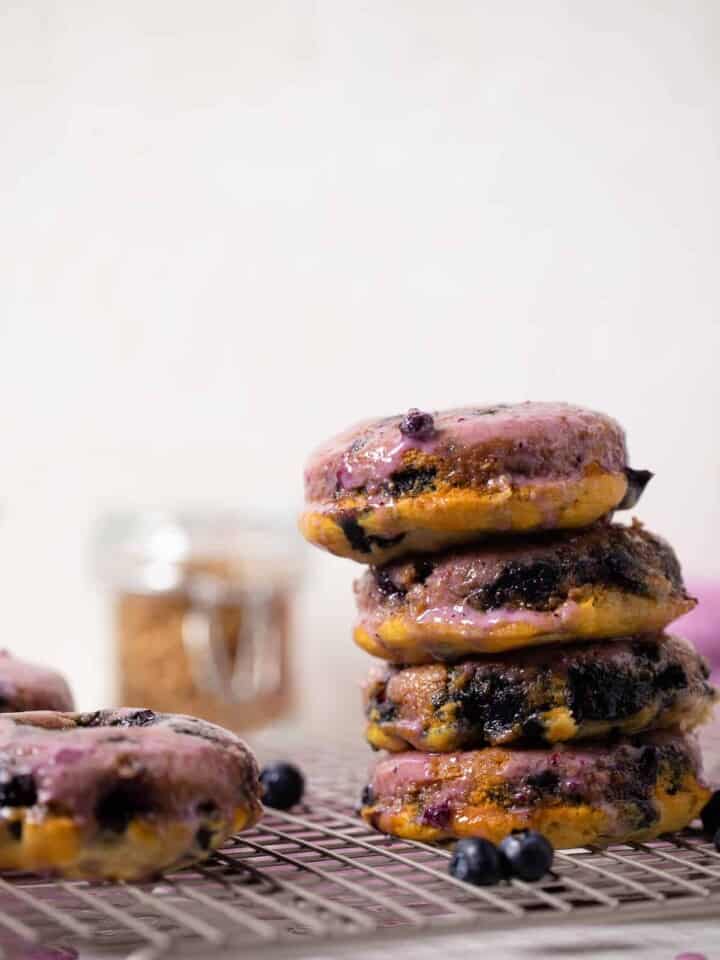
New To Making Your Own Doughnuts/Donuts? Try These Next!
MADE OUR RECIPE(S)?
If you make Homemade Glazed Doughnuts, tag @orchidsnsweettea_ on Instagram and hashtag it #orchidsandsweettea!
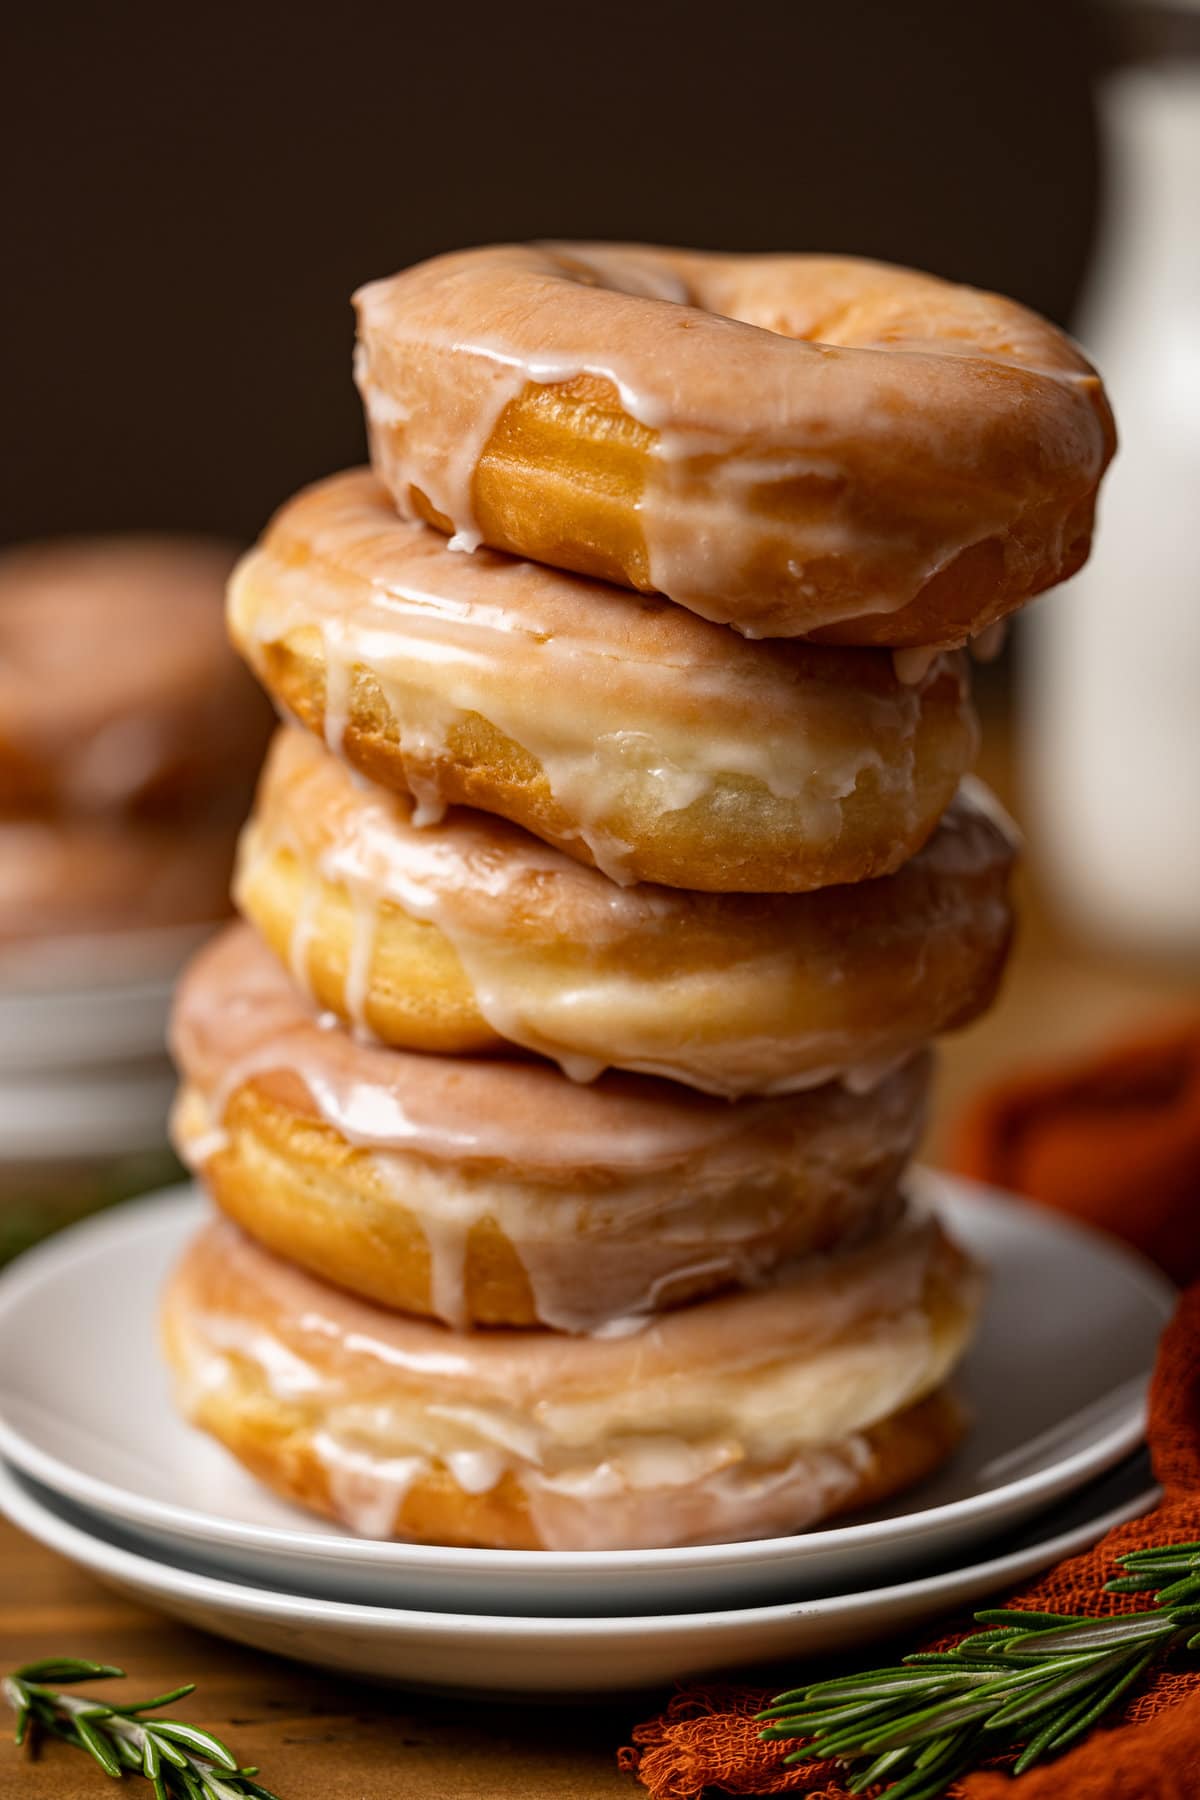
The Best Classic Glazed Doughnuts
Ingredients
DOUGHNUTS:
- 3 cups organic All-purpose flour (See Notes!)
- 2 cups organic pastry flour
- ½ cup organic cane sugar + 1 Tbsp!
- ½ teaspoon sea salt
- Pinch of ground cinnamon
- 1 packet Rapid Rise Yeast (That's 2 ¼ tsps!)
- 1 cup WARM water
- 1 teaspoon vanilla extract
- ½ cup unsalted butter, melted + WARM
- ½ cup Almond milk, at room temp.
- 2 large organic eggs, at room temp.
- 2 egg yolks
GLAZE:
- 3 cups organic powdered sugar, sifted
- ½ cup water or Almond milk
- ½ teaspoon vanilla extract
- 1 tablespoon raw honey, optional (This helps to give the glaze a "shiny" look)
Instructions
TO MAKE THE DOUGH:
- Combine yeast and 1 tablespoon cane sugar in the bowl of an electric stand-mixer and slowly pour in WARM water while stirring frequently. Allow 5-10 minutes for the mixture to sit and for the yeast to activate. NOTE: When yeast is successfully activated, there will be "a foam-like layer formed atop mixture."
- Add in the room temperature milk and WARM butter to the yeast mixture and whisk until well combined. Add in the eggs (one at a time), egg yolks, and vanilla, whisking to incorporate.
- In a large bowl, whisk together the all-purpose flour, pastry flour, cane sugar, cinnamon, and sea salt and add them to the wet ingredients and mix on low-speed until well combined and everything begins to form into a dough-like consistency, about 2-3 minutes.
- Change “Mixer head” to kneading accessory and knead dough for 5-10 minutes on high speed until dough ball becomes smooth and elastic and dough springs back when lightly pressed together with 2 fingers. NOTE: If dough is still too sticky, add 1 tablespoon of flour at a time until texture is achieved!
- Change “Mixer head” to kneading accessory and knead dough for 5-10 minutes on high speed until dough ball becomes smooth and elastic and dough springs back when lightly pressed together with 2 fingers. NOTE: If dough is still too sticky, add 1 tablespoon of flour at a time until texture is achieved!
- Lightly grease a large bowl with a small amount of olive oil and place the dough ball in the bowl, tossing it around until coated. Cover with plastic wrap (or a towel) and let sit for 1 hour, allowing the dough to rise and double in size.
ROLL + CUT DOUGH:
- Add a bit of flour to a surface and place the risen dough onto it, lightly adding a bit of flour to the top. Using a rolling-pin, roll out the dough into a rectangular shape----approximately 9″x14 and ½-inch thick. NOTE: Try not to make the dough too thin or else your doughnuts will be thin and a little hardened once fried.
- Using a donut cutter (about 3.5 inches), cut out doughnuts and place them unto a flat surface with parchment paper to avoid them from sticking to surface or each other. Repeat until all doughnuts are cut out.
HEAT OIL:
- In a medium-sized dutch oven pot, heat 3-4 cups of oil over medium-low heat. Add a few doughnuts to heated oil (about 3-4 at a time if they fit) and fry on each side until golden brown, about 2-3 minutes each side. Using a skimmer, transfer the fried doughnuts from the oil unto a plate lined with paper towel to further drain any excess oil. Repeat until all doughnuts are fried and transferred to paper towel.
TO MAKE THE GLAZE:
- Whisk together the powdered sugar, vanilla, honey, and Almond milk until smooth and consistency is met.
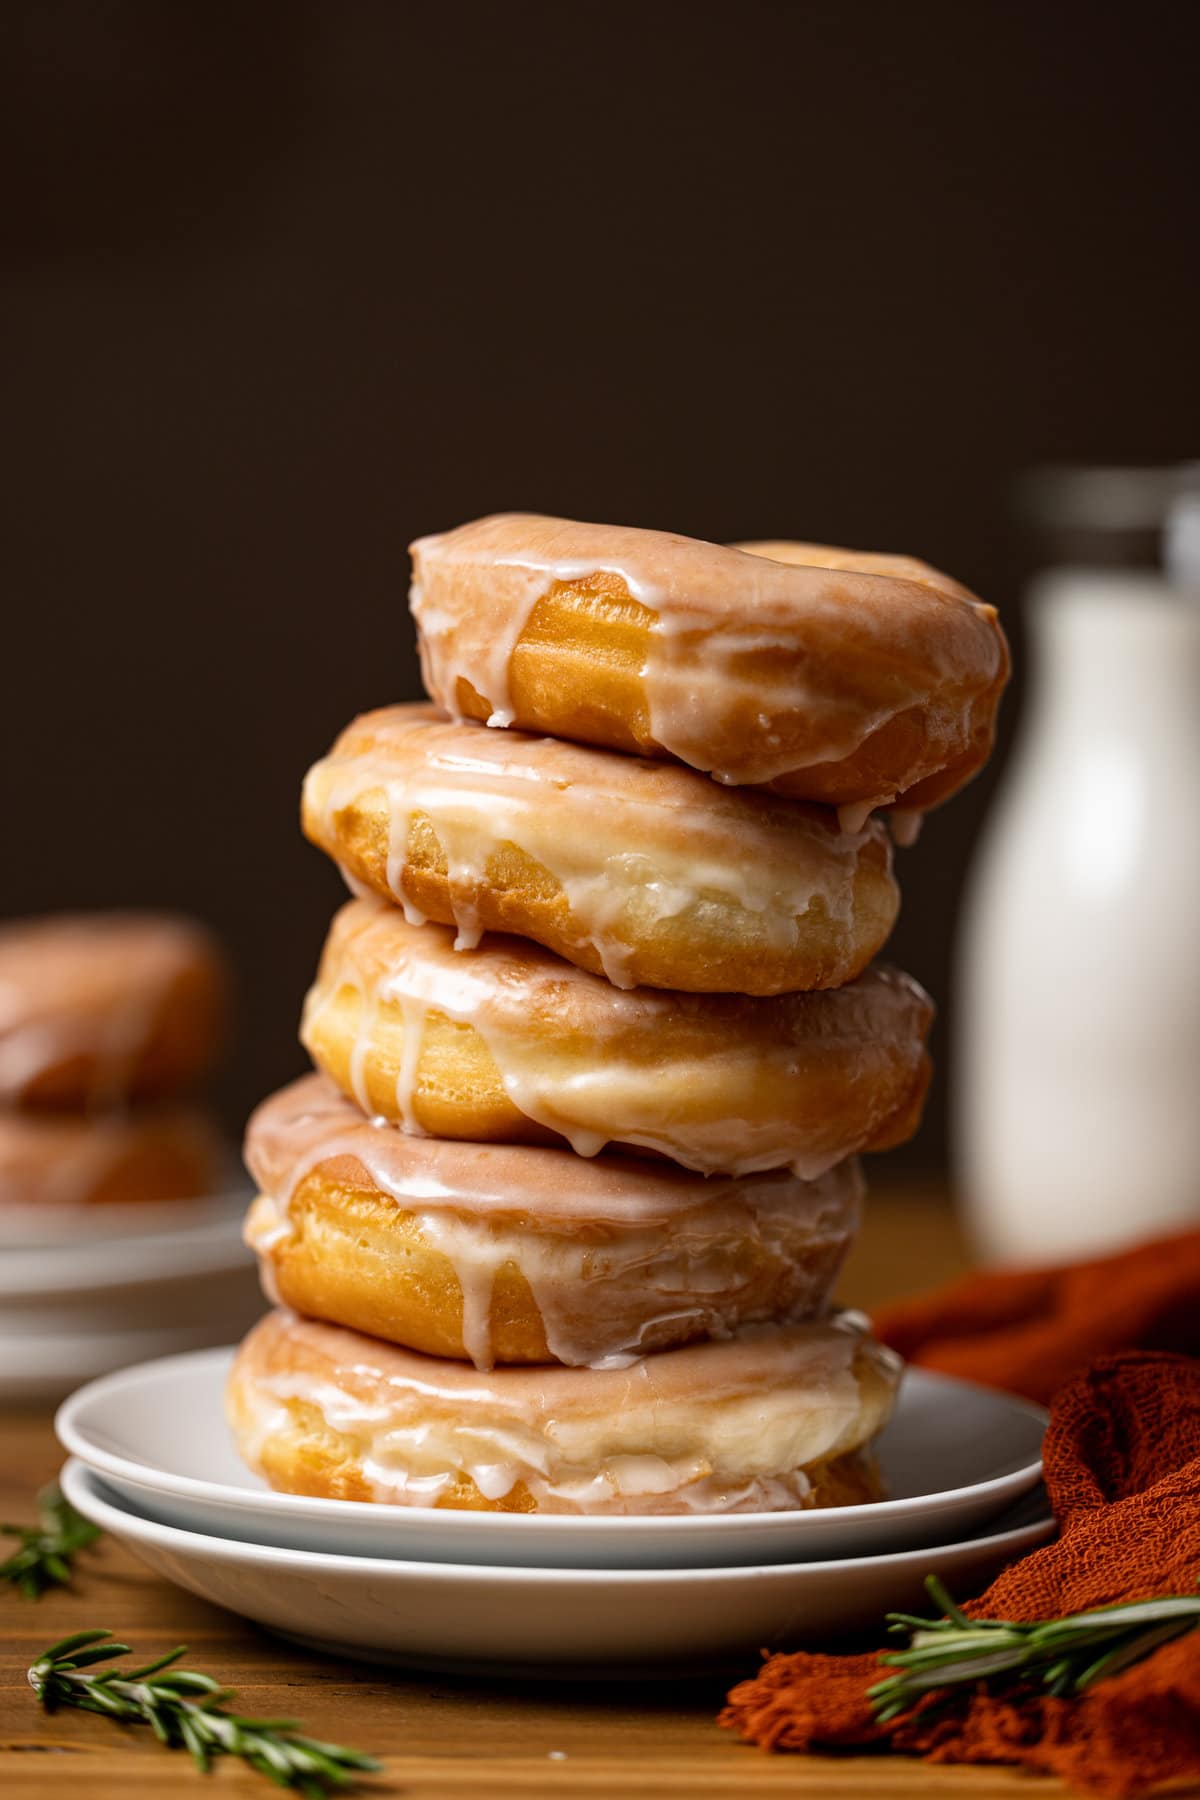
- Line your warm doughnuts unto a rack side by side and using a large spoon or measuring cup (about ½ cup), add the glaze atop each doughnut until fully covered. Allow the glaze to slide down the sides and let everything "set" for 4-5 minutes until the glaze hardens.
- Once all doughnuts are glazed, serve and enjoy!
- Bon Appetit!
Tips & Tricks
- STORAGE: Leftovers can be stored in a tightly sealed container and best if placed in the refrigerator for up to 3 days for ultimate freshness.
- FREEZE (LONGER STORAGE): For longer storage, freeze the donuts (uncoated) in an airtight container for up to three months. To serve, defrost the donuts on the counter for several hours. Add the sugar coating just before serving.
- RAPID (INSTANT) RISE YEAST VS. ACTIVE DRY YEAST: If you’re not using the Rapid Rise Yeast for this recipe, please know that the rise time will be twice as long (about 3 hours) since regular Active Yeast doesn’t work as quickly.
- DAIRY-FREE OPTION: To make these Classic Glazed Doughnuts entirely dairy-free, simply ensure that you use a plant-based milk as well vegan butter instead of unsalted.
- AIR FRYER OPTION: See FAQ section!
- FLOUR: If you don't have pastry flour, feel free to substitute with all-purpose flour.
- OIL: Instead of canola oil, you can use the following oils for frying doughnuts: coconut oil, avocado oil, vegetable oil, sunflower oil.
Nutrition
DID YOU MAKE THIS recipe?
Tag @orchidsnsweettea_ on Instagram and hashtag it #orchidsandsweettea

LOVE THIS RECIPE?
LET US KNOW!
can i airfry this?
Hi Tyler! Yes, you can! Just preheat the Air Fryer to 350 degrees Fahrenheit. Once preheated, place 3-4 donuts in the air fryer, making sure that they don't touch. Spray the donuts with cooking spray and air fry until golden brown, about 4 minutes. 🙂
just wondering if I can omit eggs or what would I substitute the eggs with to make it vegan?
Hi! Yes! You can sub the eggs with 1 Tbsp of apple cider vinegar and 2 Tbsps of unsweetened applesauce. 🙂