
Homemade Vegan Oat Milk Chocolate Bars
Homemade Vegan Oat Milk Chocolate Bars
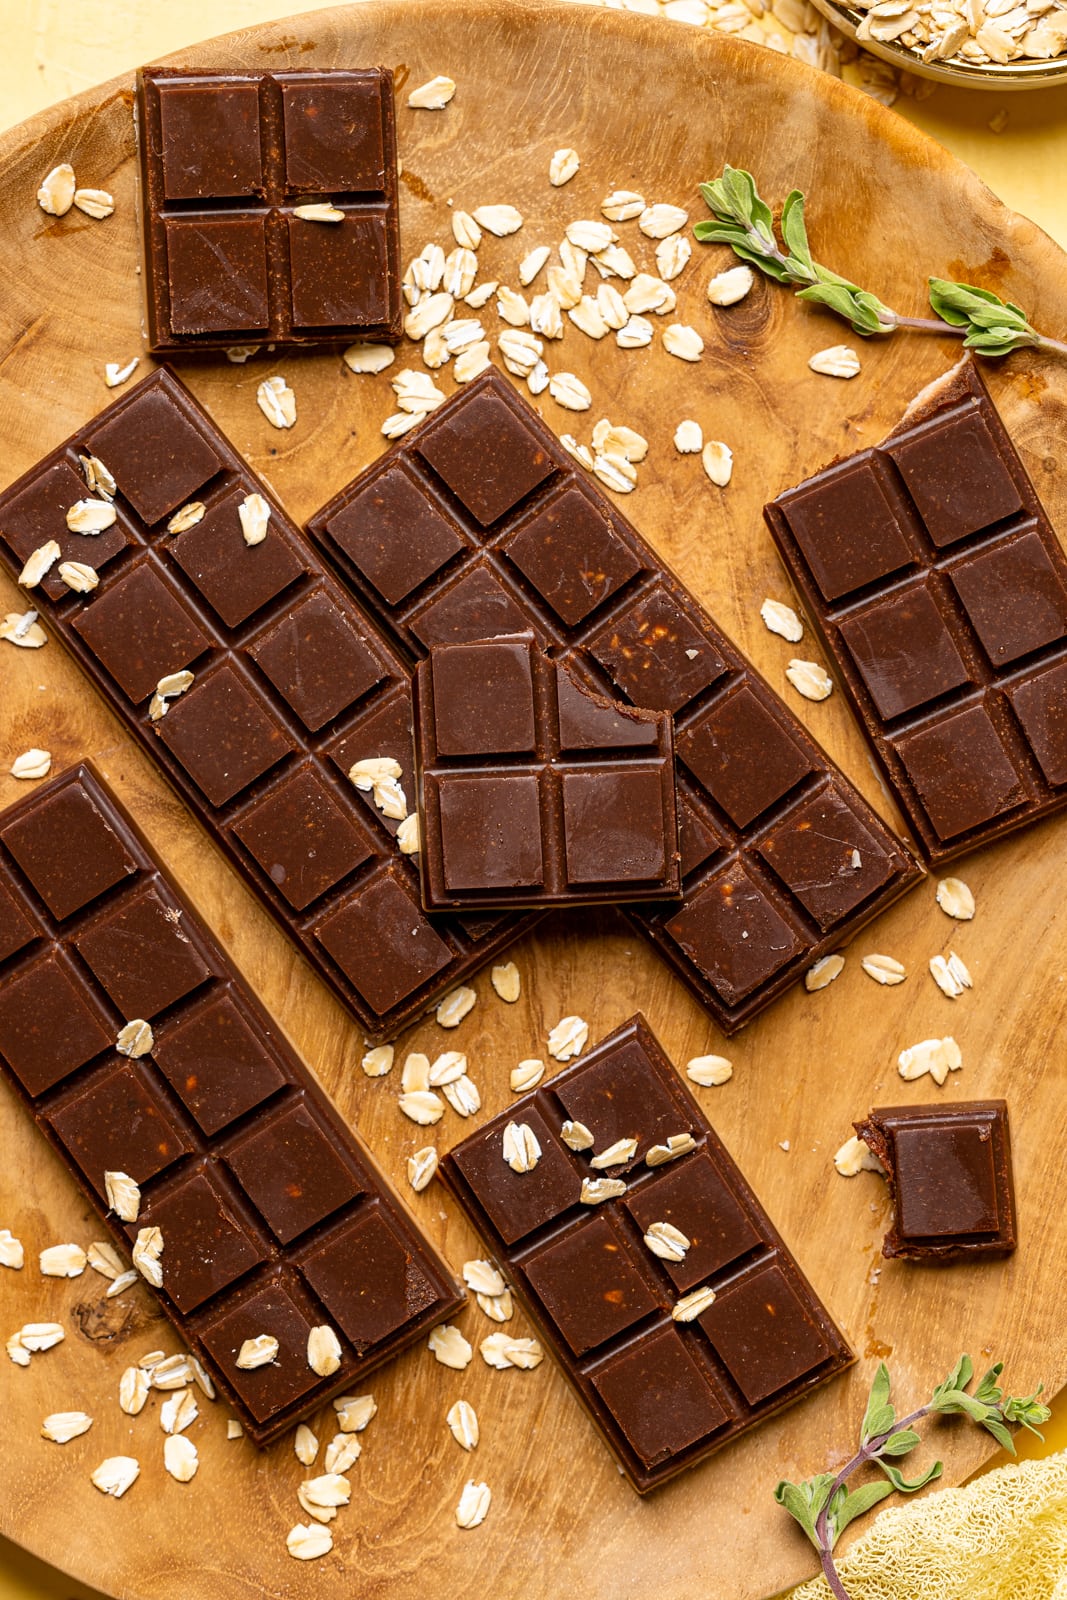
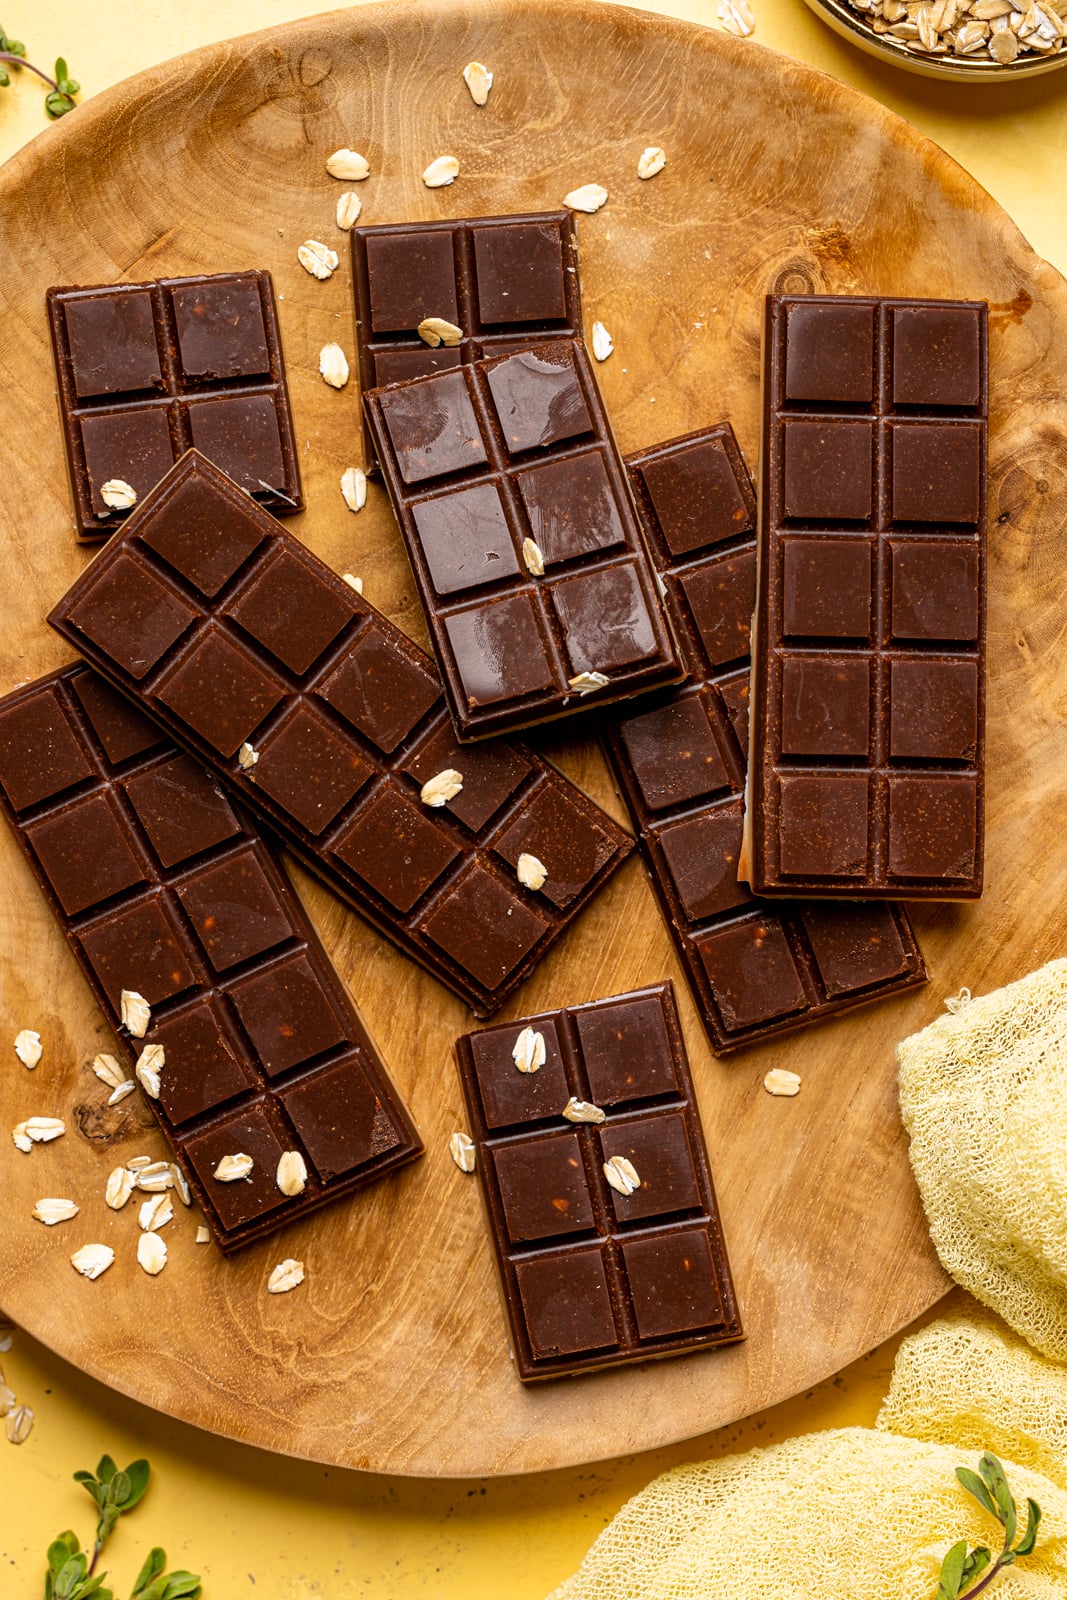
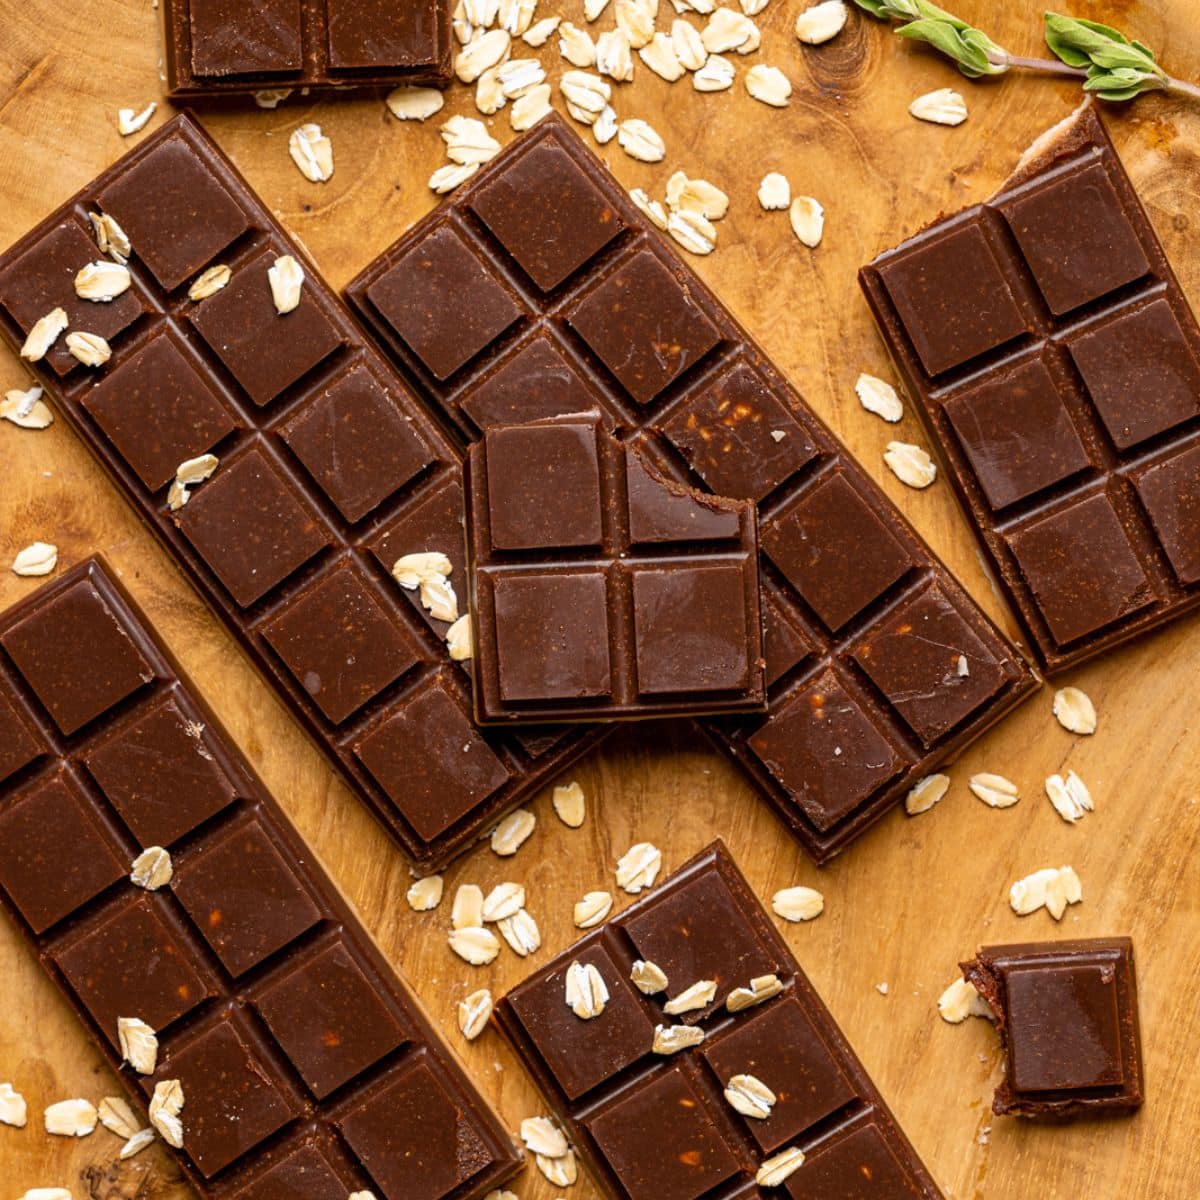
These Homemade Vegan Oat Milk Chocolate Bars are the epitome of an easy dessert or snack option that is just as crisp on the outside and a melt-in-your-mouth velvety texture on the inside---as regular chocolate bars. Only a few ingredients required, entirely dairy-free, and all vegan.
Disclaimer: This post contains affiliate links via Amazon for products that I wholeheartedly love and receive commission from.
I can't tell you how amazing homemade chocolate bars are! Prior to attempting to make them on my own, I often felt like this was such an impossible task, but it's not. These Homemade Vegan Oat Milk Chocolate Bars literally only require a handful of ingredients and the process is so simple, easy, and seamless.
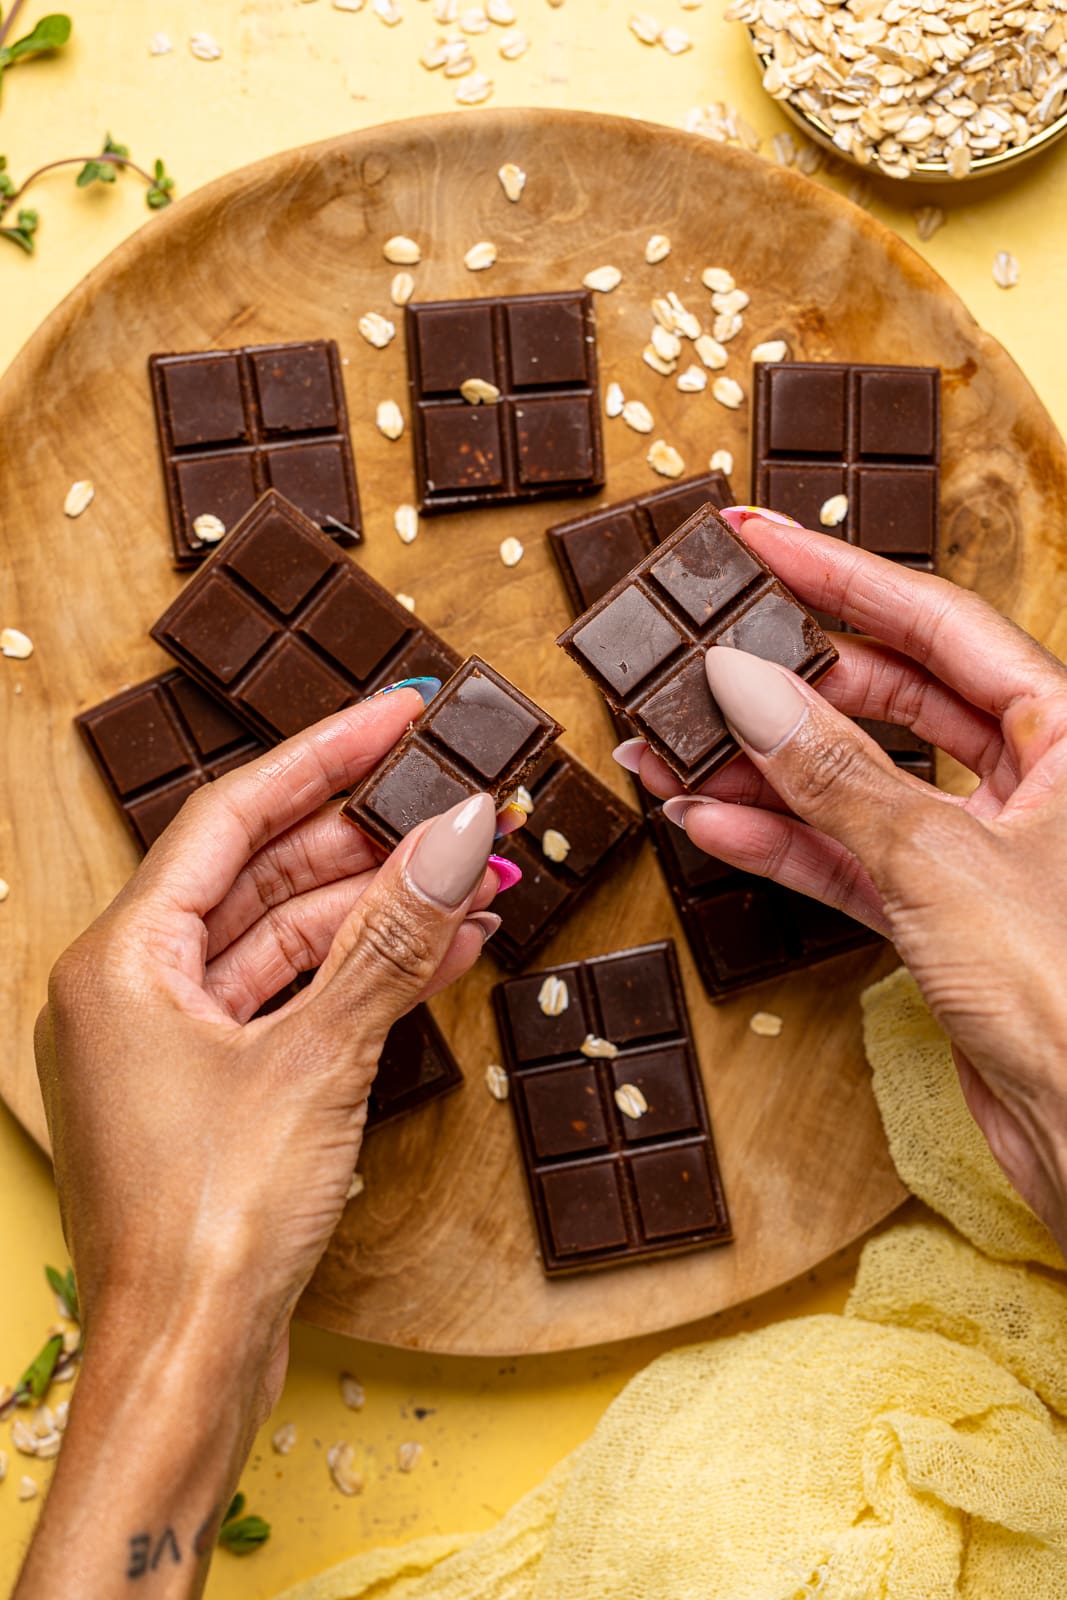
Plus, I love that you can easily add these homemade chocolate bars to your favorite things by chopping them up and sprinkling them in delicious recipes like these Espresso Rye Pecan Chocolate Chip Cookies, Vegan Chocolate Cake, or Chocolate Oreo Vegan Skillet Brownie.
One of the best parts about these chocolate bars is the addition of oat milk without actually using liquids. Yes, you heard that right! For many, oat milk is a staple when it comes to dairy-free milk and I thoroughly enjoy it by an organic store-bought version like Ripple Foods, but also enjoy making my own homemade oat milk which is such an easy process as well and can be whipped together in batches for less work throughout the week.
Is it Worth Making Chocolate Bars from Scratch?
To be honest, I find it so very worth making your own homemade chocolate, especially when you use premium, high-quality ingredients. Besides, the best part about making your own chocolate is that you have more control over the healthiness of the ingredients used, the sweetness levels, and personalization of additional toppings and flavor combos.
What is the Most Important Ingredient in Chocolate?
The most important ingredient in chocolate is the cocoa or cacao powder. Because of this, it's so important to have a high-quality powder to create that richness and flavor that you desire in your chocolate bar.
Jump to:
- Is it Worth Making Chocolate Bars from Scratch?
- What is the Most Important Ingredient in Chocolate?
- How Do I Turn Dark Chocolate into Milk Chocolate?
- How to Make Oat Milk Chocolate Bars
- What Are the Ingredients in a Chocolate Bar?
- Oat Milk Chocolate is the New Trend
- Why Use Milk Powder instead of Milk?
- What is Milk Powder Used for?
- How to Make Milk Powder at Home
- The Best Alternative to Oat Milk Powder
- Why Oat Milk? Health Benefits of Oats!?
- Which Coconut oil is Healthier: Refined or Unrefined?
- What is Cacao Butter?
- Is Cacao Butter the same as Cocoa Butter?
- What Do You use Cacao Butter for?
- Common Q + A's for Homemade Chocolate Bars
- More Must-Try Decadent Chocolate Recipes!
- MADE OUR RECIPE(S)?
- Homemade Vegan Oat Milk Chocolate Bars
How Do I Turn Dark Chocolate into Milk Chocolate?
When it comes to the flavor of milk chocolate, it's all about the balance of caramelized sugar and vanilla. Therefore, to make your chocolate bars more "milk chocolate" in flavor, simply substitute the maple syrup with cane sugar and melt it in with the chocolate. In addition, you can also add an additional 1 teaspoon of vanilla extract for extra flavor.
How to Make Oat Milk Chocolate Bars
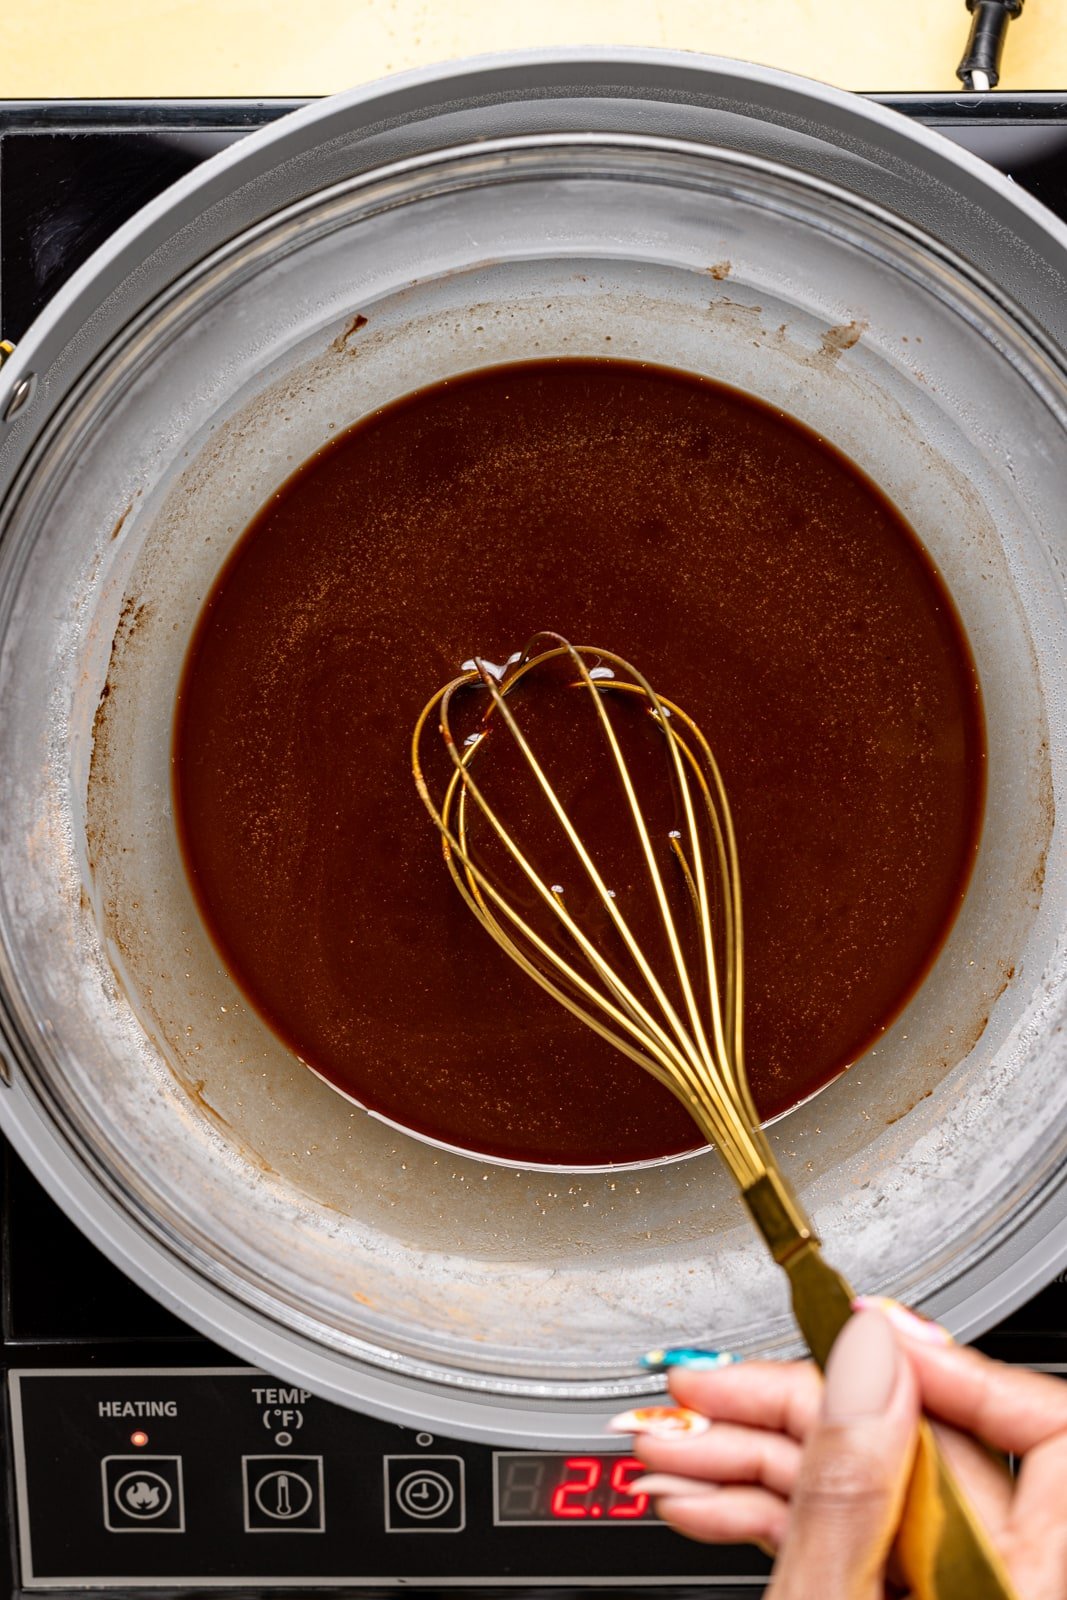
To make these easy, delicious homemade chocolate bars, you'll start by melting your coconut oil or cacao butter until smooth. Much like with ganache, it's best to do this over a water bathe on the stovetop that directly in a skillet or saucepan to avoid burning or clumping because of the heat being too high in temperature.
Then you'll whisk in the cocoa powder and remaining ingredients until combined and smooth. The mixture should drip off the whisk once lifted.
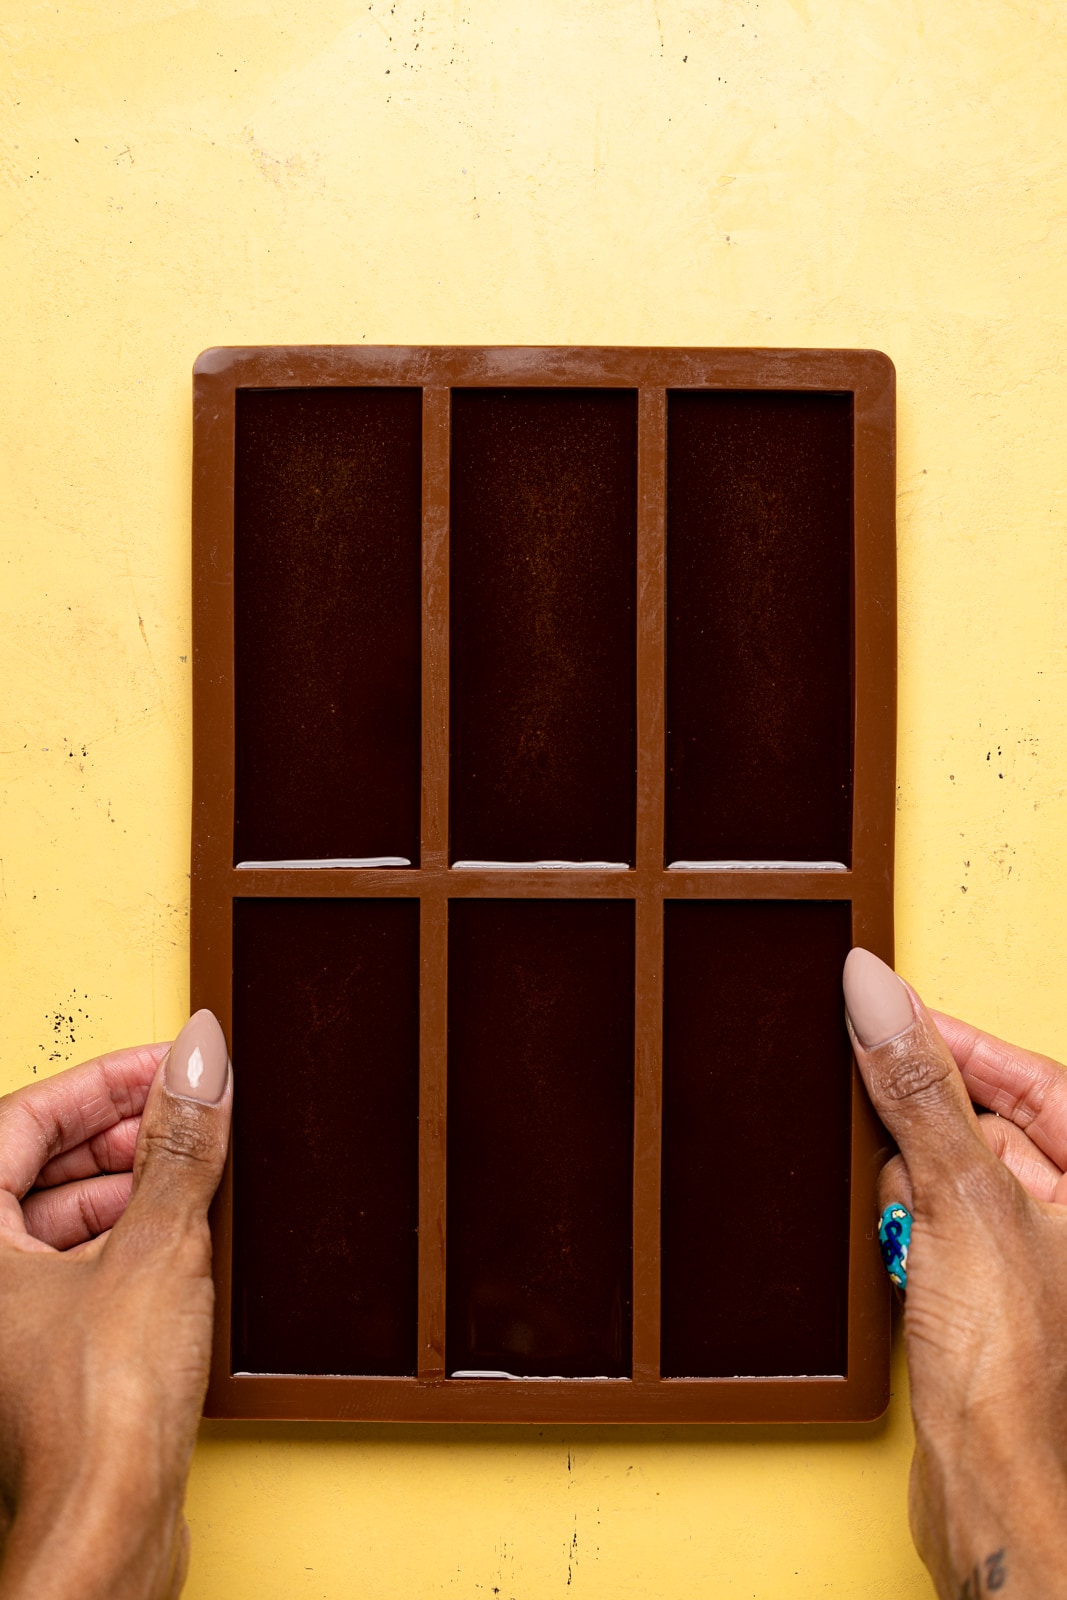
Finally you let it cool slightly before pouring it into your chocolate molds, let it sit until it reaches room temperature and then adding them to the fridge or freezer to set. Remove and enjoy!
What Are the Ingredients in a Chocolate Bar?
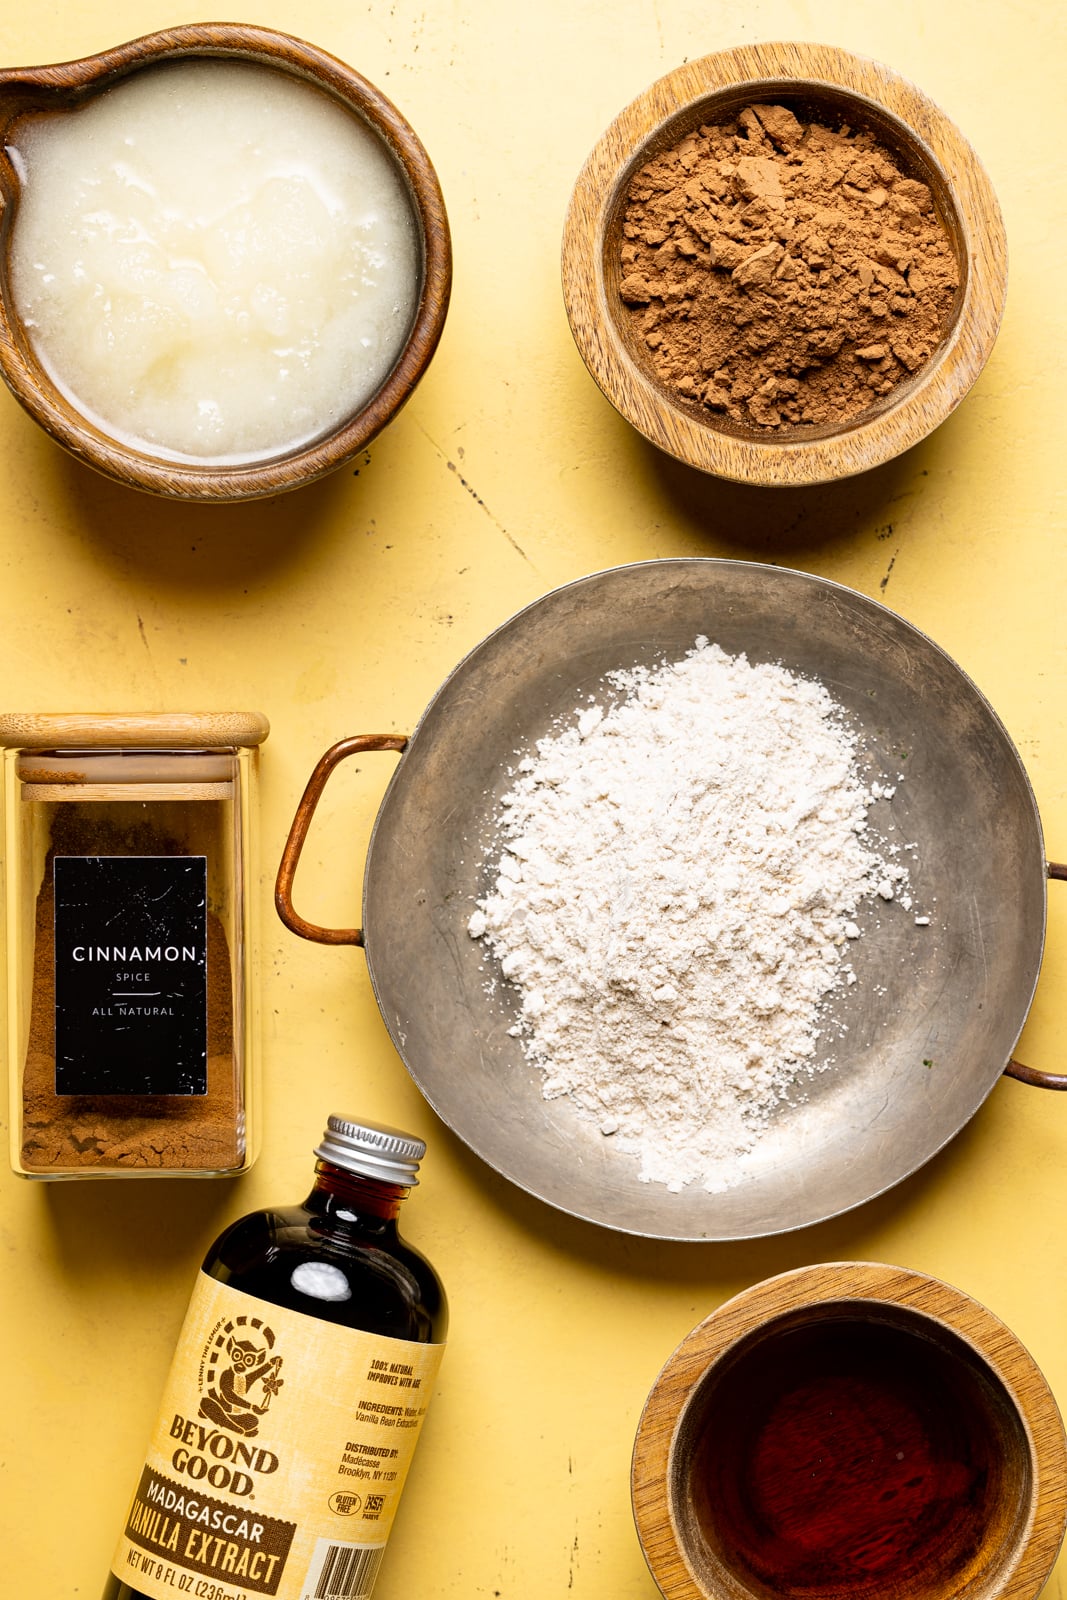
Some of the ingredients for these homemade chocolate bars are typical pantry staples, except for maybe one (hello, cacao butter or milk powder). Here’s what you need:
- Coconut oil. This is usually a staple in most homes and can be solid as it's going to melted once you begin the steps. I recommend using unrefined coconut oil for the healthiest option, but if you have refined coconut oil that's fine. However, you can also use cacao butter (chopped into pieces) which is easy to find at most big grocery stores or online. I love using Navitas Organics for cacao butter.
- Cocoa or Cacao powder. I use organic cocoa or cacao powder. Just makes sure that it's high-quality and unsweetened since you'll be using your own sweetener.
- Oat milk powder. You can purchase an organic store-bought oat milk powder online at places like Amazon, iHerb, etc.
- Cinnamon. For that classic spice flavor pairing that helps to enhance the chocolate profile.
- Vanilla extract for a bit of warmth and enhanced flavor profile.
- Maple syrup. I like this natural liquid sweeter, as it's not refined and vegan friendly. However, you can replace maple with cane sugar or coconut sugar, especially if you're looking for a more milk chocolate flavor.
Oat Milk Chocolate is the New Trend
I recently read via Hello Magazine that oat milk chocolate will be a trend for 2022 which I honestly didn't see coming. Apparently, this had a lot to do to with people's desire to find more plant-based alternatives, especially when it comes to chocolate. Definitely makes sense.
Why Use Milk Powder instead of Milk?
Basically, since milk powder is essentially just milk that is evaporated out for a longer shelf life, it's the best thing to use in recipes that want to give the same "milk taste", but can't necessarily use any liquids like these homemade chocolate bars.
What is Milk Powder Used for?
In general, milk powder is usually used in infant powder or candies, especially chocolate. However, some people enjoy using milk powder in their teas, coffees, smoothies or baking recipes that require less liquids to avoid the batter from being thin, etc.
How to Make Milk Powder at Home
If you don't have any oat milk powder or general milk powder at home, you can totally make your own! While the process is a bit time consuming, the process itself is fairly easy and can be achieved with just your oven and food processor---the entire process takes about 8-12 hours. You can use this method for any dairy or dairy-free milk. Here's what you'll need to do:
- Bring your milk to room temperature.
- Pour room temp. milk into an oven-safe dish and set your oven to it's lowest setting.
- If you have a fan option, turn it on. If not, keep your oven opened slightly to allow the milk to evaporate faster.
- The milk should become pastier and pastier (be sure to stir occasionally) as it continues to evaporate until it's final consistency is like paste.
- After it becomes a paste, spread it out unto a baking sheet lined with parchment paper and return it to the oven to finish dehydrating.
- Once the paste is completely dry, you should be able to lift it up like "bark" where it's snappable (with no bend).
- Finally, add the pieces to a food processor and grind until it becomes a powder. Then sift the powder into a jar, bowl, or dish. Store the powder in an airtight container (make sure there's no moisture) and keep it in a cool dry place for a few months.
- Use as needed.
The Best Alternative to Oat Milk Powder
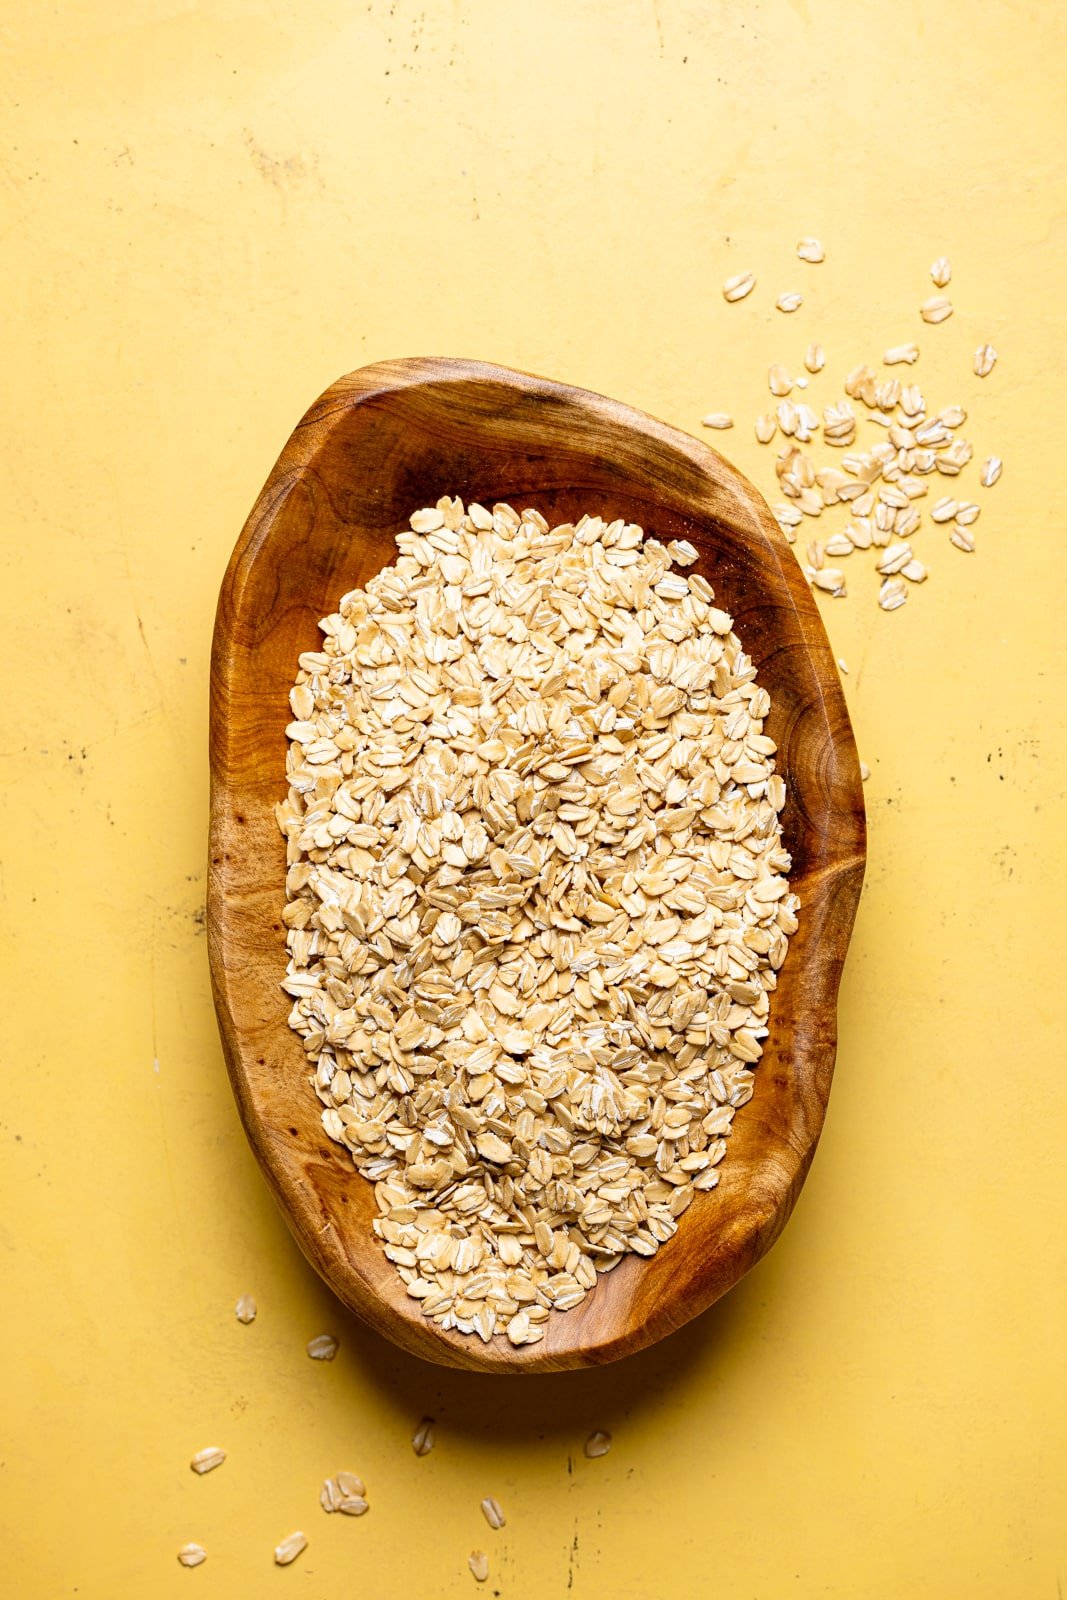
If you don't have oat milk powder or just don't want to spend any money on an ingredient that you won't use often---I completely understand! No worries. You can still get a bit of oat flavor by simply grinding up oats until it becomes a powder-like consistency, then sifting it with a strainer and following the recipe in place of the milk powder.
Why Oat Milk? Health Benefits of Oats!?
If you aren’t familiar, oats are super nutritious! They include a great source of carbs, fiber (the soluble kind!), protein, and fat. In addition, they are loaded with important vitamins, minerals, and antioxidant.
Other great benefits:
- They can help to lower cholesterol.
- Improves Blood Sugar levels.
- May help with losing weight.
- Great alternative for skincare.
- Helps to relieve constipation.
Which Coconut oil is Healthier: Refined or Unrefined?
While both types of coconut oil is used when it comes to cooking and baking, unrefined coconut oil actually has a bit more nutritional value that it's counterpart. Also, it's higher in antioxidants and polyphenols----compounds that give the oil many of its health benefits and it's free of additives that may be used during the refining process.
What is Cacao Butter?
Cacao butter is naturally occurring plant-based fat derived from the cocoa or cacao bean. After cacao pods are harvested, the beans inside are fermented, dried, and roasted. Those roasted beans are then ground and the grinding process allows the cocoa butter to be separated from the cocoa mass (which often goes on to life as cocoa powder).
Much like coconut oil, cacao butter is actually an oil that becomes solid at room temperature. In addition, although it's too brittle and hard to use as a solid, it's very easy to incorporate once melted especially since it has a low melting point.
Is Cacao Butter the same as Cocoa Butter?
Yes! Believe it or not, cacao butter and cocoa butter are actually the same product and is made the same way. They are the fat that comes from cocoa beans. The beans are taken from the larger cacao plant before being warmed and pressed to extract all the fats.
What Do You use Cacao Butter for?
Basically, melted cacao butter is a great alternative and substitute for any oil, margarine, or dairy butter in many recipes like cookies, brownies, homemade chocolate, cakes, etc. However, I always recommend only substituting in partial amounts because cacao butter will continue to firm up the recipe a little after cooking.
Common Q + A's for Homemade Chocolate Bars
Honestly, there is a variation of chocolate molds to chose from and it depends on the shape and depth of the chocolate bars that you want. Personally, I love having the original chocolate "ridges" as a traditional bar, so I purchased these silicone chocolate molds via Amazon and they're so affordable!
Absolutely! I'm a big believer in personalizing any recipe to meet and satisfy your taste buds and these chocolate bars are no different. I love creating a nice twist on these bars by adding additional ingredients like chopped nuts, cacao nibs, caramel sauce, orange slices/zest, sea salt, cookie butter, peanut butter cups (chopped), pistachios, crushed Oreos, you name it!
My go-to for these chocolate bars is usually maple syrup, which is a natural sweeteners----and they work for these chocolate bars also. However, you can feel free to use coconut sugar, cane sugar, stevia or date syrup as a great substitute.
Generally speaking, using either one is fine for these bars! Again, I use organic versions of both, therefore, the difference might be slight in the taste when it comes to using either one. Also, cacao powder tends to be more expensive, but I love purchasing mine from Navitas Organics.
In technical terms---Chocolate is actually made from Cacao beans (or seeds). It’s said that companies who use the term ‘Cacao’ are referring to the beans, pods, or ground up version of the beans. However, the term Cocoa is often referred to as the powdered version of it all (which is formed after the fat is pressed out of the bean).
Homemade chocolate will last 2 to 3 months in the refrigerator or in the freezer. At room temperature, they'd last only two to three weeks.
Basically, to make them harden completely at room temperature, it's best to store them in a sealed container. The trick is to keep them in a cool, dry, dark place away from all heat or moisture for the best results.
More Must-Try Decadent Chocolate Recipes!
- Dairy-free Iced Mocha Latte
- Chocolate Espresso Smoothie
- Easy Extra Fudgy Vegan Brownies
- Homemade Sugar Free Vegan Caramel Brownies
- Espresso Rye Pecan Chocolate Chip Cookies
- Chocolate Peppermint Mocktail
MADE OUR RECIPE(S)?
If you tried this Homemade Vegan Oat Milk Chocolate Bars or any other recipe on my website, please please leave a 🌟 star rating and let me know how you go in the 📝 comments below. I love hearing from you.
Homemade Vegan Oat Milk Chocolate Bars
Ingredients
CHOCOLATE BARS:
- 1 cup coconut oil, solid (You can also use cacao butter, if preferred)
- ¾ cup organic cocoa powder, unsweetened (You can also use cacao powder)
- 6 Tbsps pure maple syrup (You can also use coconut sugar or cane sugar)
- 1 teaspoon vanilla extract
- 3 Tbsps Oat milk powder (See Notes for where to purchase; Homemade recipe in post!)
- ⅛ teaspoon sea salt
- Pinch of ground cinnamon
Instructions
MELT THE INGREDIENTS TOGETHER:
- In a medium or large saucepan/skillet half-filled with water over medium-high heat, place a heat-safe bowl atop water bed. In the heat-safe bowl, add the coconut oil and whisk until melted fully. Add in the cocoa powder, maple syrup, vanilla, salt, cinnamon, and milk powder, continuing to whisk until everything is smooth and fully melted.
- Let the mixture cool slightly, about 2-3 minutes. Whisk again before transferring to molds.
POUR INTO MOLDS:
- Using chocolate molds, pour the chocolate mixture into each cavity, filling them until practically full. If using any chopped toppings, I would only fill molds at the ¾ mark and then top with toppings. Repeat until all molds are filled. NOTE: Ensure that you place chocolate molds on a flat surface that can be easily transferable (i.e. a cutting board, baking sheet, etc.) because silicone molds tend to bend which might cause the chocolate mixture to spill.
LET IT COOL AT ROOM TEMPERATURE:
- Let chocolate mixture cool to room temperature for about 15-20 minutes.
FREEZE OR CHILL:
- Carefully transfer everything to the refrigerator to chill for 1-2 hours or the freezer for about 1 hour or until chocolate bars are completely set and hard.
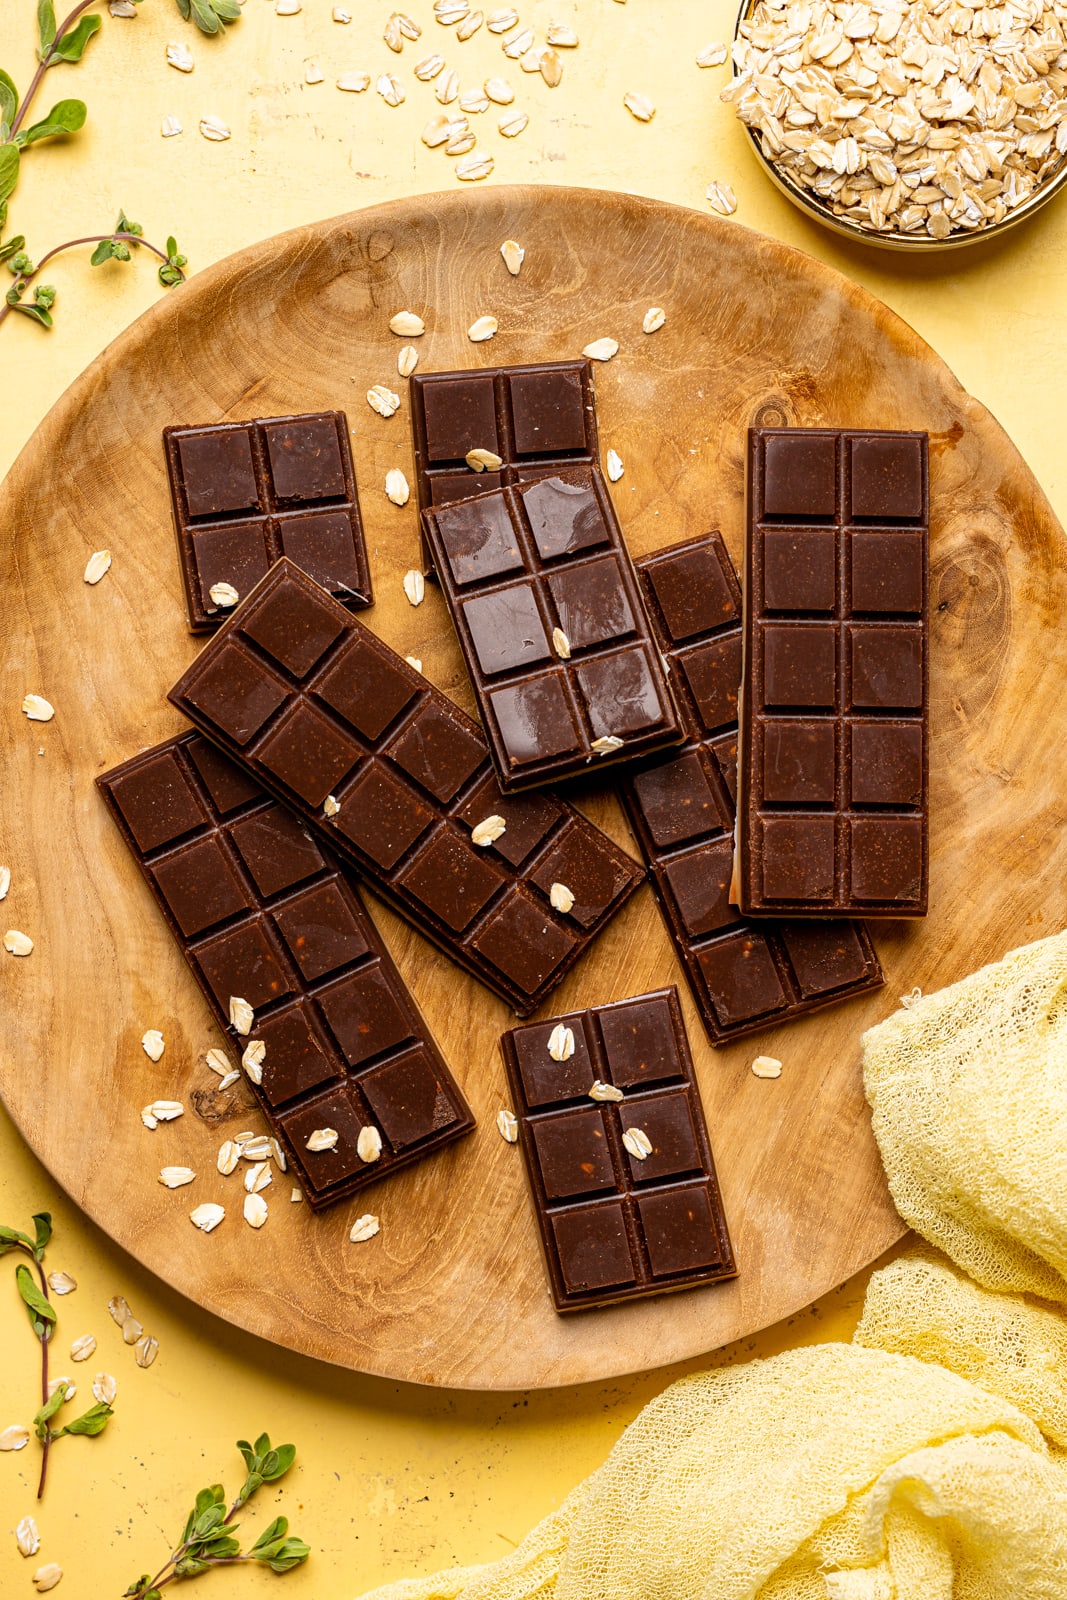
- Remove the chocolate bars from their molds, cut (if preferred) and enjoy!
- Bon Appetit!
Tips & Tricks
- STORAGE: Once properly stored in an air-tight container or tightly sealed ziplock bag or an air-tight container, leftovers can last for 2-3 weeks or frozen for longer. When ready to serve, allow bars to sit at room temperature for a few minutes before eating.
- SWEETENER: If you choose to opt out of maple syrup, you can always substitute with coconut sugar or organic cane sugar, if desired.
- TOPPINGS: See post for great topping options for these chocolate bars!
- OAT MILK POWDER: Because liquids ruin the chocolate bars, it's best to use oat milk powder for a nice oat milk flavor. However, if you don't have it handy, simply grind up oats until it becomes a powder-like consistency in a food processor.
- SERVING SIZE: This recipe makes 6 bars in the molds. To create more, simply double or triple ingredients.
Nutrition
DID YOU MAKE THIS recipe?
Tag @orchidsnsweettea_ on Instagram and hashtag it #orchidsandsweettea

LOVE THIS RECIPE?
LET US KNOW!
FAO:
For the people having trouble. The reason it is seizing is because oatly/any type of shop bought vegan milk is made from water. This will instantly seize any chocolate!
Hi John! Thanks so much for your feedback on this! It should be great since I last updated this recipe! 🙂
Question, I don't like coconut so I don't want to use coconut oil and cacao butter is crazy expensive. any other ideas for a substitute for that part of the recipe? Thanks
Hi Sara! You can definitely try substituting the coconut oil with another neutral oil like vegetable oil or olive oil or butter (which you'd be melting). 🙂
Hi- I know this is a bit of an older recipe but I was wondering if you knew how this would hold up in baking? I’be got a batch in the freezer and was thinking about making a double chocolate sourdough
Hi Anabelle! Thanks so much for reaching out! Unfortunately, I'm not sure how well these would hold up in baking since the ingredients are more tailored to a no-bake option. So sorry! 🙂
Your posts stand out from other sites I've read stuff from. Keep doing what you're doing! Here, take a look at mine Webemail24 for content about about Social Media Marketing.
Can I add fruit and/nuts to the recipe? I'm looking for a non-dairy chocolate recipe with raisins and nuts.
Hi Van! Absolutely! I actually mention this in the FAQ section! I hope you enjoy! 🙂
Love it! Was really missing milk chocolate as a vegan. This tastes great and is easy to make. I used cacao butter rather than the coconut oil...
Hi Linda! I'm so thrilled that you enjoyed these homemade chocolates! Definitely an easy treat that I keep handy in my house also! 🙂
This worked great, except I added finely milled sunflower seeds as lecithin and no liquid vanilla extract. Its amazing to see your chocolate is shiny and didn't seize. I microwaved half 30, 20, 10 seconds then added to another melted batched over bowl of boiling water. The pot melted was running. Mixing the two together turned into shiny tempered chocolate!
Hi Clarissa! I'm so thrilled to hear that you loved this recipe and that everything worked out great! Thanks so much for giving it a try! 🙂
For the most part this is a good recipe but I had to make a simple syrup and pumpkin pie spice added it to the mix which made it taste lovely. My only problem is my chocolate doesn’t set it melts when left out on the counter at room temperature. Any advice?? I would love to give a 5 star but my chocolate melted almost instantly.
Hi Kat! Thanks so much for your feedback! I'm so sorry to hear that your chocolate melted and wasn't solid enough. When allowing it to set at room temperature, you definitely need to ensure that it's at a really cool environment for it to set properly. In addition, leftovers should always be refrigerated and not left out at room temp. If you find that it doesn't set entirely at room temp. you can definitely add it to the fridge after the initial period for a few minutes to solidify it more. 🙂
Shanika, thanks for responding to my comment. I tried again and it went a little better.
After heating the cacao butter, cacao powder and vegan butter, the consistency was smooth and glossy, just as melted chocolate should be, so no problem on that stage. Issues arose once the mixture had cooled and I added milk (used homemade cashew milk this time). For some reason, milk seems to make the mixture into that thick paste, no matter how much I use to try and thin it out.
This time, I tried reheating it over the stove to melt it down, but the oil separated due to me having it at too high of a temperature. Then, my husband helped salvage it by taking it off the heat and gradually adding warm milk. He didn't measure how much he added, but it soon returned to the correct consistency. However, the flavour was still quite bitter and lacking creaminess even with the extra milk, yet it was an improvement from before.
We added some chopped dates on top which will hopefully make the bars a bit sweeter. And this time, there was plenty of mixture. Made 3 bars so far as that's the amount of moulds we have.
My thoughts are that maybe there was a reaction caused by adding cold milk to the room temperature mixture, so perhaps you should state it should be warm before adding?
Hey Ash! Absolutely my pleasure! I actually have had more experience with making my own chocolate since I last posted this recipe and have recently updated the entire recipe and reshot everything. I definitely hope that you find the new info I share helpful and it comes out with great success! 🙂
I had the same problem as the previous commenter, Geordie. The mixture became a thick, dry paste and only made about 3 bars for me with a very poor texture. It was more like a bitter, dark chocolate rather than milky. The only changes to the recipe I made was that I used stevia rather than agave. The milk I used was Califia Farms barista oat milk.
Quite disappointing. I really want to start making my own chocolate since I'm trying to avoid sugar.
But... I will try again. Maybe it needs more milk. I'll review that article you linked about chocolate seizing, as well.
Hi Ash! I'm so sorry to hear about your troubles with this recipe! I'll be sure to revamp + reshoot this one this week, including a few troubleshooting tips! Thanks so much for your feedback! 🙂
Very bad recipe. Not sure if it was because I used Oatly oat milk but if this is the case it should specify. I followed the recipe to a tee and when adding the rest of the ingredients after letting the mix cool, it thickened to a chocolate paste rather than staying runny like chocolate. Which in turn made it impossible to get into molds without having an unsmooth surface. this also only made 5 chocolate bars using molds like pictured, not 12.
Hi Geordie! I'm so sorry to hear that these bars didn't turn out well! I don't normally use Oatly milk, therefore I'm unsure of the texture, however, your mixture shouldn't have come out "paste-like". This might have happened if you overheated the chocolate causing everything to become clumpy. I've attached an article for you to read about why + how this happens as well as my IG Reel video of me making the chocolate so that you can see it. I hope that this helps! 🙂
Article of Chocolate Seizing: https://www.thespruceeats.com/how-to-fix-overheated-or-burnt-chocolate-521579
IG Reel of Chocolate Bar: https://www.instagram.com/p/CbFyEjzjd4w/
Thank you for the recipe, Shanika! Could you use coconut oil instead of cacao butter?
Hi Ameerah! Absolutely! You can definitely sub cacao butter with coconut oil! I hope that you enjoy! 🙂
Hi, great recipe. Would coconut milk work as well, instead of the oat milk? Thanks
Hi Kathy! Thanks so much! Absolutely! You can use your fave plant-based milk for this one for sure! 🙂
These bars were amazing! I can't believe I just made my own chocolate bars! thank you!
Really amazing in taste and flavors, Will make again, very good recipe!
This is so easy and the chocolate bars are perfect gifts for my vegan friends.
This looks really delicious and fairly simple to make! Can't wait to try it out! thanks for the recipe
As a chocolate lover, I give this recipe 5 stars! Super delicious!!