
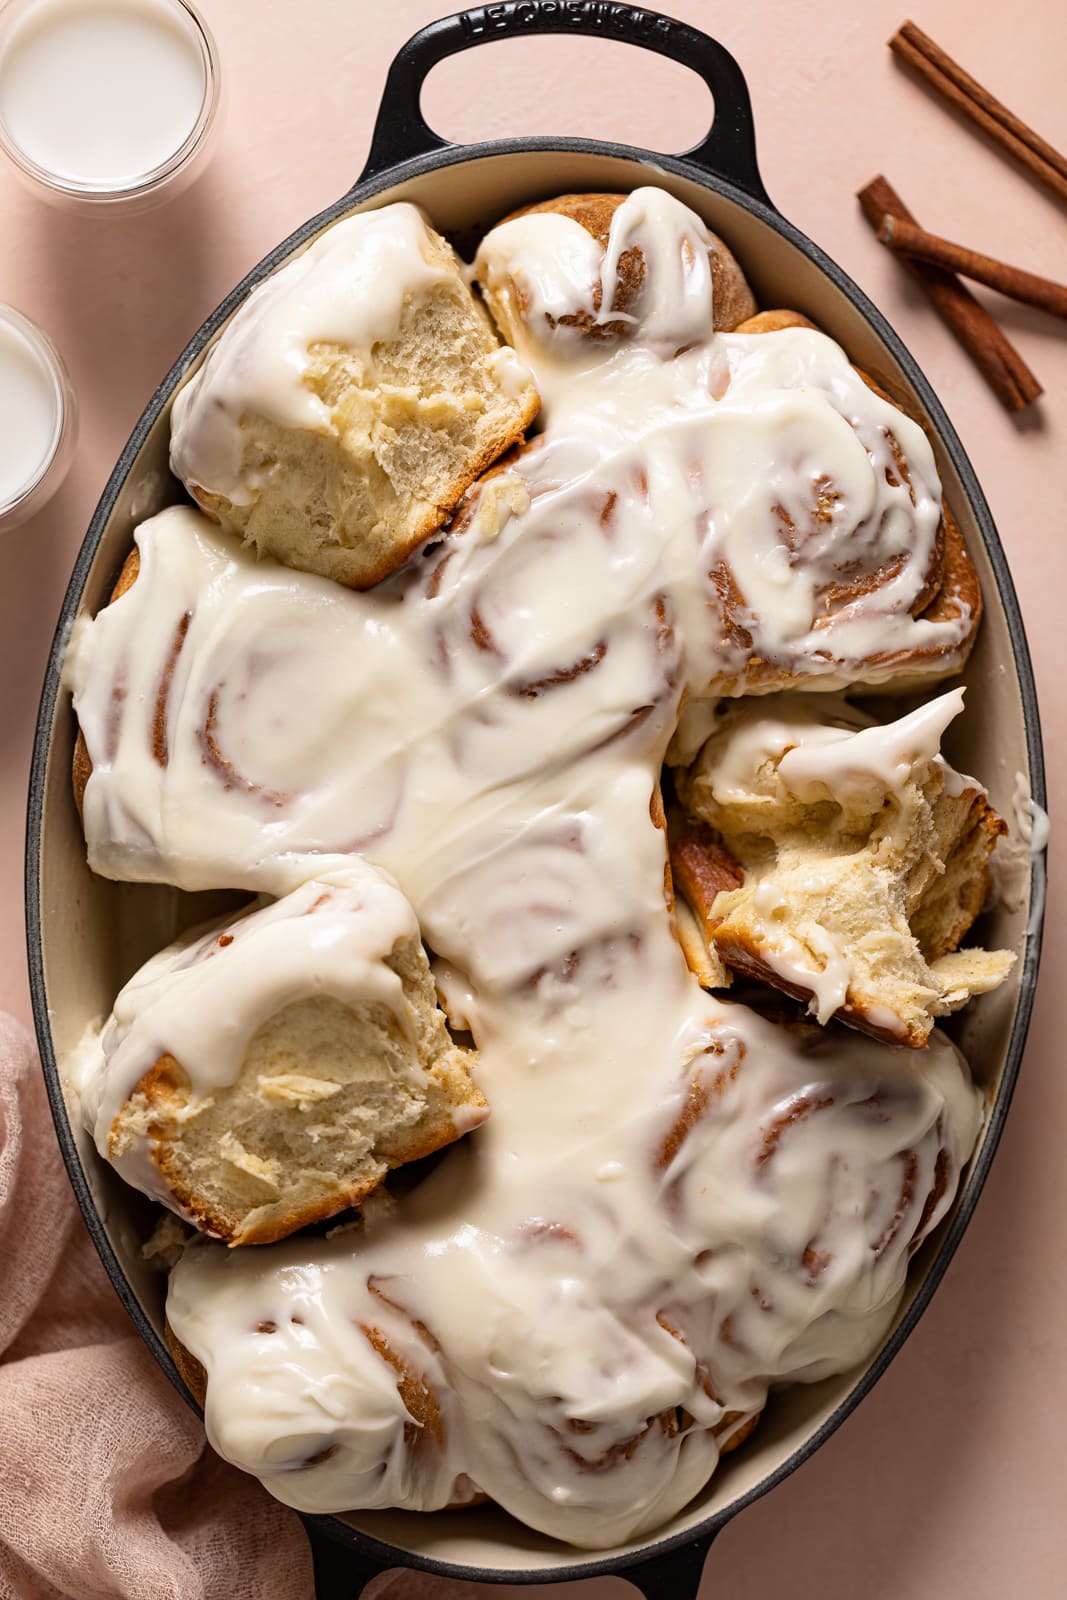
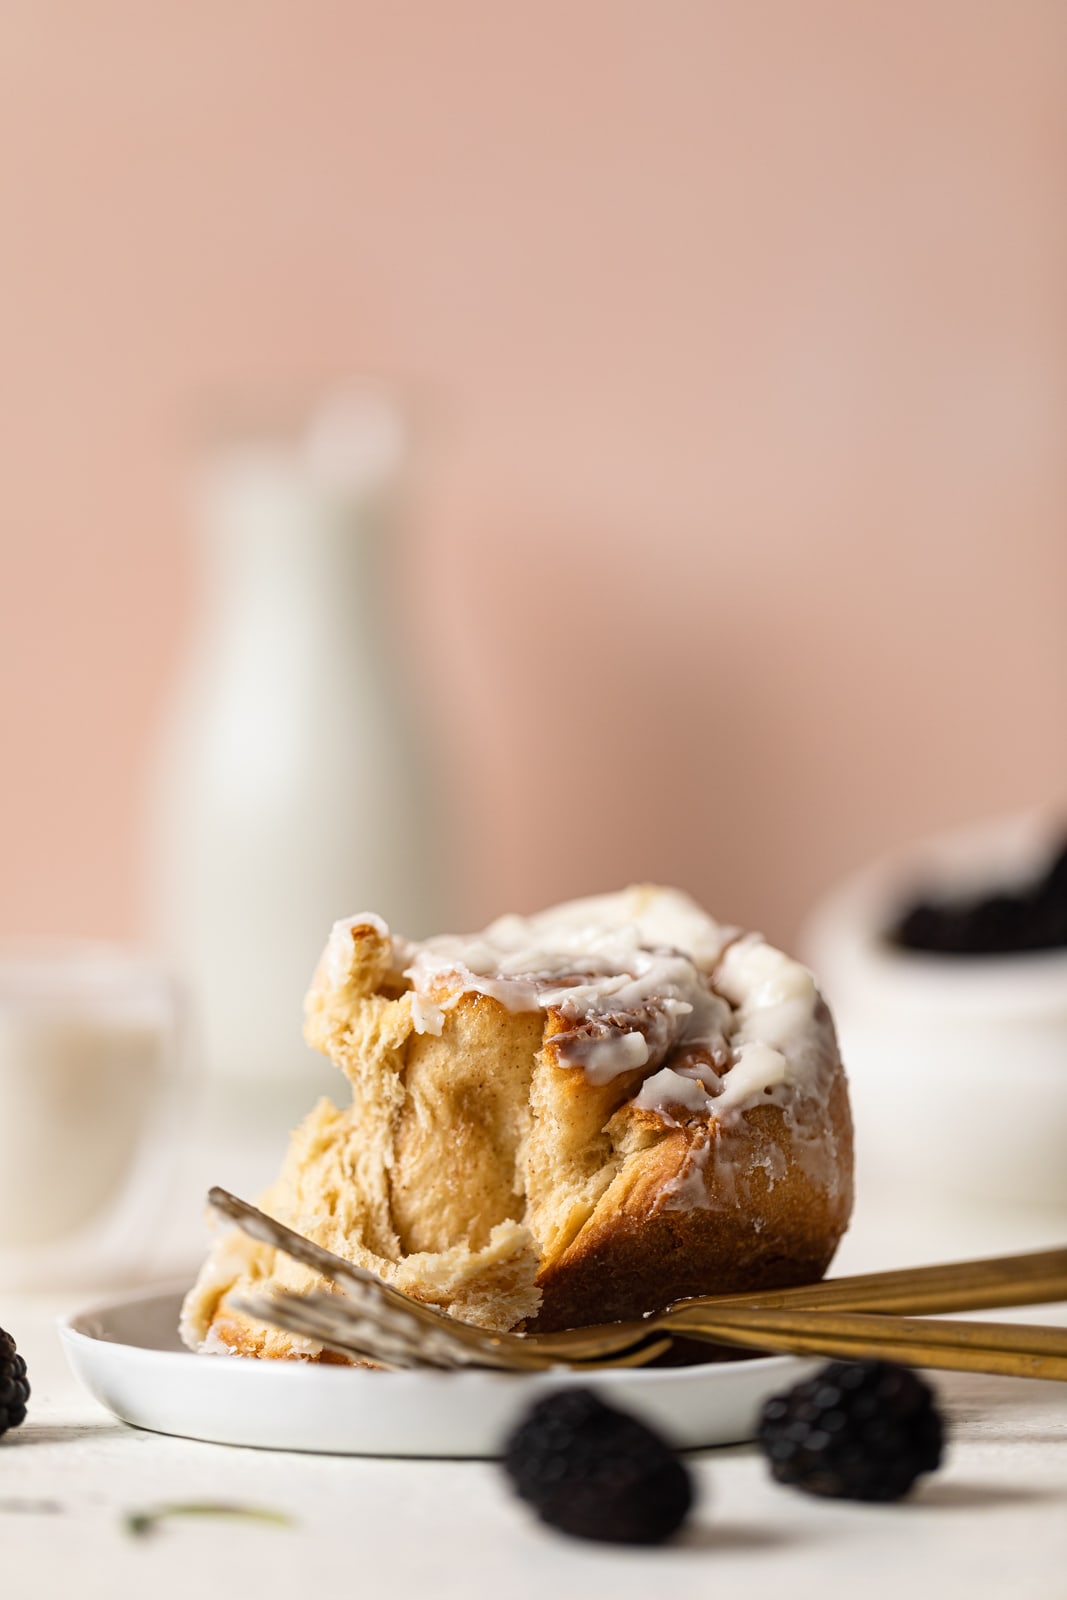
The Best Homemade Cinnamon Rolls
The Best Homemade Cinnamon Rolls
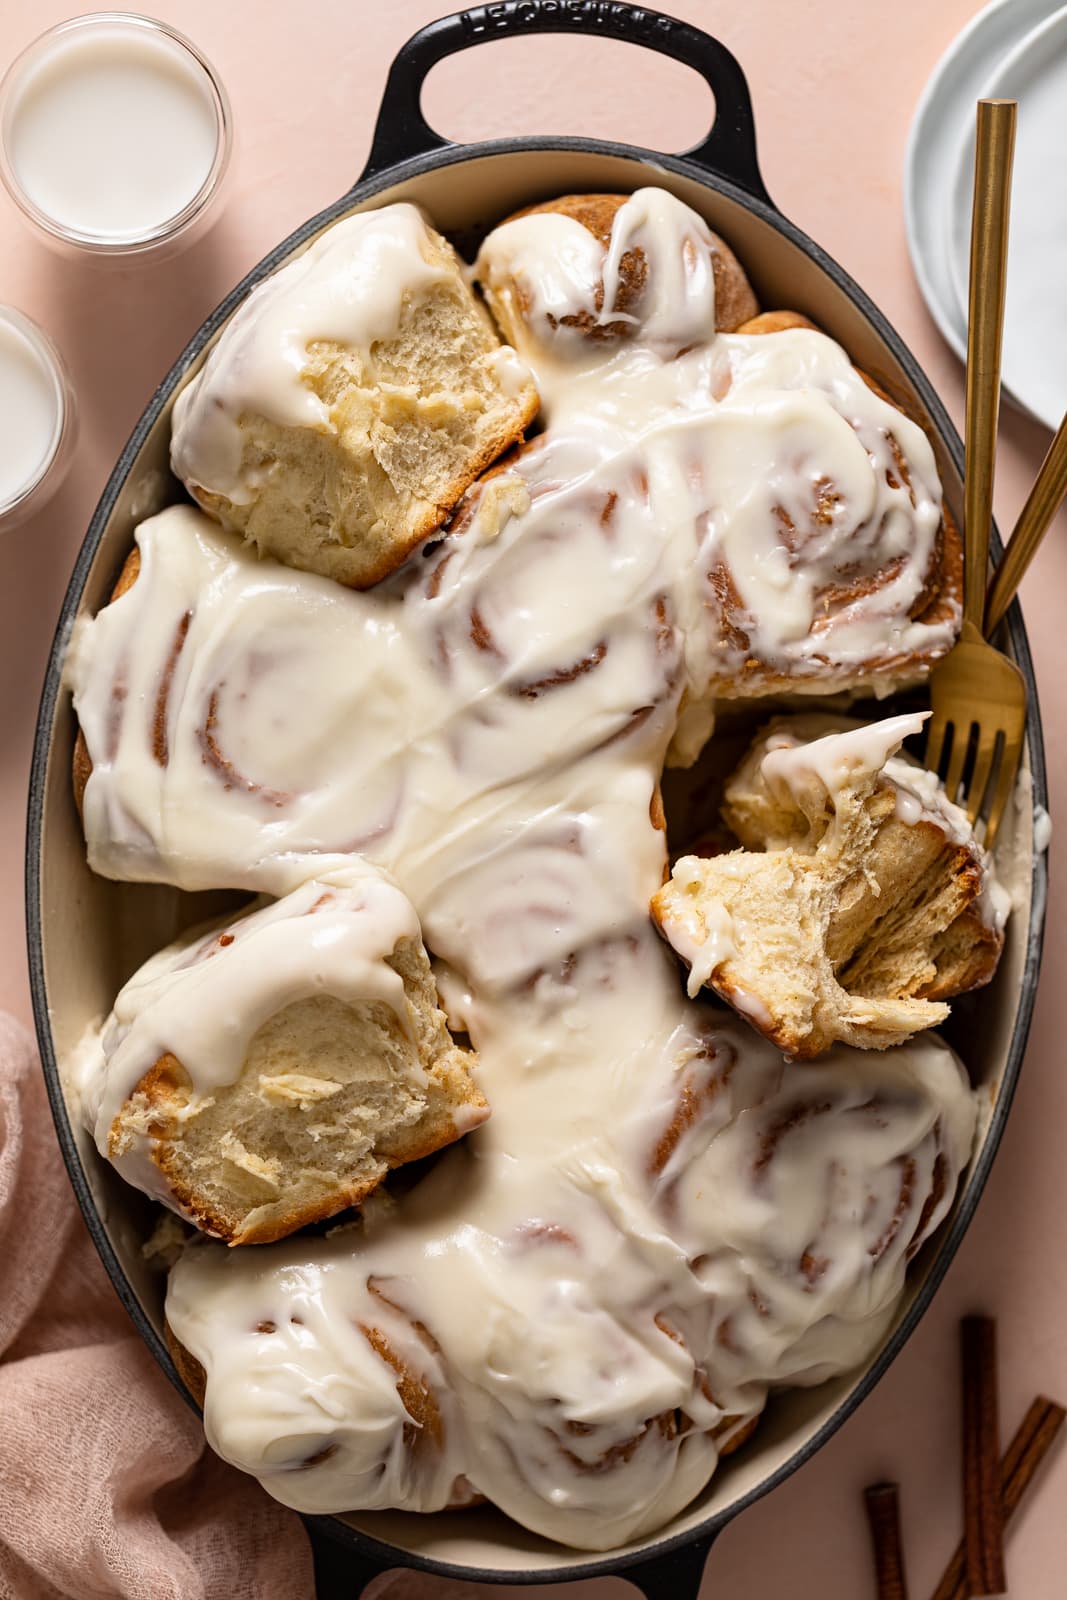
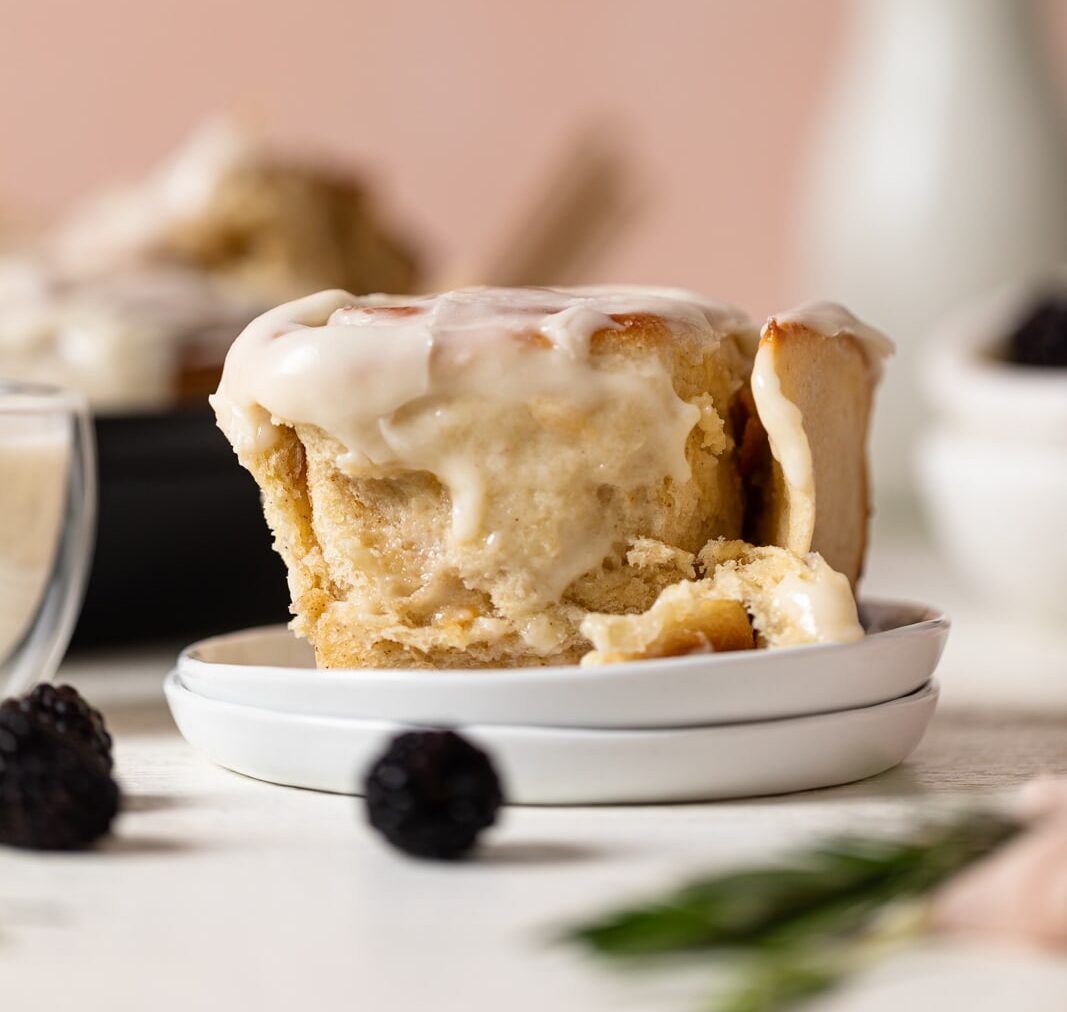
The ultimate easy cinnamon roll recipe, your go-to for the Best Homemade Cinnamon Rolls! These rolls are pure magic, thanks to a simple and quick dough that creates fluffy and mouthwatering perfection. Brace yourself for the heavenly taste of the sweet cinnamon filling generously swirling inside each roll. These rolls freeze beautifully, allowing for convenient make-ahead preparations. Whether you're looking for a holiday treat or a satisfying breakfast snack, these are the best cinnamon rolls you'll ever encounter. Gluten-Free + Vegan option.
Why Homemade Cinnamon Rolls?
If you've been an avid reader of Orchids + Sweet Tea, then you'll know that Cinnamon Rolls are one of my favorite sweet treats to make. I've always had a fascination and love for cinnamon rolls. You can roll up pretty much anything into a fluffy homemade dough, and it would be delicious, hence why I have so many types of cinnamon rolls on my site! From my festive Gingerbread Cinnamon Rolls to my carrot cake-inspired Southern-Style Carrot Cake Cinnamon Rolls to these Homemade Pumpkin Chai Cinnamon Rolls that taste like a sweet hug. I have tried so many creative flavor combos, but they all came from my LOVE of the classic cinnamon roll recipe!
After many years of trial and error, I have perfected the Best Homemade Cinnamon Rolls. It turns out you don't have to be a professional baker to make sticky, gooey, frosted homemade pastries! All you need is this homemade cinnamon roll recipe. The results are incredibly light, airy, + fluffy, with a sticky-sweet glaze that's smeared on top for sweetness in every bite.
Jump to:
- Why Homemade Cinnamon Rolls?
- Ingredients for Homemade Cinnamon Rolls
- Cinnamon Roll Filling
- Sweet Rolls or Cinnamon Buns?
- How to Make Easy Homemade Classic Cinnamon Rolls
- Why You'll Love These Homemade Cinnamon Rolls
- Tips For Making The Perfect Cinnamon Rolls
- What Is The Best Way To Cut Cinnamon Rolls?
- How to Make Cinnamon Rolls Overnight?
- Can I Make These Easy Cinnamon Rolls Without a Long Rise?
- Homemade Cinnamon Rolls Trouble Shooting
- Topping + Flavor Ideas
- Best Homemade Cinnamon Rolls Q+A's
- More Breakfast & Brunch Recipes
- MADE OUR RECIPE(S)?
- Delicious Homemade Classic Cinnamon Rolls
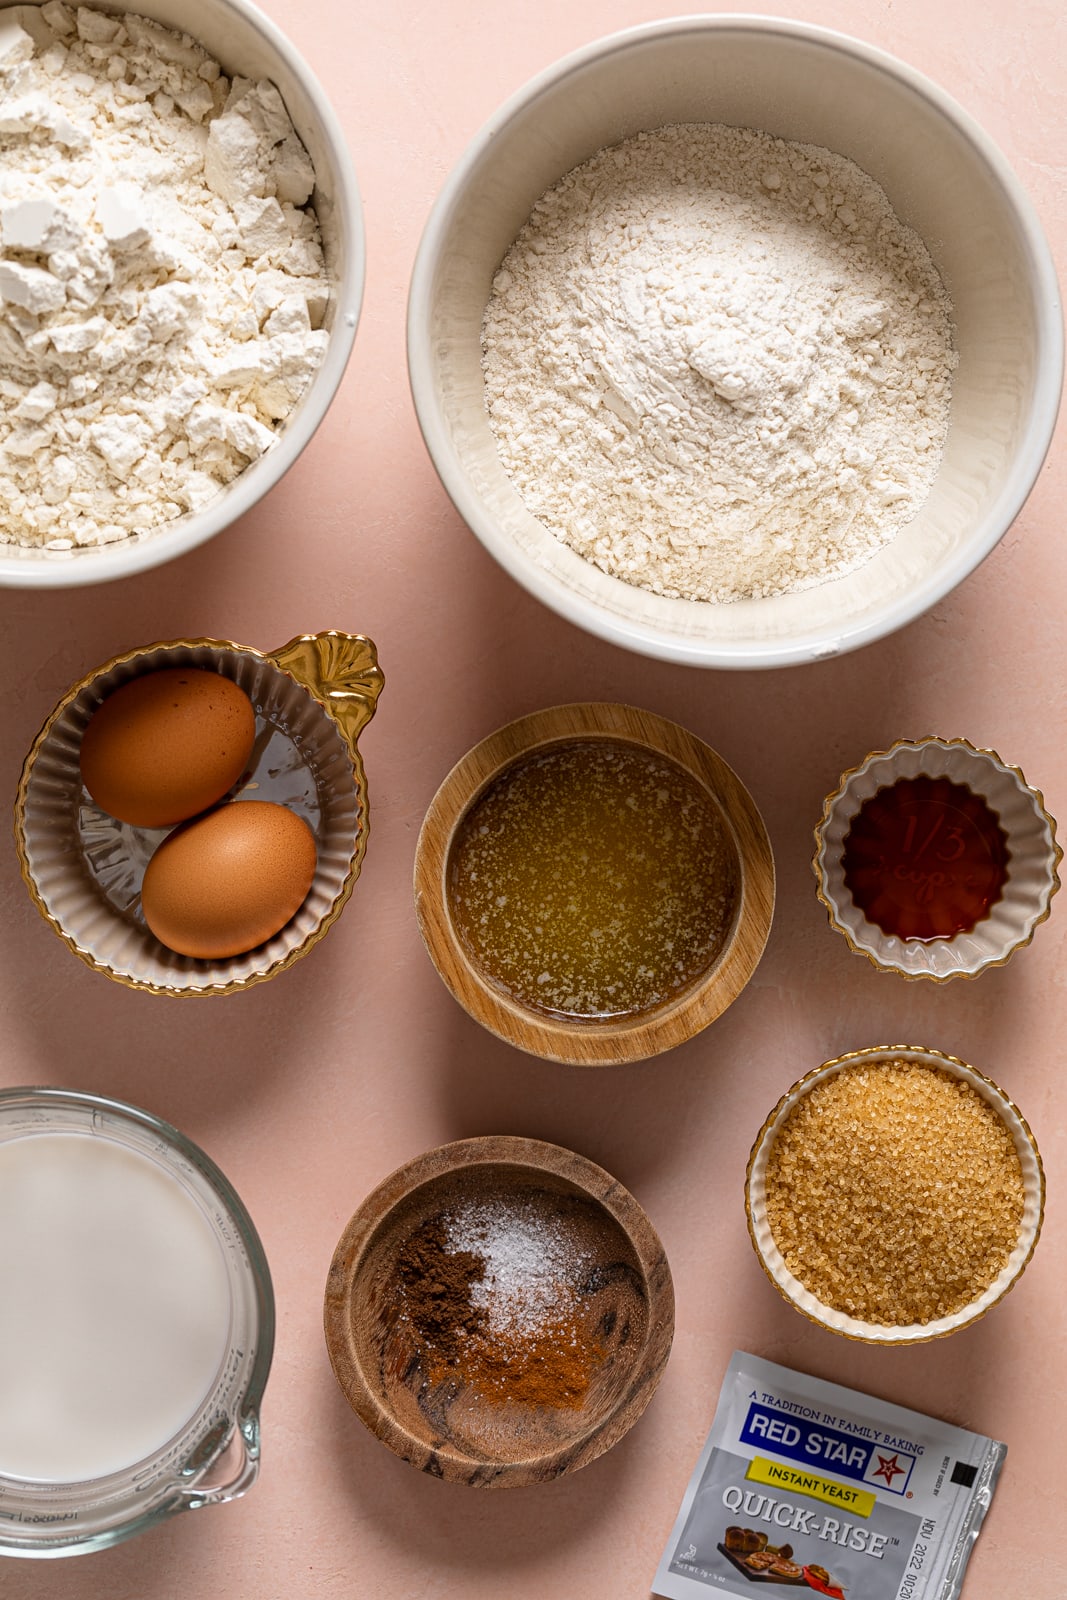
Ingredients for Homemade Cinnamon Rolls
Here's what you need for the fluffy brioche-style dough:
- All-purpose flour. I use organic flour from Bob's Red Mill.
- Bread flour. You can find this from King Author or Bob's Red Mill.
- Brown sugar. You could also use coconut sugar.
- Instant yeast. Also called Rapid Rise Yeast.
- Spices. Cinnamon and allspice for cinnamon rolls, of course!
- Eggs. These should be at room temperature for easy blending.
- Almond milk. You can use regular milk, or any dairy-free milk you like.
- Butter. Use warm, unsalted melted butter.
- Vanilla extract. The pure vanilla is the best flavor.
Cinnamon Roll Filling
Here's what you need to make the spiced filling for your cinnamon rolls:
- Brown sugar
- Butter. Again, unsalted butter. Soften the butter to room temperature.
- Spices. The filling is flavored with cinnamon, nutmeg, ginger, and allspice.
Cinnamon Roll Glaze
Top your pastries with a white glaze made with:
- Cream cheese. Soften this to room temperature for a fluffy texture.
- Powdered sugar. If you use granulated sugar, your frosting will have a gritty texture, so I highly recommend powdered sugar.
- Vanilla
- Heavy cream. You could substitute this with vegan milk if you prefer dairy-free.
- Cinnamon. For a bit more spiced flavor.
Sweet Rolls or Cinnamon Buns?
No matter what you prefer to call them—cinnamon buns, cinnamon rolls, sweet rolls, or sticky buns—these irresistible treats have a special place in everyone's heart. It's hard to find someone who doesn't adore them! A cinnamon bun or sweet roll is a soft and sweet bread dough, often filled with a delightful cinnamon-based mixture. These delectable delights are commonly enjoyed during the holiday season. When baked, the filling creates a tantalizing swirl of pure deliciousness. If you're looking for an easy cinnamon roll recipe, you've come to the right place!
How to Make Easy Homemade Classic Cinnamon Rolls
Start by making the dough:
- Start by combining the yeast and 1 tablespoon brown sugar in the bowl of an electric mixer. Then slowly pour in the warm water, stirring constantly. Allow the mixture to rest for 10 minutes. This allows the yeast to activate (it'll become foamy when done right!).
- Meanwhile, melt the butter and milk together over the stovetop on low to medium heat, stirring frequently until the butter has fully melted.
NOTE: You don't want the mixture to get too hot or boil! Set aside and let it cool until WARM.
- Add the lukewarm butter-milk mixture to yeast and mix until well combined. Add eggs, one at a time, and continue mixing at low speed until well combined.
- Next, combine the all-purpose flour, bread flour, brown sugar, sea salt, and cinnamon to the wet ingredients and mix at low speed until well combined.
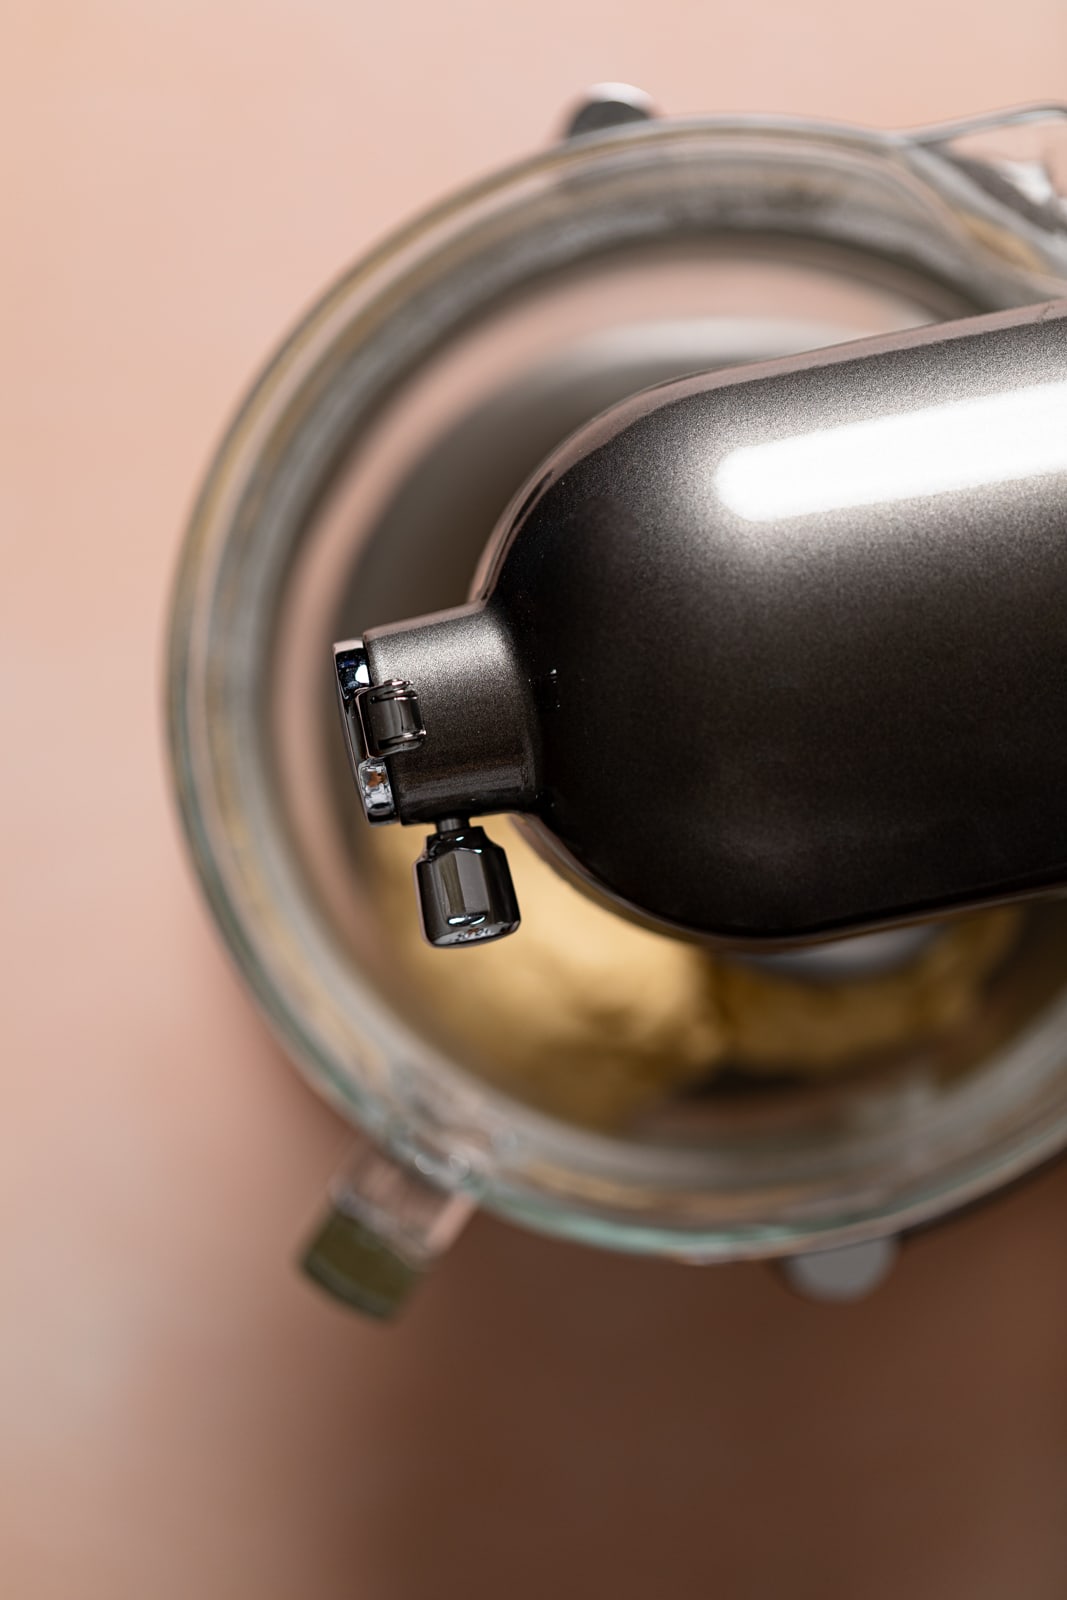
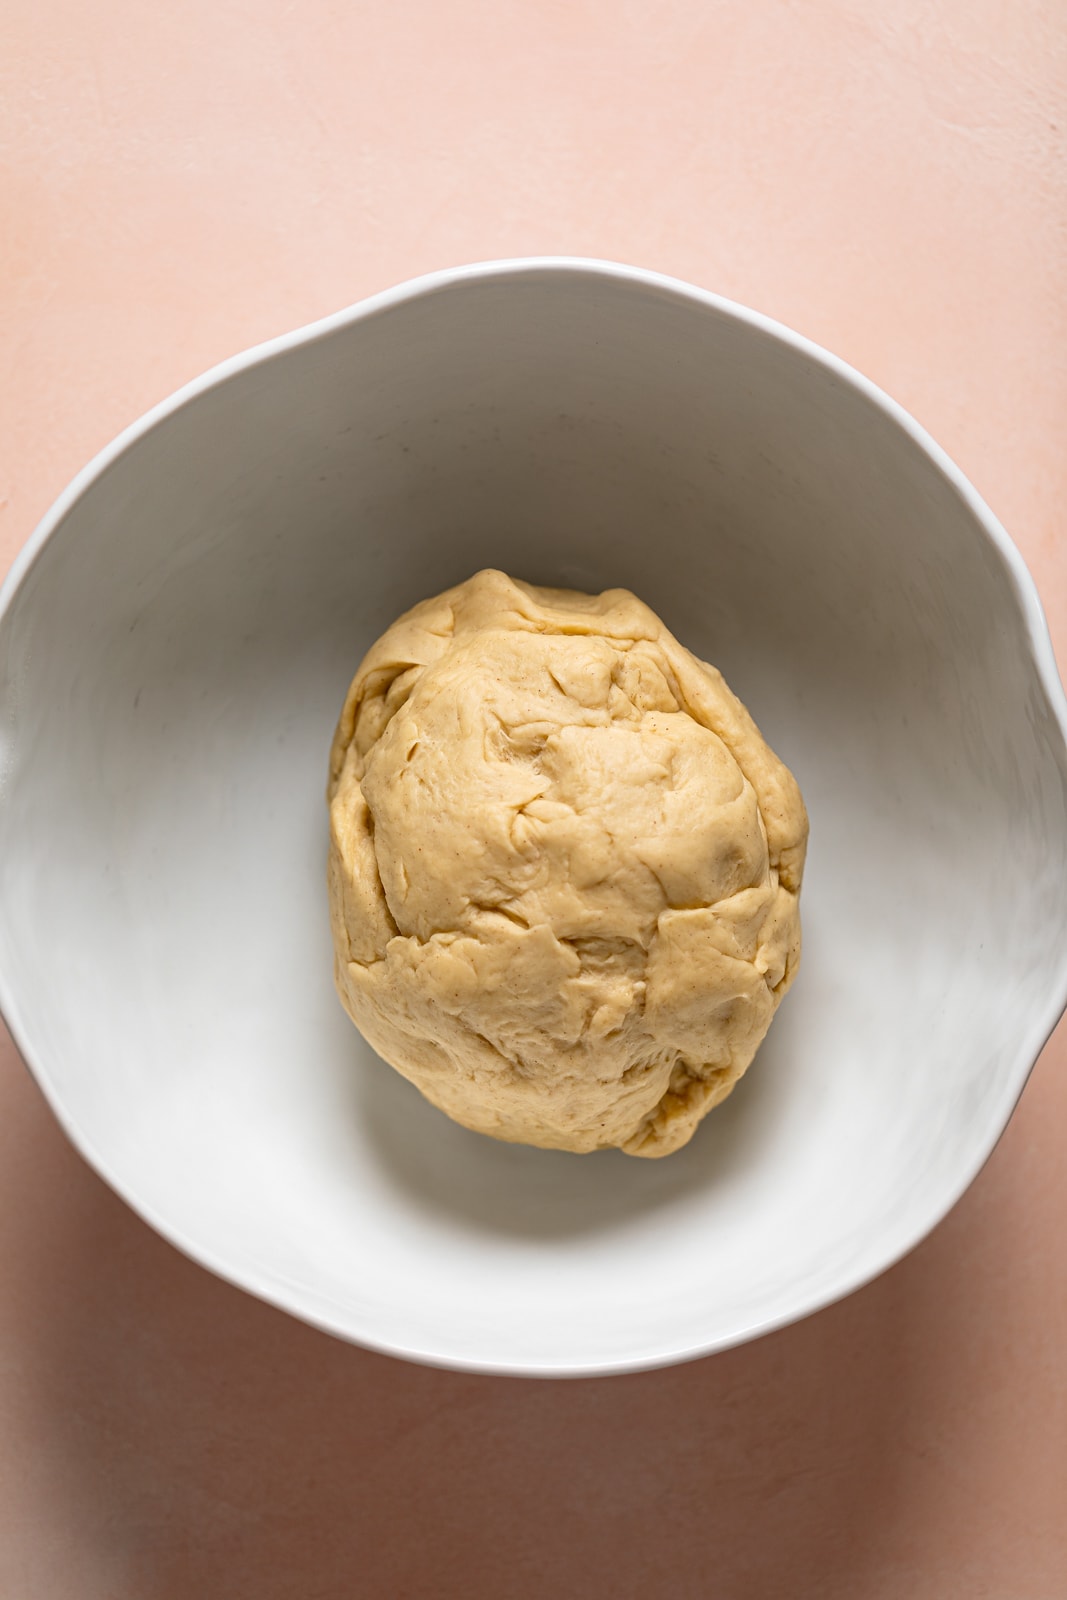
- Change "mixer head" to kneading accessory and knead the dough for 5-10 minutes on medium-high speed until dough ball becomes smooth and elastic and dough springs back when lightly pressed with 2 fingers.
NOTE: If the dough is too sticky, add 1 tablespoon of flour at a time until texture is achieved!
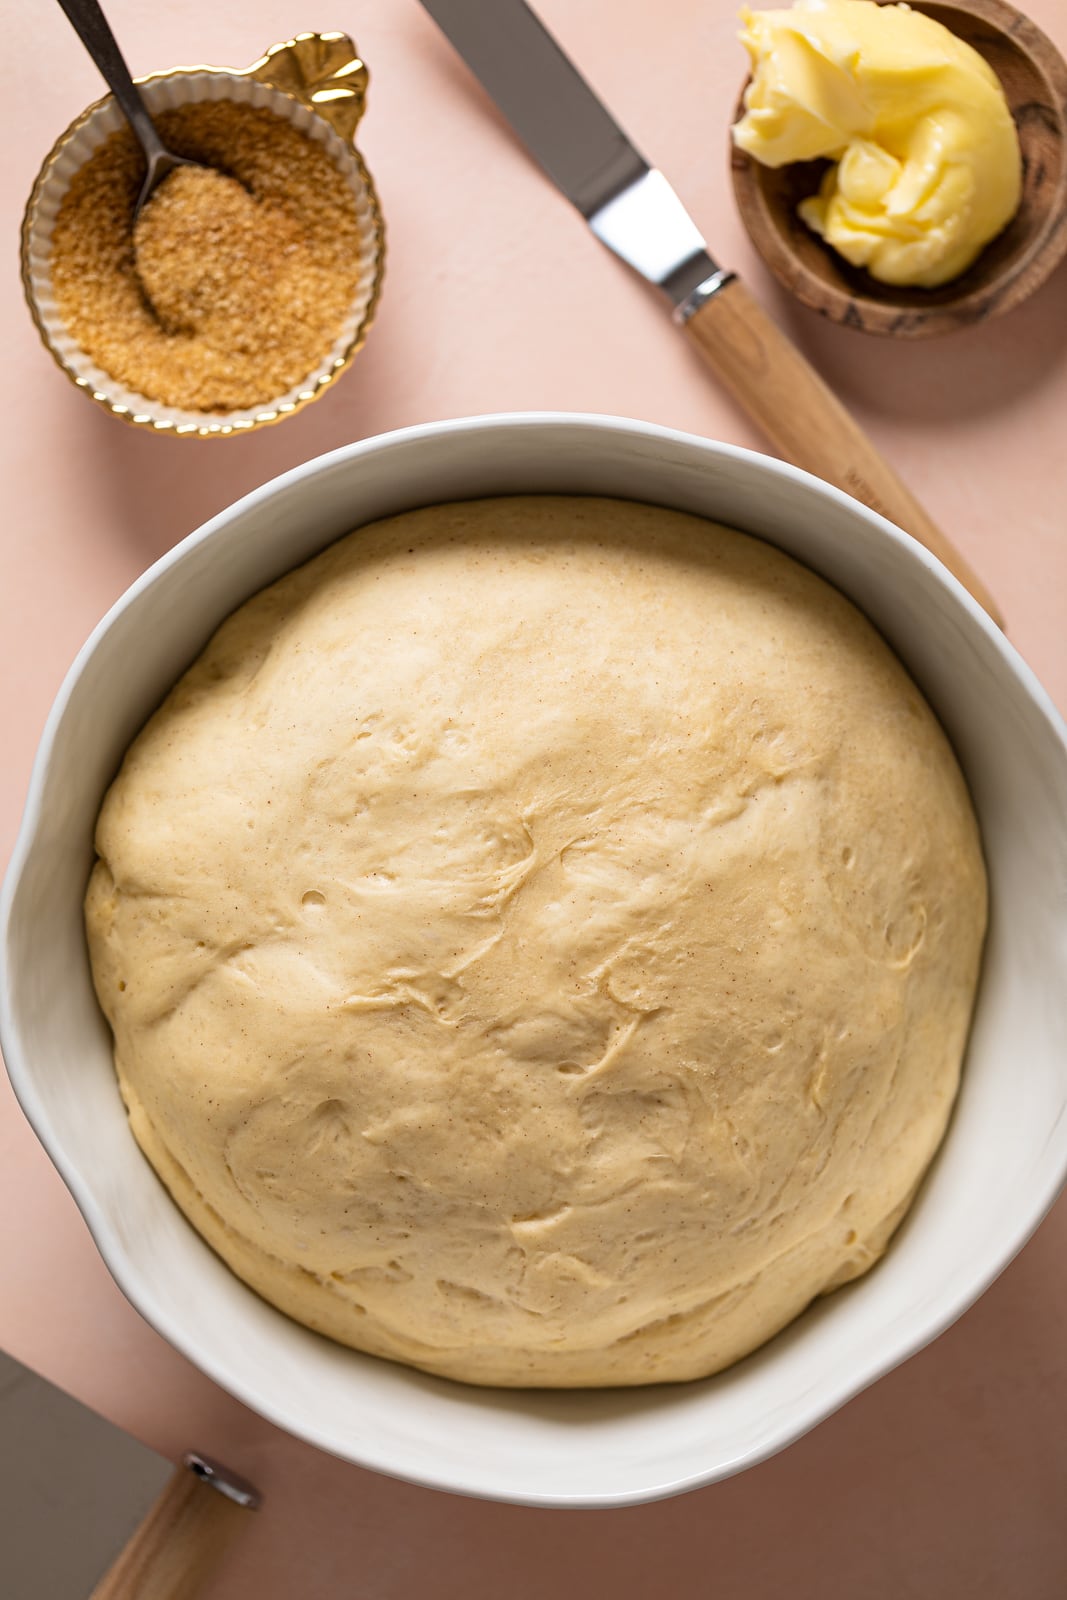
- Once the dough ball is perfectly kneaded, add it to a lightly greased bowl and cover with plastic wrap. Let it sit and rise for 1 hour to an hour + 15 minutes. In the meantime, you can work on the filling!
For the Filling:
- Add the softened butter (best if done at room temp. so that it's more "paste-like" in texture once smeared) in a bowl and set aside. In a separate bowl, combine the cinnamon, nutmeg, ginger, allspice, and brown sugar, mixing them together. Set aside.
- Once the hour has gone by and your dough has risen (about double its original size), preheat the oven to 375 degrees Fahrenheit. Next, flour a flat surface and place the dough on it, and using a rolling pin, roll it out to a rectangle (approximately 9x14), trimming the edges if needed.
NOTE: Try not to make the dough too thin or else rolling it up will be hard to do!
- Then, generously add ¾ of the softened butter atop dough (spreading it our evenly with a spoon or knife), followed by the brown sugar-spice mixture, ensuring that the top is coated evenly. NOTE: I also use a 'pastry brush' to sweep sugar mixture evenly across the dough to ensure that every bite is sweet!
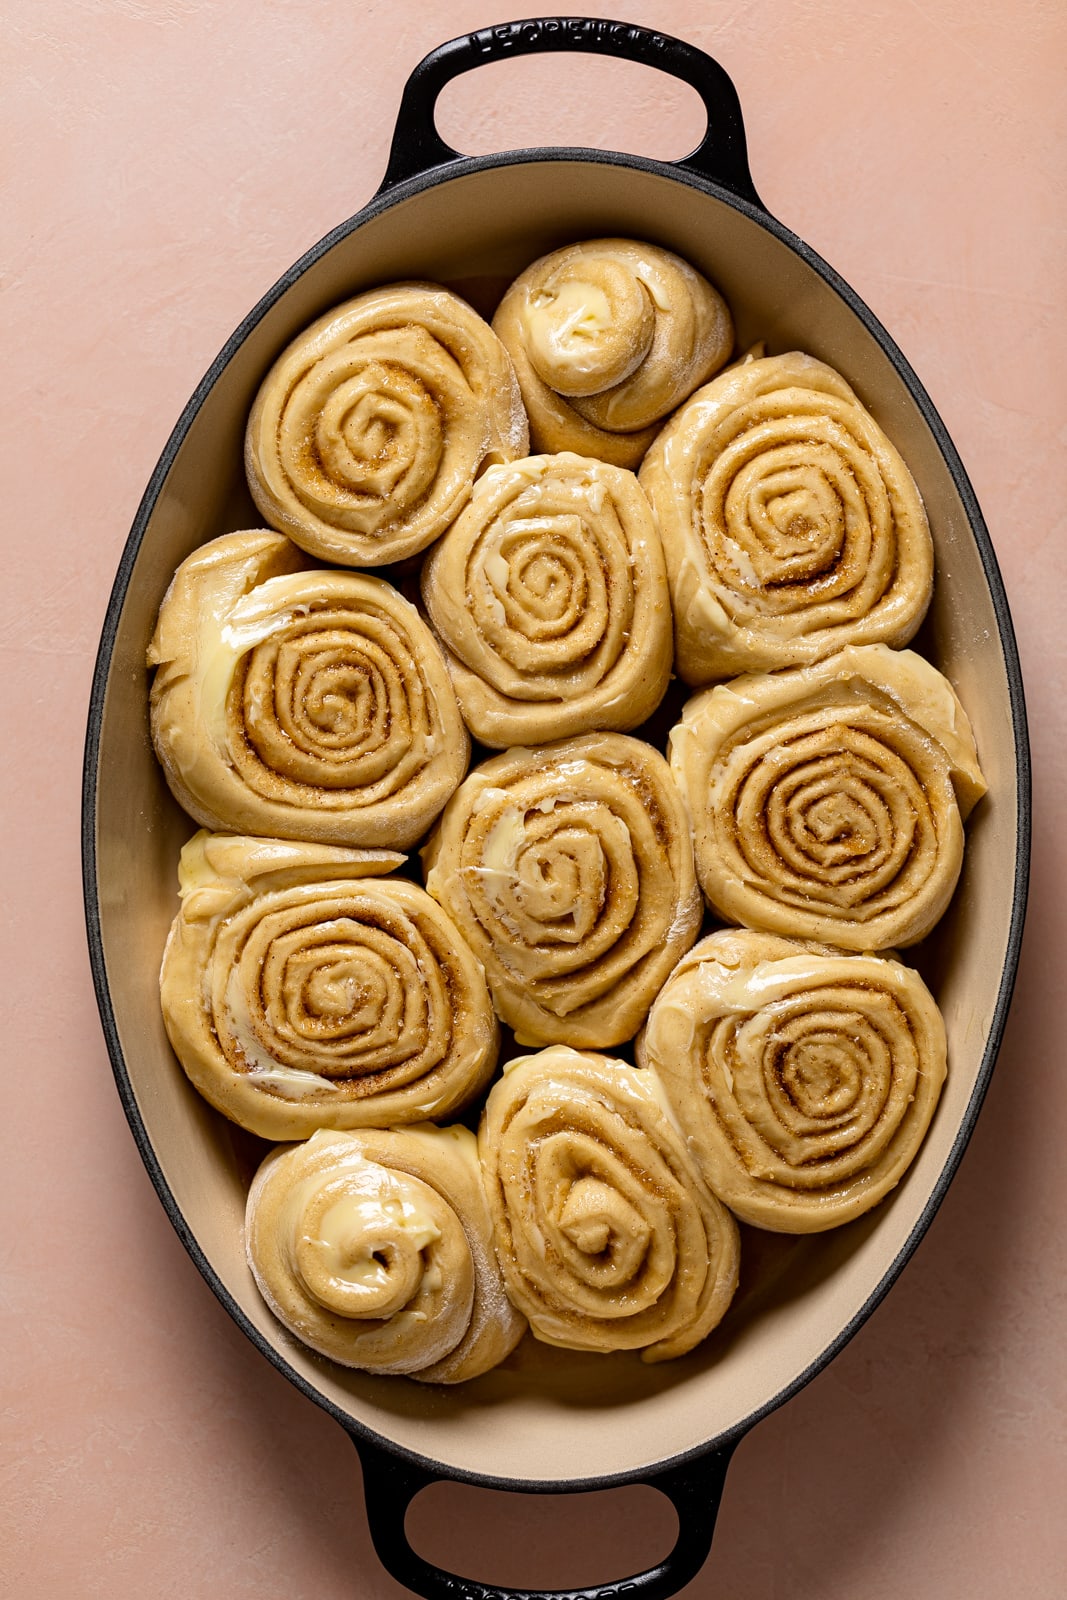
- Tightly roll dough (long-ways) and using a pastry cutter, cut dough into 1.5-inch rolls, placing each roll into a large baking dish (lined with parchment paper).
- Then place plastic wrap over the baking dish with rolls and let them rise again for another 20 minutes.
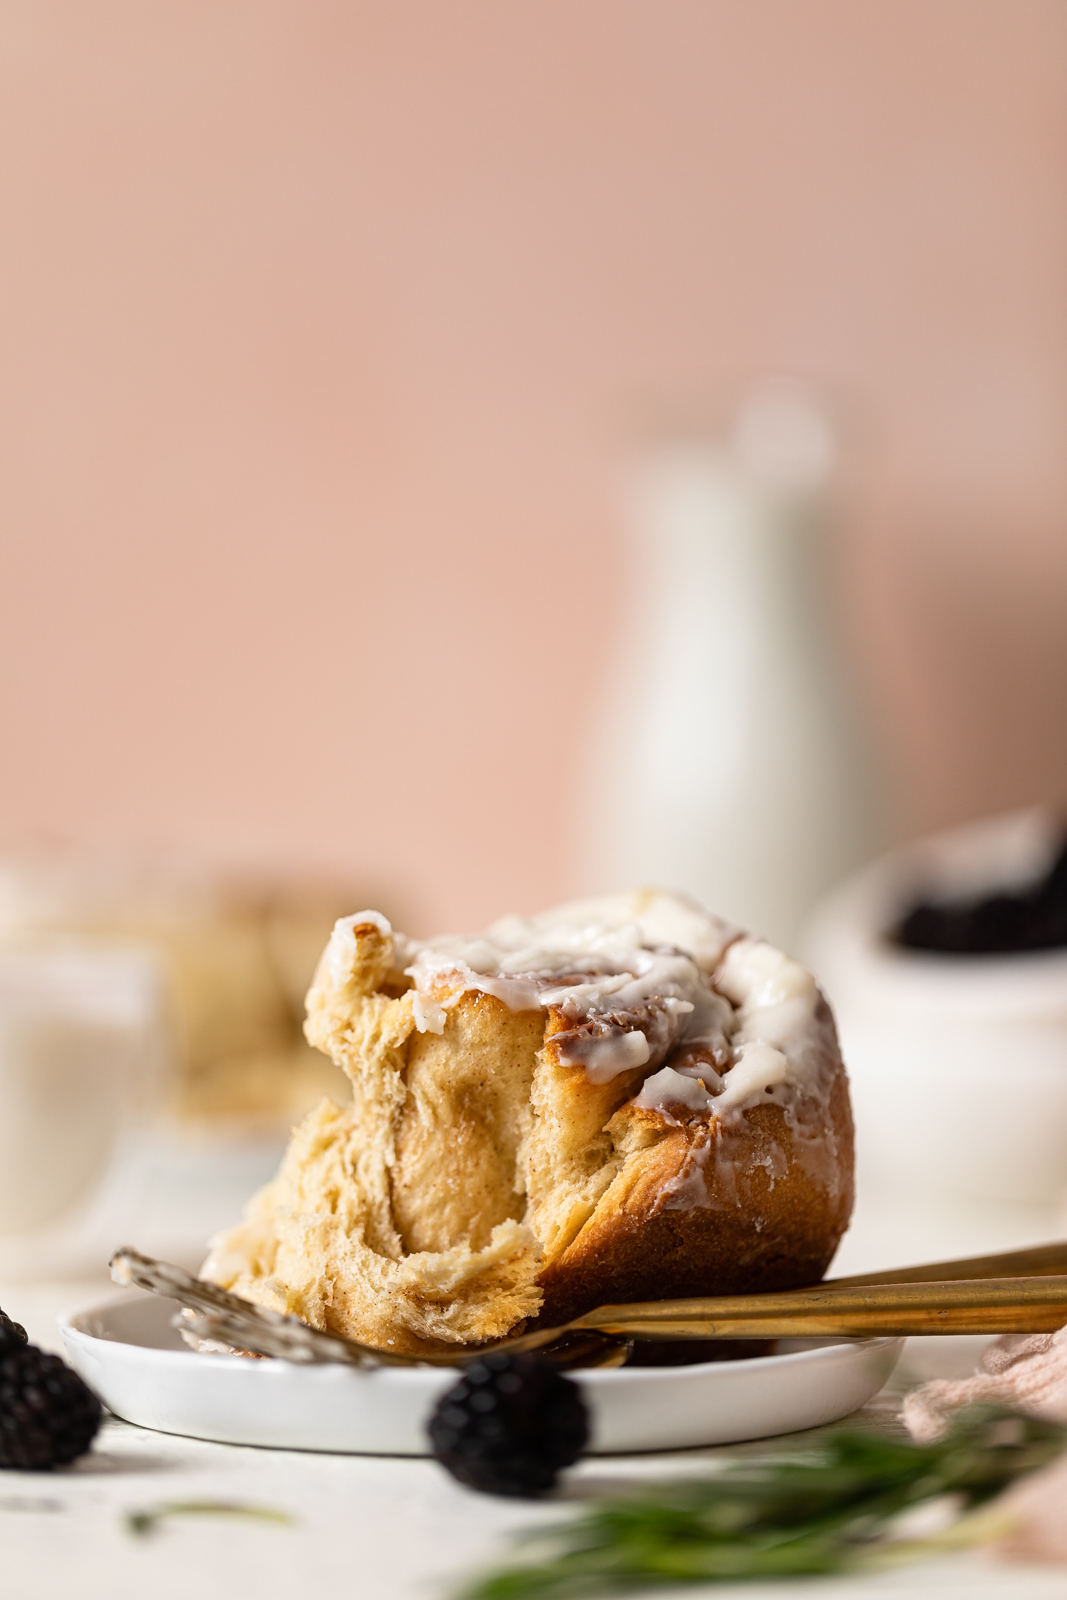
- Once the rolls have doubled in size (once again!) or have gotten significantly larger, smear the tops of the rolls with a little more softened butter and then bake them for approximately 25 minutes in a preheated oven. Look at how gorgeous they are as they come out of the oven! Drool-worthy.
Why You'll Love These Homemade Cinnamon Rolls
OK, so if you’re still not entirely sold on these homemade cinnamon rolls, then let me tell you what’s so great about them.
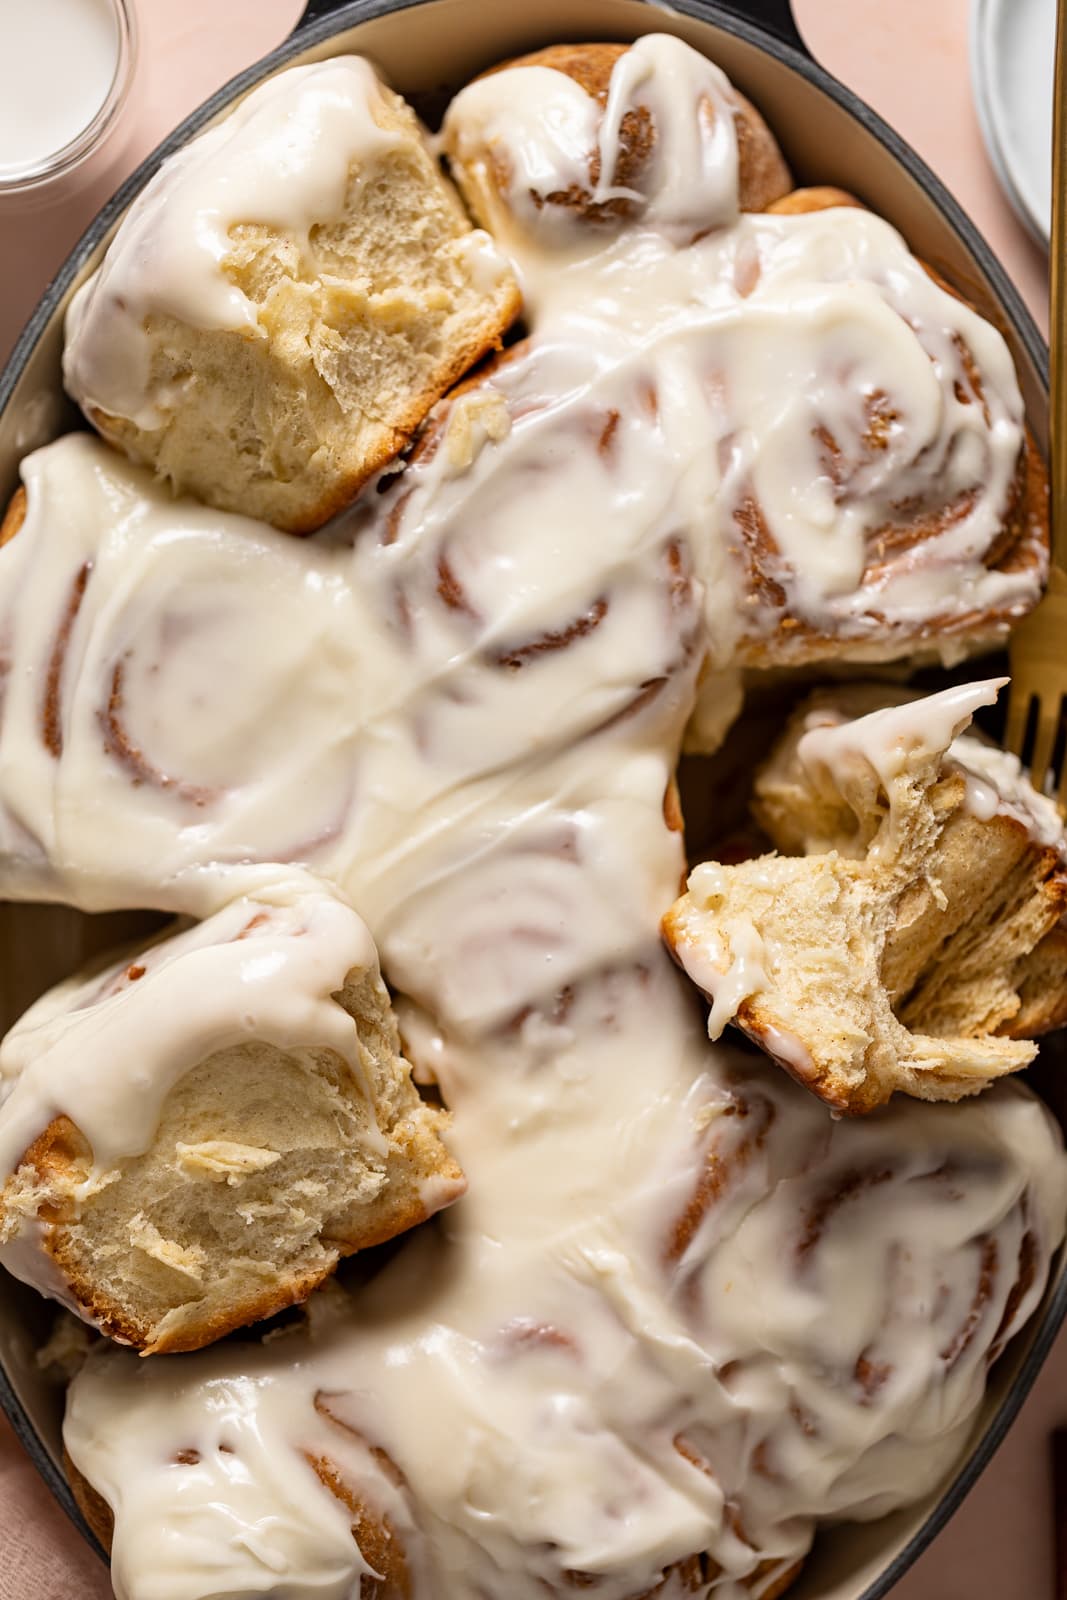
- They are SOFT, FLUFFY, + BRIOCHE-LIKE in texture
- A phenomenal make-ahead breakfast
- Fun to eat! Pillow-y spirals of buttery dough filled with hypnotic swirls!
- Mouthwatering, fluffy cinnamon goodness.
- Freezes beautifully for convenience.
- Perfect kid-friendly + lunchbox-friendly treat!
- Warm, gooey, and utterly delightful.
Tips For Making The Perfect Cinnamon Rolls
Due to many delicious attempts at perfecting this recipe, I have come across some very helpful tips that will ensure a perfectly baked cinnamon roll.
Never Overheat The Milk!
It is so important that your milk is warm but NOT hot! It should be warm to the touch. If you find that your milk has overheated, allow it to cool before adding the yeast. Milk that is too hot will kill the yeast, and you won't get the big, fluffy rise in the dough. We want these rolls super fluffy, and that's only possible when the yeast is bloomed properly.
Use very soft butter at room temperature
Like in most baking, room temperature ingredients mix better than cold ingredients. Beat in your butter while it is completely room temperature for a seamless, tender texture.
Do not worry about over-mixing
I know it sounds weird, but hear me out. With cakes and cookies, you never want to overwork a dough because working develops the gluten in the flour. Gluten development leads to a chewy, unpleasant texture in cakes and cookies, making them dense and heavy. Because cinnamon rolls use a yeast dough, it is required to develop the gluten in the dough. The yeast brings elasticity that lightens and fluffs the dough, much like bread dough. When making these rolls, keep on mixing even after you think you've mixed enough!
Rise the dough overnight
While I developed this recipe as a quick-bake cinnamon roll, more flavor develops in the dough if you allow it to rise overnight. The dough has more time to rise, leading to a more developed, yeast-bread flavor. This yeast flavor is a perfect pairing with the sweet filling and frosting.
Use a bread flour mix
After much trial and tribulation, I have found that a mix of bread flour and all-purpose flour is the perfect combination for cinnamon rolls. The bread flour gives a tender, thick, brioche-like texture that I think is perfect for this dish.
Roll them up tight!
A loose roll will fall apart upon slicing and bake unevenly. Instead, begin with a very tight roll and keep that momentum throughout the roll. The dough is sturdy and can handle being rolled tightly due to its elasticity.
What Is The Best Way To Cut Cinnamon Rolls?
Ready to ditch the traditional knife and embrace a quirky method for cutting cinnamon rolls? It's time to bring out the dental floss. Yes, you read that right! Unflavored dental floss is the secret weapon for perfectly sliced cinnamon rolls.
Why? Because it slices from the inside out, avoiding any squishing mishaps that can happen with a regular knife. Simply run it along the bottom of the rolls, and cross the two ends over each other. Give it a pull, and voila! Your perfectly sliced cinnamon rolls are ready to bake. But if you're using a knife, remember to channel your inner lumberjack and saw gently back and forth without squishing the rolls.
How to Make Cinnamon Rolls Overnight?
If you don’t want to make your Cinnamon Rolls on the same day, you can simply follow all steps (including the initial 1+ hour rise) and after cutting rolls and placing them into your baking pan, just cover them tightly (using foil paper of plastic wrap) and refrigerate them overnight or for 8-12 hours instead. The following day, remove from refrigerator and keeping them covered, let cinnamon rolls rise at room temp 1 to 1 ½ hours.
Can I Make These Easy Cinnamon Rolls Without a Long Rise?
Absolutely! When it comes to these cinnamon rolls or any for that matter, you always have the option of making them the traditional way which requires a 1-2 hours initial rise and then another 20-25 minute rise before baking OR an overnight option.
However, if you're in a rush to make these or don't want to deal with a long rise time, you can simply create your dough and do a quick rise (20-25 minutes) and place them straight in the oven to bake. Either way, cinnamon rolls are AMAZING and worth whatever wait time you choose!
Homemade Cinnamon Rolls Trouble Shooting
Why Are My Cinnamon Rolls Not Fluffy?
The consistency of the dough is affected by a variety of factors, including the weather and humidity. The most common reason cinnamon rolls don't turn out fluffy is that the dough didn't have enough time to rise. You want a pan of puffy-looking buns even before baking.
Why Are My Cinnamon Rolls Rising Unevenly When I Bake Them?
During baking, the centers of the cinnamon rolls may appear whack-a-mole-style. This can happen if you roll them too tightly or if the pan is too small/crowded. It's happened to me several times don't worry it's fixable. Remove the pan from the oven and gently push the highly raised areas down with the back of a spoon it is an easy fix!
Why Are My Cinnamon Rolls Hard?
Unfortunately, when cinnamon rolls come out too hard and/or dense, it means that the yeast wasn't activated properly, and the dough didn't rise like it should have. If the dough doesn't double in size before being rolled out, then this is an indication that the dough didn't rise adequately.
Topping + Flavor Ideas
Elevate your homemade cinnamon rolls with these tantalizing topping and flavor ideas:
Nutty Crunch - Sprinkle chopped nuts, such as pecans or walnuts, on top of your cinnamon rolls before baking. They add a delightful crunch and a hint of earthy flavor.
Chocolate Swirl - Introduce a dose of chocolatey goodness by swirling melted chocolate or Nutella into the cinnamon filling. It creates a delightful flavor combination that chocolate lovers will adore.
Citrus Zest - Brighten up your cinnamon rolls by adding a sprinkle of citrus zest, such as orange or lemon. It adds a refreshing and tangy twist to the sweet rolls.
Decadent Drizzles - Drizzle your cinnamon rolls with indulgent sauces like salted caramel, chocolate ganache or honey for a heavenly and gooey experience.
Best Homemade Cinnamon Rolls Q+A's
Yes! To make fluffy classic cinnamon rolls gluten-free, substitute both the all-purpose and bread flour with Bob's RedMill 1:1 baking flour. Reduce the amount by 1 cup and add more if necessary if the dough is too sticky.
To make these cinnamon rolls vegan, simply omit the eggs and substitute with 1 tablespoon of apple cider vinegar. Also, substitute the butter with vegan butter and omit the cream cheese and add ¼ cup of softened vegan butter instead OR a vegan cream cheese of your choice.
Store leftover rolls in an airtight container in the fridge for one to two days. For longer storage, keep in the freezer for up to six months. Defrost the rolls for a few hours on the counter before storing.
If you’re not using the Rapid Rise Yeast for this recipe, please know that the rise time will be twice as long (about 3 hours) since regular Active Yeast doesn’t work as quickly.
Absolutely! Usually, I make my cinnamon roll dough via my electric stand-mixer which has the appropriate attachments for the kneading process, however, with these cinnamon rolls, I have had the pleasure of doing this all by hand and it wasn't difficult.
It just requires a bit more arm work, that's all! Plus, there’s nothing that a light drizzle of flour can’t help, right?! You'll basically follow all steps for making the dough in a large bowl and once it begins to come together and can form a ball, then you'll begin working the dough in a front-to-back and folding motion a few times until you begin to feel the dough "soften" and become elastic-like. It took me about 5-6 minutes or so total. Not bad!
YES! Basically, you would preheat your air fryer as you would your oven---somewhere around 360 degrees or so. Prepare your air fryer basket with non-stick oil spray and then doing all of the steps in making the cinnamon rolls. Once rolls are created, you'll add each roll to the prepared basket, leaving a bit of space in between and cook them in the air fryer for 8 minutes to start. They should be full cooked through, but you can add additional minutes for an outside crisp of the rolls. Remove them and then frost them warm! Enjoy!
More Breakfast & Brunch Recipes
- Veggie Breakfast Strata
- Warm Vegan Apple Cinnamon Pancakes
- Sweet Potato Berry Breakfast Boats
- Vegan Breakfast Eggs + Potatoes
- Maple Cinnamon Oatmeal + Roasted Oranges
MADE OUR RECIPE(S)?
If you make these Best Homemade Cinnamon Rolls or any other recipe from us? be sure to tag us on Instagram at #Orchidsandsweettea so that we can share the love!
Delicious Homemade Classic Cinnamon Rolls
Ingredients
DOUGH:
- 3 cups organic All-purpose flour (See Notes!)
- 2 cups Artisan Bread flour
- ½ cup organic brown sugar + 1 Tbsp
- 1 packet Rapid Rise Yeast (That's 2 ¼ tsps!)
- 1 teaspoon ground cinnamon
- Pinch of ground allspice
- 1 teaspoon sea salt
- 2 large eggs, room temp.
- 1 ¼ cups Almond milk, room temp. (You can also use regular dairy milk, if preferred!)
- ¼ cup WARM water (See Notes!)
- 6 Tbsps unsalted butter, melted (Make sure that it's WARM, not hot!)
- 1 teaspoon vanilla extract
FILLING:
- ½ cup organic brown sugar
- ½ cup unsalted butter, softened at room temp.
- 1 tablespoon ground cinnamon
- ¼ teaspoon ground nutmeg
- ¼ teaspoon ground ginger
- Pinch of ground allspice
CREAM CHEESE GLAZE:
- 4 oz. organic cream cheese, at room temp. (That's ½ a pack!)
- 4-5 cups organic powdered sugar, sifted
- 1 teaspoon vanilla extract
- 1-2 Tbsps organic heavy cream or plant-based milk
- Pinch of ground cinnamon
OTHER:
- 1 tablespoon unsalted butter, melted (For brushing the tops)
Instructions
FOR THE DOUGH:
- Combine yeast and 1 tablespoon brown sugar in the bowl of an electric mixer and slowly pour in warm water while stirring frequently. Allow 10 minutes for the mixture to sit and for the yeast to activate.
- Add in the room temperature milk and warm butter to the yeast mixture and whisk until well combined. Add in the eggs (one at a time) and vanilla, whisking to incorporate.
- In a large bowl, whisk together the all-purpose flour, bread flour, brown sugar, cinnamon, allspice, and sea salt and add them to the wet ingredients and mix on low-speed until well combined and everything begins to form into a dough-like consistency, about 2-3 minutes.
- Change “Mixer head” to kneading accessory and knead dough for 5-10 minutes on high speed until dough ball becomes smooth and elastic and dough springs back when lightly pressed together with 2 fingers. NOTE: If dough is still too sticky, add 1 tablespoon of flour at a time until texture is achieved!
- Lightly grease a large bowl with a small amount of olive oil and place the dough ball in the bowl, tossing it around until coated. Cover with plastic wrap (or a towel) and let sit for 1 hour, allowing the dough to rise and double in size.
- In the meantime, you can work on the filling!
FOR THE FILLING:
- Add the softened the butter (best if done at room temp. so that it's more "paste-like" in texture once smeared) in a bowl and set aside. In a separate bowl, combine the cinnamon, nutmeg, ginger, allspice, and brown sugar, mixing them together. Set aside.
- Once the dough has risen fully, preheat the oven to 375 degrees Fahrenheit and line a large 9x13 baking dish with parchment paper, allowing excess to hang from the sides.
- Add a bit of flour to a surface and place the dough onto it, lightly adding a bit of flour to the top. Using a rolling-pin, roll out the dough into a rectangular shape (approximately 9″x14 and ½-inch thick), trimming the edges if needed. NOTE: Try not to make the dough too thin or else rolling it up will be hard to do!
- Then, generously add ¾ of the softened butter atop dough (spreading it out evenly with a spoon or knife), followed by the brown sugar-spice mixture, ensuring that the top is coated evenly. NOTE: I also use a 'pastry brush' to sweep sugar mixture evenly across the dough to ensure that every bite is sweet!
- Tightly roll dough (long-ways) and using a pastry cutter, cut dough into 1.5" rolls, placing each roll (cut side down) into a large baking dish (lined with parchment paper!).
- Then place plastic wrap over the baking dish with rolls, smear the tops with remaining softened butter and let them rise again (for another 20 minutes).
- Once the rolls have doubled in size (once again!) or have gotten significantly larger, bake them for approximately 35-40 minutes in the preheated oven.
- While all the baking magic is happening, make the Cream Cheese Glaze.
FOR THE CREAM CHEESE GLAZE:
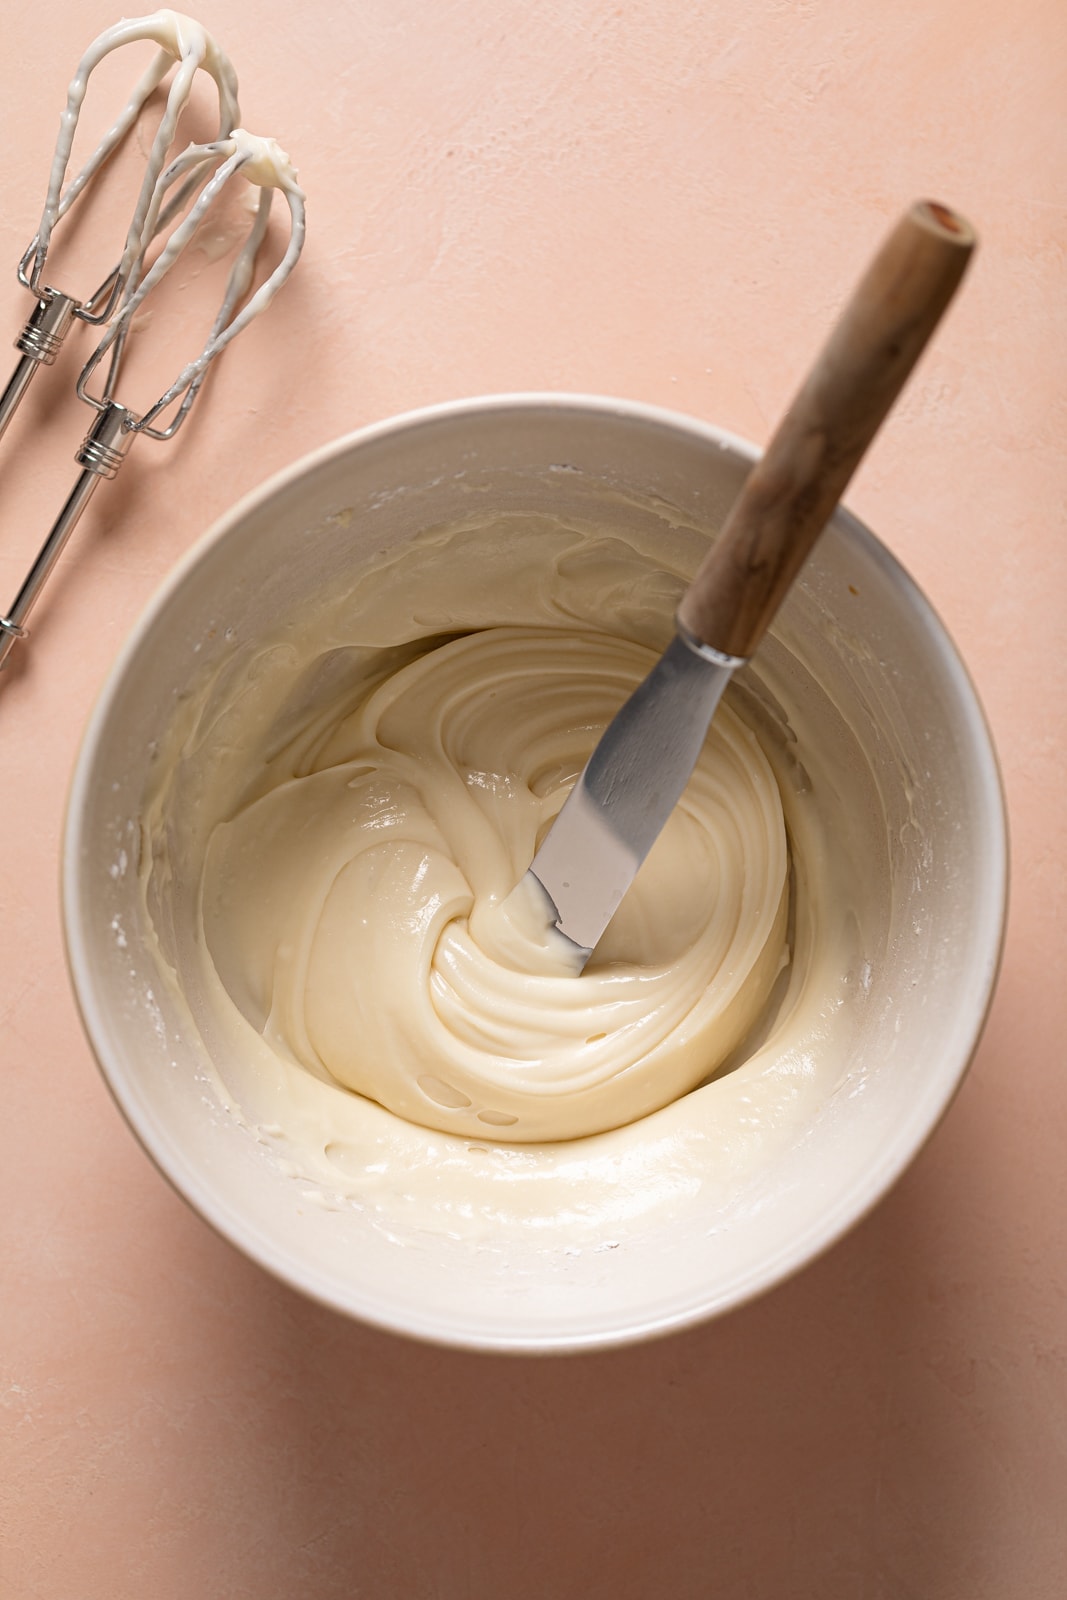
- In a large bowl, beat (using a hand-mixer) the softened cream cheese until creamy and smooth. Add the powdered sugar, vanilla, cinnamon, and heavy cream/milk, beating everything together until the glaze becomes smooth and velvety. NOTE: Add additional heavy cream (1 tablespoon at a time) if the glaze is too thick or powdered sugar (1 tablespoon at a time) if too thin.
- Remove the rolls from oven and wait 25-30 minutes or until it completely cools, before spreading the frosting/glaze atop the rolls using a rubber spatula evenly until fully covered.
- To serve, cut out each roll desired and enjoy.
- Bon Appetit!
Tips & Tricks
- TO STORE: Cinnamon Rolls can be kept fresh at room temperature when tightly wrapped or sealed for up to 3 days. Fresh for up to 1 week in the Refrigerator. Baked rolls can be frozen up to 2 months.
- RAPID (INSTANT) RISE YEAST VS. ACTIVE DRY YEAST: If you’re not using the Rapid Rise Yeast for this recipe, please know that the rise time will be twice as long (about 3 hours) since regular Active Yeast doesn’t work as quickly.
- FLOUR: If you don’t have bread flour, you can always just use all-purpose flour entirely instead.
- GLUTEN-FREE OPTION: If you're looking to make these GF, I recommend substituting both flours with Bob's 1:1 Baking flour and slightly reducing the amount by 1 cup, slowing adding more if the dough is too sticky.
- OVERNIGHT OPTION: If you don’t want to make your Cinnamon Rolls on the same day, you can simply follow all steps (including the initial 1+ hour rise) and after cutting rolls and placing them into your baking pan, just cover them tightly (using foil paper of plastic wrap) and refrigerate them overnight or for 8-12 hours instead. The following day, remove from refrigerator and keeping them covered, let cinnamon rolls rise at room temp 1 to 1 ½ hours.
- VEGAN OPTION: To make these classic cinnamon rolls vegan, simply omit the eggs and substitute with 1 tablespoon apple cider vinegar. Also, substitute the butter with vegan butter and omit the cream cheese and add ¼ cup of softened vegan butter instead.
Nutrition
DID YOU MAKE THIS recipe?
Tag @orchidsnsweettea_ on Instagram and hashtag it #orchidsandsweettea
Delicious Homemade Classic Cinnamon Rolls.

LOVE THIS RECIPE?
LET US KNOW!
My husband has fallen in love with me all over again! These roll are perfection and so tasty. Thank you!
Hi Kim! Wow! This truly makes me SO happy to hear! Thanks so much for choosing to give these rolls a try! 🙂
I’m confused about instruction step 2: “Add in the room temperature milk and warm butter to the yeast mixture followed by the mashed banana and whisk until well combined.”
The mashed banana isn’t mentioned anywhere else (including the ingredients) and I’m wondering if it’s an error as my dough turned out way too sticky when I added one.
Hi Ava,
My apologies for any confusion! I have updated the instructions as this was a typo! Thanks so much for pointing that out!
Making these right now! they are coming out amazing so far, just rolled them and let them sit for 20 to rise again but sadly they didn't get any bigger. I had to undo some to reroll tighter after I cut them I don't know if that messed them up? But I also used active dry yeast so I'm letting them sit longer before I bake, let me know if either or these things affected it! 🙂
Hi Mackenzie! Thanks so much for choosing to make my cinnamon rolls! Either thing done shouldn't affect the rolls at all. However, using active dry yeast does require a bit longer rise time. I do hope that they turned out great! 🙂
I very rarely leave comments on recipes, but I just made these rolls, and I couldn't NOT leave a comment. I've made a lot of cinnamon rolls over the years, but none have ever turned out as well as these. They were fluffy and sweet, and perfectly cinnamony. I ate two standing at the counter right out of the pan. I've also always thought that the roll part was just a conduit to getting the frosting into my mouth, but the roll part is just as good as the frosting part! You're right about the yeast. Using regular active dry, the dough took quite awhile to rise, but who cares? They were definitely worth the wait!
Hi Anna! OMG----this comment definitely MADE MY DAY! I'm so glad that you love these cinnamon rolls and they are definitely my go-to sweet treat! I'm a girl who loves things well seasoned, therefore, I'm so glad that you appreciate the cinnamon intense flavor of these! Thanks so much for sharing your thoughts and I'm so honored that you chose to make my recipe! Xx
Thanks for your nice post I really like it and appreciate it.
https://www.globalmarketestimates.com/market-report/global-skin-3d-bioprinting-market-3035
Truly appreciate the way you made this delicious cinnamon rolls. Everything is so nicely described that really helped. Looking forward for more such yummy recipes in future too.
Hi! I'm so happy to hear that you enjoyed these cinnamon rolls! Thanks so much for your feedback! Looking forward to you enjoying future recipes! 🙂
I love this recipe!! For the past 4 weeks I’ve been trying to make cinnamon rolls. Sadly I have thrown out many cinnamon rolls. Finally ! I have found a keeper. I didn’t t use the organic flours, I used Gold Medal cause that’s what my local Walmart had. Thank You so much for this recipe❤️
Hi Anna! I'm so happy to hear that you had success with this recipe! Definitely one of my faves! Thanks so much for giving it a try! 🙂
I had to find the original maker of these picture perfect rolls I saw on Pinterest because you know pple be theifing photos. 😂
These are beautiful!!! 💕💕I will be back to your blog soon.
Hi Denise! Haha!!!! Thanks so much! I definitely hope that you try these and enjoy them! 🙂
Truly the best cinnamon rolls ever. We just made them for Christmas morning and they were absolutely perfect!
Hi Britney! I'm so honored that you and your family love this recipe! Thanks so much! Merry Christmas! 🙂
Love love loved this rolls! Soft and chewy.
HI Ellie! I'm so happy to hear that you enjoyed these! Happy Holidays!
I made these yesterday and they are delicious! They’re soft even a day later. I definitely will make these again, I used whole milk but otherwise made recipe as is.
Hi Christi! OMG! I'm so happy to hear that! Yes, these are really soft even as leftovers! Hope you continue to enjoy! 🙂
I cooked these for the 25 minutes specified but the interior rolls were still uncooked, so I've just popped them into the oven again, hoping they will still cook up some. Next time I will put them in for a minimum of 45 mins total. But the one on the corner edge was delicious if a tad bit soft!
Hi Joan,
Thanks so much for your feedback! I'm so sorry to hear that they didn't bake through enough! It definitely depends on your oven in terms of the heat factor. Also, I definitely recommend to ensure that too much butter isn't added before the rolling process and halfway through the cooking process----poke a few small holes in between the rolls to help the heat seep through. 🙂
I LOVE these rolls! These are my new go to food to bake for when times are tough, new baby, I love you, or just because. The taste is amazing and directions are simple. Can dough be frozen to have some on hand?
Hi Emily! OMG! I'm so honored and so happy that you enjoy these! Yes, definitely-----baked rolls can be frozen up to 2 months. 🙂
This is my go to, absolutely favorite cinnamon roll recipe! I have always prepped the rolls and let them sit overnight but I will not be able to do that today. After putting the rolls in the pan, will it be okay if I place them in the fridge for a couple of hours before baking them? Or will this mess up the process since it wouldn't be for a full 8-12 hours. Thank you!!
Hi Madison! I'm so honored that you choose to make my Cinnamon Rolls! These are my fave as well! Since you're keeping them in overnight, I definitely don't recommend placing them in the fridge for a shorter time since this slows done the rising process. You can definitely allow it to rise at room temp. for more than an hour if need be. I hope that they turn out great! 🙂
Love this recipe! They came out delicious. I'll definitely be baking them again.
Hi Monica! I'm so glad that you enjoyed these! 🙂
These are the best cinnamon rolls! I have tried numerous other recipes that were just ok. Your recipe is absolutely the best tasting, fluffiest/most impressive looking rolls and has purely magical frosting! I have made the recipe three times this week and I am happily sharing with neighbors and family....with many, many compliments on how good they are!
OMG, I'm so honored Misty! I truly do love these cinnamon rolls and am so glad that your family + friends have enjoyed them! Thanks so much for choosing my recipe! 🙂
I’ve made a few of your recipes lately as my youngest is GF and we’ve enjoyed them all so I wanted to say, thank you. Also, these look so good! I must make them. Just wondering how you measure the flours as there’s no weight measurements. Do you spoon into the cups and level or scoop and level? sometimes this makes all the difference in cinnamon roll recipes so wanted to check first. Thanks! 🙂
Hi Loz! I'm so happy that you've enjoyed my recipes thus far and I'm so honored that you chose my blog! With my cinnamon rolls, I often measure my flour by scooping and leveling. These are my fave so I hope that you enjoy them! 🙂
Can I use regular active dry yeast instead of rapid rise?
Hi Ashley,
You certainly can! You might need to let it rise a bit longer if it doesn't rise quickly!
This was my first attempt at cinnamon rolls (which I love) and they turned out great! I tweaked the frosting to my personal liking, but I think the dough was perfect without sweetness and with good fluff. I will make these again many times over.
Hi Analee! I'm so happy that they turned out great! I definitely love a little more fluff too so this is my favorite every time! Thanks so much for sharing! 🙂
Would I be able to knead the dough by hand? I don't have a bread hook attachment for my mixer 🙁
Hi Isabelle! Yes, you can also knead by hand! 🙂
I made these yesterday and they turned out perfect. So delicious. One thing I would mention regards the icing. It was extremely sweet and I only ended up using half the amount that I prepared following the recipe. But obviously that's an easy thing to adjust based on personal taste so not a big deal.
Hi Suzanna! I'm so happy to hear that you enjoyed them! Yes, the icing is definitely based on preference and can easily be adjusted! 🙂
I can’t wait to try this recipe thank you for being so descriptive and helpful with your ingredients for us non-cooks or bakers I should say. I’d like to be complementary on your beautiful hands .. keep Protecting them as a woman of a certain age I know they go away , thank you
Hi Vickie! I do hope that you enjoy them as much as I did! And you’re absolutely welcome—-I always like to ensure that my recipes are super helpful for any level of skills that you may have in baking/cooking! Also, I really do appreciate your compliment! I will be sure to keep them protected! 🙂
Hi! How long does the dough need to rest after overnight refrigeration before shaping?
Hi Emma! If you don’t want to make your Cinnamon Rolls on the same day, you can simply follow all steps (including the initial 1+ hour rise) and after cutting rolls and placing them into your baking pan, just cover them tightly (using foil paper of plastic wrap) and refrigerate them overnight or for 8-12 hours instead. The following day, remove from refrigerator and keeping them covered, let cinnamon rolls rise at room temp 1 to 1 1/2 hours.
Okay thanks. An earlier response made it seem like you refrigerate for the first rise, but just to confirm you only overnight refrigerate for the final rise after they are rolled and cut and all? Thanks!
Hi Emma! I do apologize for the confusion! That’s correct—you refrigerate after the initial 1 hour rise, roll out and cut! I’ve ensured that I’ve updated my notes so that it reflects this! I hope that this helps!
If I half the recipe do I need to decrease cooking or rising time? I just looked a cinnamon roll recipe up and this looked the best, but I didn't want as many cinnamon rolls. Also, can I substitute the butter with coconut oil?
Hi Leah! The rising time still remains the same regardless of the measurements! Also, I’d recommend using vegan butter, but coconut oil wouldn’t be a great option when wanting to ensure that the rolls are fluffy and soft!
I have not made this particular recipe; however, I would like to comment in regards to overnight rising. I consider myself a professional when it comes to cinnamon rolls. I make them to sell and have been doing this for about 8 years. When I let my cinnamon rolls rise overnight I roll them up before putting them in the fridge and then the next morning I pull them right out of the fridge, pop them in the oven and bake. During my busy holiday season I freeze the cinnamon rolls unbaked and a couple of days before baking I will set them in the fridge until thawed and then bake them.
Also never put them in the fridge after they are baked. This will make them go stale very fast.
I add a tablespoon of lecithin to my dough and this keeps them soft and fresh for days sitting on the counter top (however, they never last that long at my house).
Hi Diane! Thanks so much for sharing your knowledge! I really appreciate it! 🙂
They turned out perfect! I’m saving the recipe to make again. Thanks for sharing 🙂
Hi Lyndsay! I'm so glad that they turned out great! I hope that you continue to enjoy them!
These look great! I am not a huge sweet tooth, but I do have a bit of a thing for cinnamon rolls. I love all the tips as well.
Thanks so much, Caroline! Cinnamon Rolls are my weakness when it comes to my sweet tooth as well! Haha.
OMG! These cinnamon rolls look amazing! And homemade ones are such a treat!
Thanks so much, Patty! They really are!
These look simply perfect! I could eat an entire bucket of that icing!
Haha! Thanks so much, Caitlyn!
This looks so amazing! Thanks for all your wonderful tips on how to roll the dough. I haven't tried this before but now I can't wait!
Thanks so much, Tayo! I do hope the these tips help make things easier!
Hi there,
Just wondering what size the packet of yeast is that you use? Being in Australia I have to convert the recipe to metric 😆 and not sure if our yeast packets are the same as yours! Haha
Thanks in advance!
Hi Kate! No worries at all! The packets that I use are 1/4 oz each, which is about That's 2 1/4 tsps! I hope that this helps! Enjoy! 🙂
Thanks for your prompt reply 😄 I can't wait to make these!
You're so welcome! Be sure to let me know how they turn out! 🙂
Delicious! I used Earth balance butter spread, almond milk, and made a simple glaze to make it dairy free. They turned out fluffy, sweet, and perfect! Thank you!
Hi Hallie! That’s so awesome! I’ve used the same ingredients for my vegan version of cinnamon rolls and I’m so happy that you enjoyed these! Thanks so much for sharing! 🙂
I can't wait to try these! Quick question. Do you have your dough in the fridge for the first rise or the second one, after you've shaped it into the rolls/ Thanks so much! It sounds amazing!
Hi Lyn! They really are delicious! Be sure to let me know if you enjoy them! I actually rise the dough at room temp both times!
My brother has to have gluten free
Any suggestions on how to make gluten free cinnamon rolls ?
Hi Sarah! If you need it to be GF, then instead of using both flours listed, just use Bob’s Red Mill Gluten-Free 1:1 Baking Flour and add 4 tsps of baking powder to the dry ingredients!
If making GF , do we sub bobs flour for amount of both flours or just one?
Hi Jamie! You do the Bob's Red Mill GF Flour for both! 🙂
I’m kind of nervous using ginger. I’ve done the cinnamon and nutmeg combo before, and it turned out great. Is the ginger taste pretty noticeable? I actually don’t mind it, as I know it’ll bring out the cinnamon, but my picky husband might.
Could I make these with gluten free flour?
Hi Taelor! Yes you can! I’d suggest using Bob’s Red Mill GF: 1-to-1 Baking Flour. However, if you chose to use your own, just be sure that you include Xanthan Gum if it’s not already added to that brand of flour.
Hi Cathy! Honestly, I don't notice the ginger taste at all, however, if your husband is a bit more sensitive, I'd recommend using only 1/8 tsp of ginger instead. He definitely shouldn't taste it then! Enjoy! 🙂
Also, I apologize because I didn’t see that you already had the instructions for refrigerating the dough overnight at the end of your recipe before I sent my first comment.
Oh no! I actually just added that after you asked so Thank you! ?
Hi! I can’t wait to try these cinnamon rolls - they look delicious! Prior to the recipe, you said that rising overnight is best, but the recipe doesn’t say how to do this. I was just wondering when the refrigeration takes place and if any other changes are made to the direction when refrigerating overnight? Thank you very much!
Hi Erin! I do hope that you enjoy these cinnamon rolls as much as I did! After the dough is kneaded, place in a lightly oiled, large mixing bowl. Cover tightly with plastic wrap and place in refrigerator. You can also store the dough in a self-sealing plastic bag (sprayed with oil to prevent sticking) and then place in refrigerator. The refrigeration time is considered the first rise. When you are ready to use your refrigerated dough, remove it from the refrigerator, punch it down, and allow it to rest before shaping. Hope this helps! 🙂
Thank you so much! One more thing - does the milk need to be nondairy or can you use regular milk?
No worries at all! You can always use regular milk! I just like using non-dairy milk since that’s what my family and I drink on a regular basis!
If you're not serving these until the next day would you hold off on icing them? Or put icing on and refrigerate? Thanks!!
Hi Shayla! You can do both, however, I would just save the icing for the day of and refrigerate them overnight!
These smell amazing! I would recommend to anyone trying these that I would use a baking dish larger than a 9x13. They are exploding out of my dish as it is baking. Lol
Hi Rebecca! I'm happy to hear that they smell amazing so far! I do hope that you enjoy them once they're finished! Also, they do get pretty big, however, I used a 9x13 baking dish and it didn't run over. My best suggestion is rolling them really tightly to prevent this if it becomes an issue. 🙂
I was thinking about trying the rising overnight in the fridge, do the rolls need to come to room temp before baking or can I just preheat and bake?
Hi Britanie! Yes, you can definitely have them rise overnight and fridge, but be sure to have them site at room temp before you add them to the oven. I would have them sit about 20-25 minutes.
Hi...I came upon your recipe on Pinterest and I was wondering if you’ve ever used the quick rise yeast with these?
Hi Colleen! The yeast I use is the Rapid Rise version!
Homemade Cinnamon Rolls !! just thinking about it, makes me drool !! These look so delicious!
Thanks so much, Prajakta! Haha!
Cinnamon Rolls are one thing that I love, but it is hard to find the perfect cinnamon. The one with the perfect dough, the perfect amount of sweetness! I think you nailed it!
Thanks so much Cindy! I really appreciate that! I do hope that the tips to making them perfect in my post was helpful! 🙂
WE USUALLY ONLY MAKE THESE AT CHRISTMAS, BUT THIS IS MAKING ME WANT TO MAKE THEM NOW. THEY LOOK SO GOOD!
Haha! Thanks so much, Danielle! I can't wait until the holidays to make these more often also!
Cinnamon rolls are my favorite! Especially the homemade ones 😉
Yes, I so agree with you on this one, Kelly!