
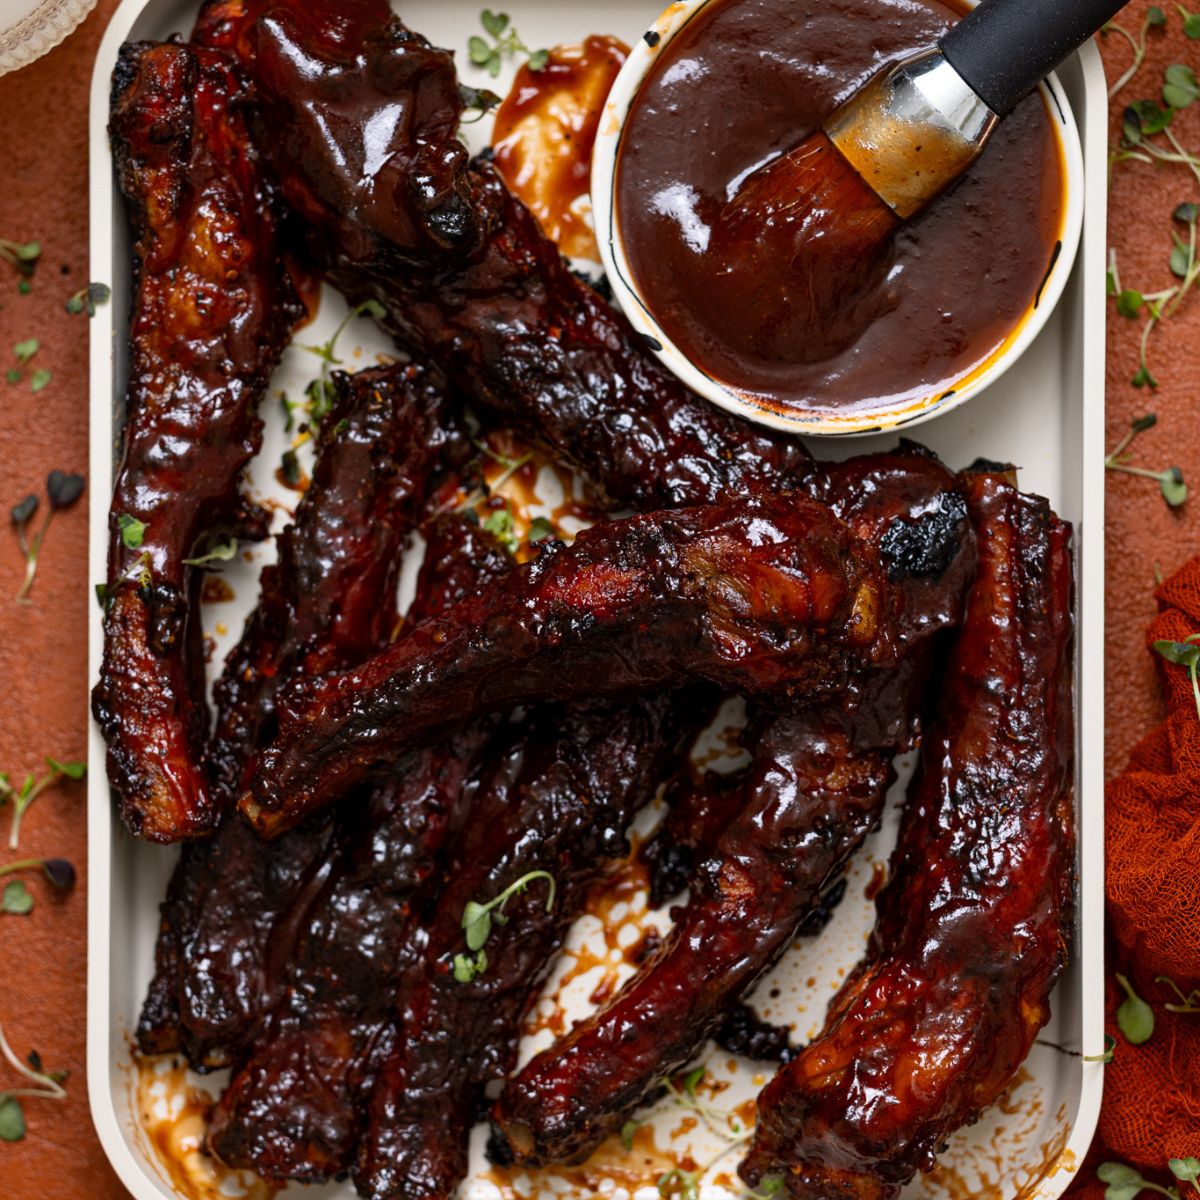
Hubby’s Favorite Oven-Baked BBQ Ribs
DISCLAIMER: This post may contain affiliate links, which means that I make a small commission off items you purchase at no additional cost to you. Please read my policy page!
Hubby’s Favorite Oven-Baked BBQ Ribs
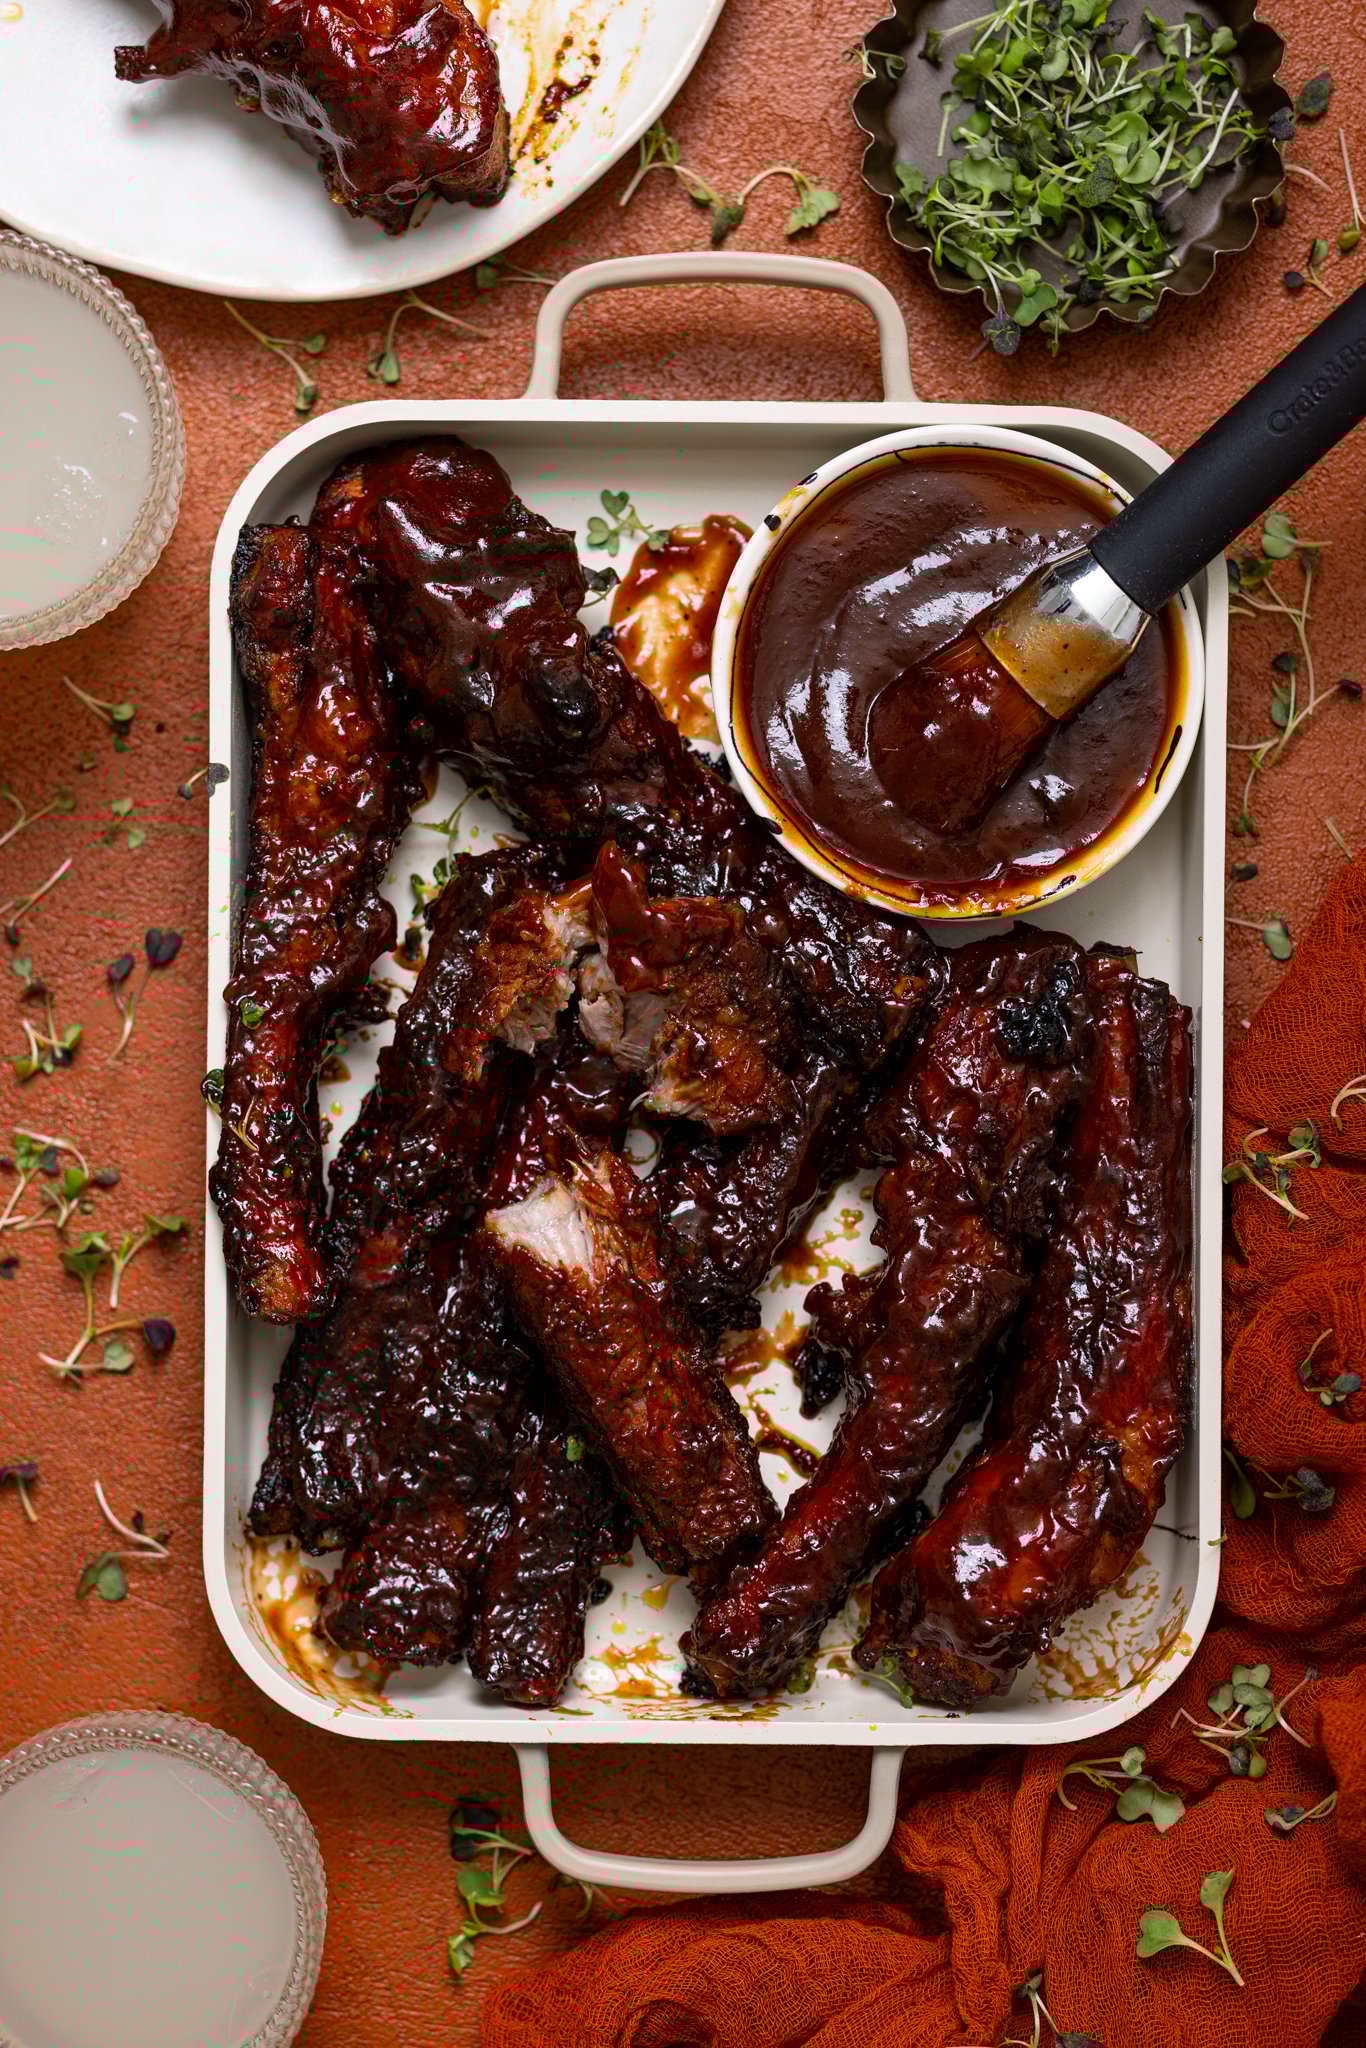
Fall-off-the-bone tender, juicy, and packed with smoky-sweet flavor, my Hubby’s Favorite Oven-Baked BBQ Ribs are the ultimate comfort food for any night of the week! Made right in the oven—no grill required, these easy BBQ pork ribs are coated in a homemade dry rub, slow-roasted to perfection, then slathered in your favorite barbecue sauce for that sticky, caramelized finish. Whether you're prepping for a cozy weeknight dinner, a backyard-style feast, or a special meal, this foolproof rib recipe brings bold flavor and serious satisfaction. Perfectly seasoned, melt-in-your-mouth ribs with minimal effort. Completely Dairy-free. Gluten-free, Air Fryer, + Grill options.
Ya'll, I seriously couldn't wait to share these delicious fall-off the bone, tender, succulent ribs with you. For years, making easy oven baked ribs have been my favorite thing to do. Of course, you know that my Southern roots has the greatest role to play in my love for some good ole' BBQ ribs. However, perfecting my recipe has come with a lot of trials and errors and tweaks that have really satisfied my husband who is Brooklyn raised----so flavor is a thing for him. Haha. After much success, I've come up with a simple, but flavorful version that he absolutely LOVES and hence my Hubby’s Favorite Oven-Baked BBQ Ribs is born!
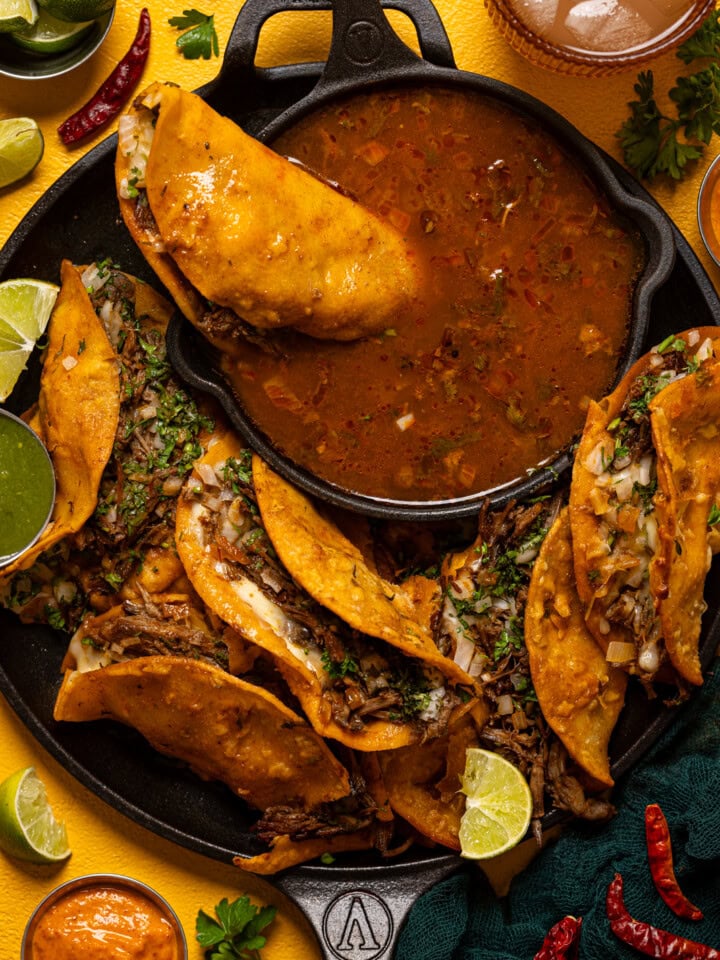
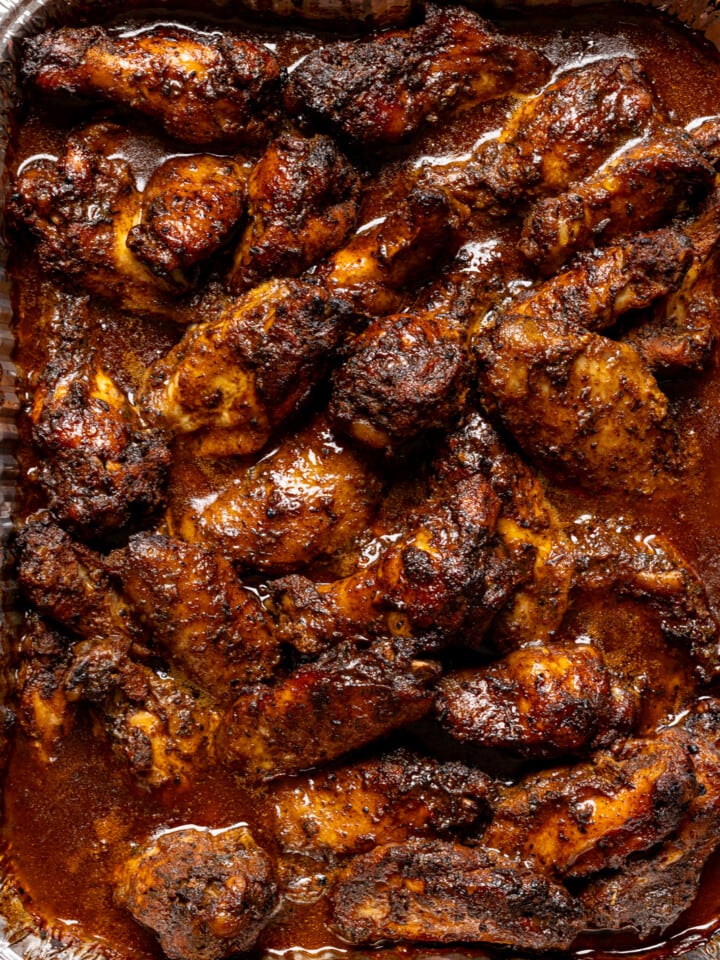
In any BBQ recipe, the seasonings and sauce are the two main things that need to always remain on point. Personally, I love a good all-purpose blend that goes on everything, which is why I created my On Everything All-Purpose Blend, however, for an intensely delicious full -on BBQ flavor, you can choose to use my Homemade On Everything BBQ Dry Rub as well from the site. If you haven't tried making your own BBQ sauce yet I definitely recommend trying! I use it for everything from coating chicken wings to slathering it on Pizza, BBQ Pulled Chicken Sandwiches, BBQ Jerk Lobster, Vegan BBQ Meatballs, Baked Sticky Honey BBQ Chicken Wings, and more!
This oven-baked BBQ ribs recipe is overall super easy to make, fall-off-the-bone tender with the perfect smoky-sweet flavor, made right in the oven (no grill needed!), completely family-approved, and the best addition to weeknight dinners, summer cookouts, game days, and holiday gatherings—plus it’s naturally dairy-free with a gluten-free option!
Jump to:
- Why You’ll Love These Oven-Baked BBQ Ribs
- How to Make Hubby’s Favorite Oven-Baked BBQ Ribs
- Ingredients for Baked BBQ Ribs
- How to Clean + Remove the Membrane from Ribs
- Tips for Baking Ribs in the Oven (So They're Tender Every Time!)
- Air Fryer or Grill Options for Making BBQ Ribs
- Troubleshooting BBQ Ribs If Something Goes Wrong
- What To Eat with Oven-Baked BBQ Ribs?
- Common Q + A's for Hubby’s Favorite Oven-Baked BBQ Ribs
- More Flavorful Recipes to Try Next!
- MADE OUR RECIPE(S)?
- Hubby’s Favorite Oven-Baked BBQ Ribs
Why You’ll Love These Oven-Baked BBQ Ribs
- Easy, Oven-Baked Perfection: No smoker or grill needed—just your oven and a little time to get that tender, juicy, fall-off-the-bone goodness.
- Flavor-Packed + Customizable: Coated in a bold dry rub and slathered in your favorite BBQ sauce—whether you like it sweet, spicy, tangy, or smoky, you’re in control.
- Naturally Gluten-Free + Dairy-Free: This recipe fits into flexible diets without compromising flavor, making it a go-to for the whole family or guests with dietary needs.
- Weeknight + Special Occasion Ready: Whether it’s a casual weeknight dinner, game day, or backyard cookout—these ribs are a total showstopper.
- Make-Ahead + Leftover Friendly: They reheat beautifully, which means you can meal prep ahead of time or enjoy them again the next day!
How to Make Hubby’s Favorite Oven-Baked BBQ Ribs
The key for this recipe is to start with great-quality pork or beef ribs and marinating them well. You can season and let it sit for just a few minutes or marinate them overnight for the best results. Then you bake, slather with BBQ sauce, and continue baking until completely tender.
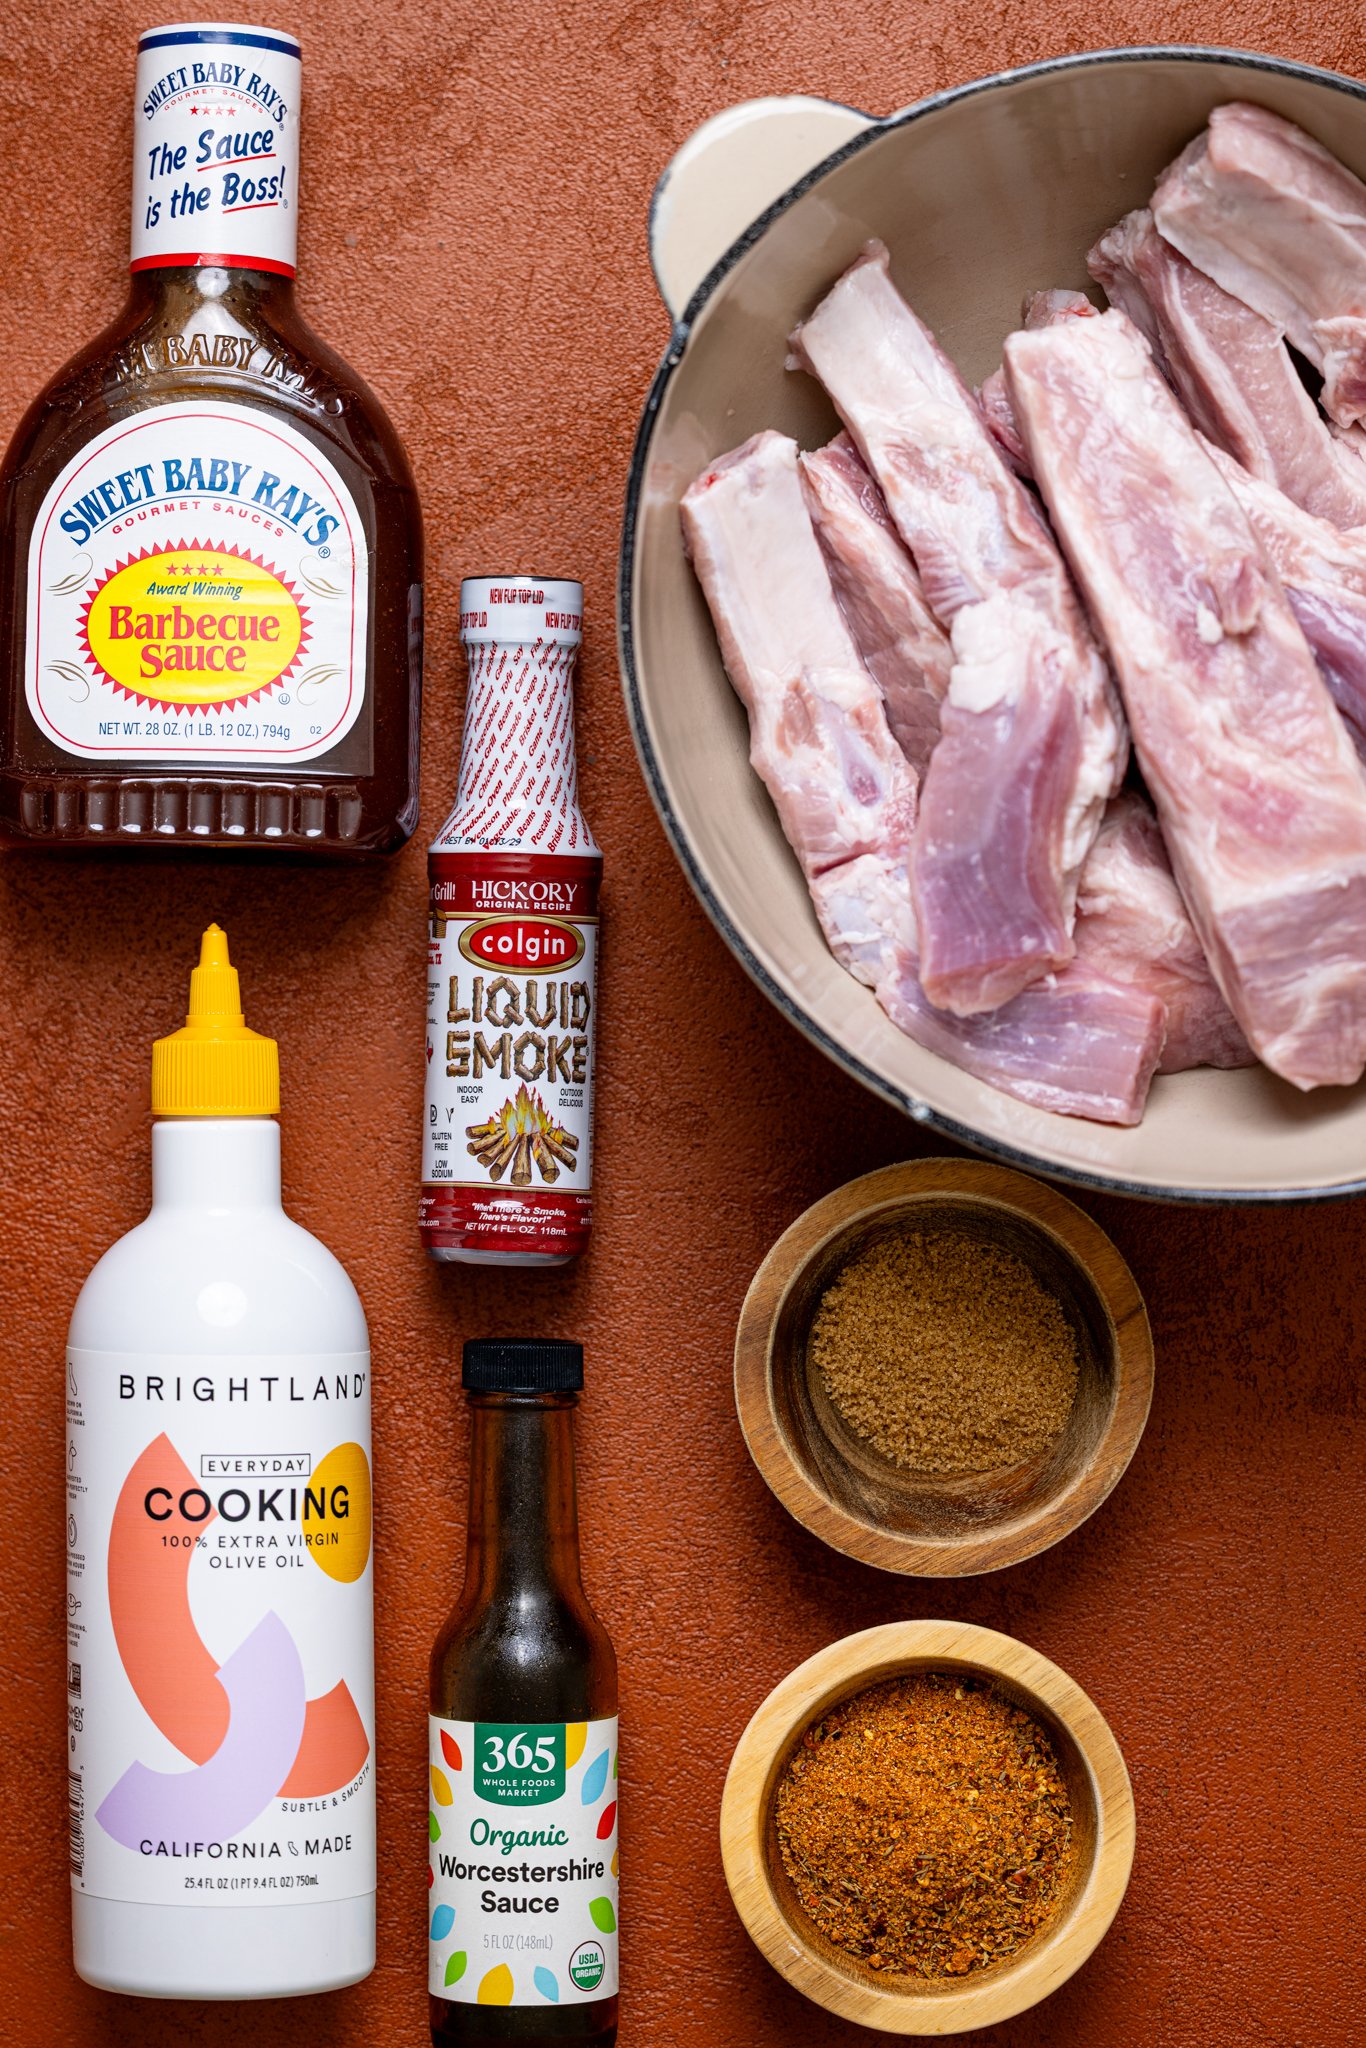
Ingredients for Baked BBQ Ribs
- Rack of pork or beef ribs, sliced or whole. About 3–4 lbs. is ideal for this recipe. Pork ribs (like baby back or spare ribs) are more common, but beef ribs give a bold, meaty bite if you prefer.
- Extra virgin olive oil. Just a little to lightly coat and help the seasoning stick. Use your favorite high-quality EVOO—I personally love California Olive Ranch or Brightland Co. for consistent flavor.
- Organic brown sugar. Adds that signature sweet caramelized flavor to balance the smoky and savory notes. Coconut sugar is a great substitute if you’re cutting refined sugars.
- On Everything All-Purpose Blend. This is my go-to for building deep flavor with ease. You can purchase my signature On Everything All-Purpose blend for that bold, well-rounded taste—or use my Homemade BBQ Dry Rub instead.
- Hickory liquid smoke. Just a bit adds that deep, woodsy, straight-off-the-grill aroma without needing a smoker. If you don’t have hickory, mesquite liquid smoke works too.
- Worcestershire sauce. Brings umami, depth, and a touch of tang. For a soy-free option, try coconut aminos (I love Bragg's) with a splash of vinegar.
- BBQ sauce. Use 1–2 cups of your favorite store-bought or homemade BBQ sauce. Whether you like sweet, spicy, or smoky—make it your own! (Check labels for gluten-free or dairy-free needs.) For store-bought, hands down Sweet Baby Ray's, Stubb's BBQ, or Kraft (for traditional users).
- Beef broth or stock (optional). Adds moisture and richness, especially if you’re baking the ribs uncovered. Water works in a pinch, but broth gives that extra flavor boost. You can also use beef bone broth----from brands I love like Kettle & Fire.
SHOP MY FAVORITE TOOLS FOR COOKING, ESPECIALLY FOR THESE RIBS!
Here, I've curated a list of cooking + baking essentials that I use to achieve my favorite baked goods or cooked meals, especially with my Hubby’s Favorite Oven-Baked BBQ Ribs recipe. Everything from my fave baking sheet or griddle, BBQ sauces, dutch ovens, immersion hand-blender, mixing bowls, and more. SEE THEM HERE!
How to Clean + Remove the Membrane from Ribs
Before you season and bake your ribs, there’s one crucial step you don’t want to skip which is removing the membrane (also known as the silver skin) from the back of the rack and also cleaning the meat. Now, I know that "cleaning" meat seems to be controversial, but it's something that I never miss---thank my Jamaican background for that. Haha. Anyway, this thin, shiny layer of connective tissue can turn chewy when cooked and blocks your seasonings from fully penetrating the meat---so it's important to remove it.
Steps to remove it correctly:
Step 1: Rinse + Pat Dry. Give your rack of ribs a quick rinse under cold water to remove any bone fragments or packaging residue. I like to rinse with a bit of vinegar and a squeeze of a whole lime with the water. Pat dry thoroughly with paper towels.
Step 2: Flip + Locate the Membrane. Place the ribs meat-side down on a clean cutting board. You’ll see a thin, silvery-white layer running along the back of the bones—this is the membrane.
Step 3: Loosen One Corner. Use a small, sharp knife (like a paring knife) to gently slide under one corner of the membrane, usually near a bone. Be careful not to cut into the meat when doing this.
Step 4: Grab + Peel. Once you’ve lifted a corner, grab it with a dry paper towel—this gives you grip and slowly pull it across the rack. It should come off in one long strip, but if it tears, just repeat the process on the remaining sections until all is removed.
Step 5: Double Check. Sometimes a thin second layer remains so run your fingers along the bones to make sure everything is removed. Now you’re good to go and ready to season!
Tips for Baking Ribs in the Oven (So They're Tender Every Time!)
- Remove the membrane (silver skin) from the back of the ribs. Again, this step is essential for a fall-off-the-bone texture! See the step-by-step directions above for the easiest removal process. Remember, it allows the seasonings to penetrate and keeps the ribs from being too chewy.
- Pat ribs dry before seasoning. Moisture on the surface can prevent a good crust from forming like with any meat (i.e. chicken, wings, other red meats, etc). Drying your ribs with a paper towel helps the dry rub stick better and caramelize beautifully in the oven.
- Don’t skimp on the dry rub. Even if you're slathering them in BBQ sauce later, a flavorful dry rub locks in deep flavor as the ribs roast low and slow---so it's imperative that you don't skimp on seasoning them well. Try my On Everything All-Purpose Blend or Homemade BBQ Dry Rub for best results.
- Wrap them in foil for the first bake. Covering the ribs with foil traps steam and keeps them ultra-moist during that first slow bake, but this ins't required. This mimics the “low and slow” BBQ pit style and ensures juicy ribs every time. However, if you add the beef broth as I've suggested, you wouldn't need to necessarily do this step!
- Bake low and slow for tender meat. Again, this is optional and if you have more time to spare! The sweet spot for baking it slow? 275°F for 2.5 to 3 hours. This gives the meat time to break down gently, resulting in tender, pull-apart ribs without drying them out.
- Sauce at the end for a caramelized finish. After the initial bake, uncover the ribs (if covering), and brush generously with BBQ sauce, and return them to the oven or broiler to create that sticky, glazed crust everyone loves. This is why I initially only suggest adding a bit of BBQ sauce after seasoning. The best time to smother the ribs with sauce is towards the end as directed.
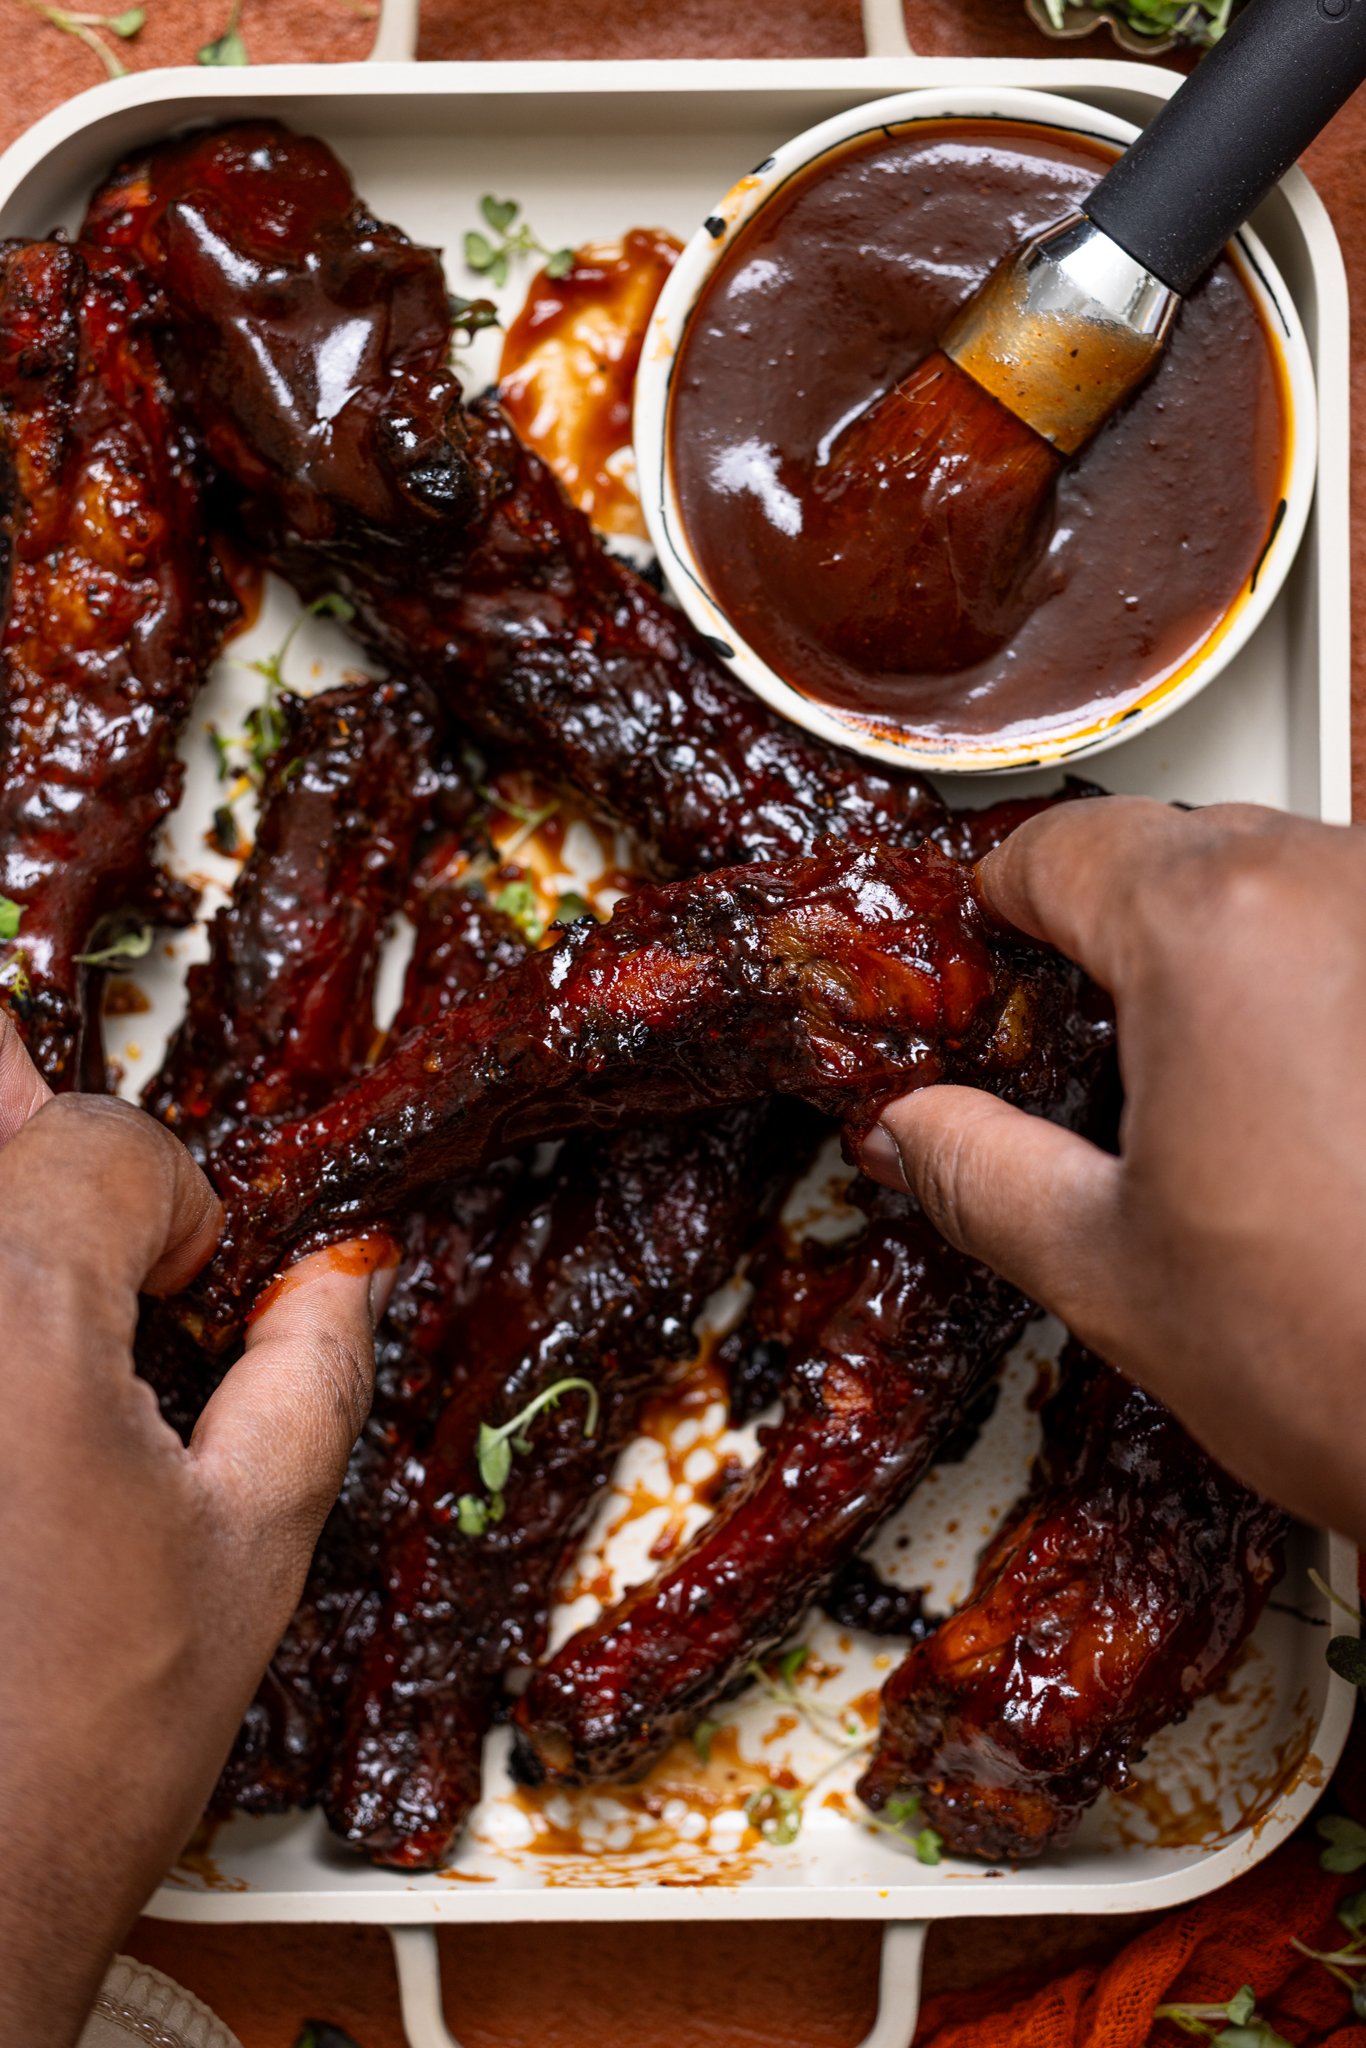
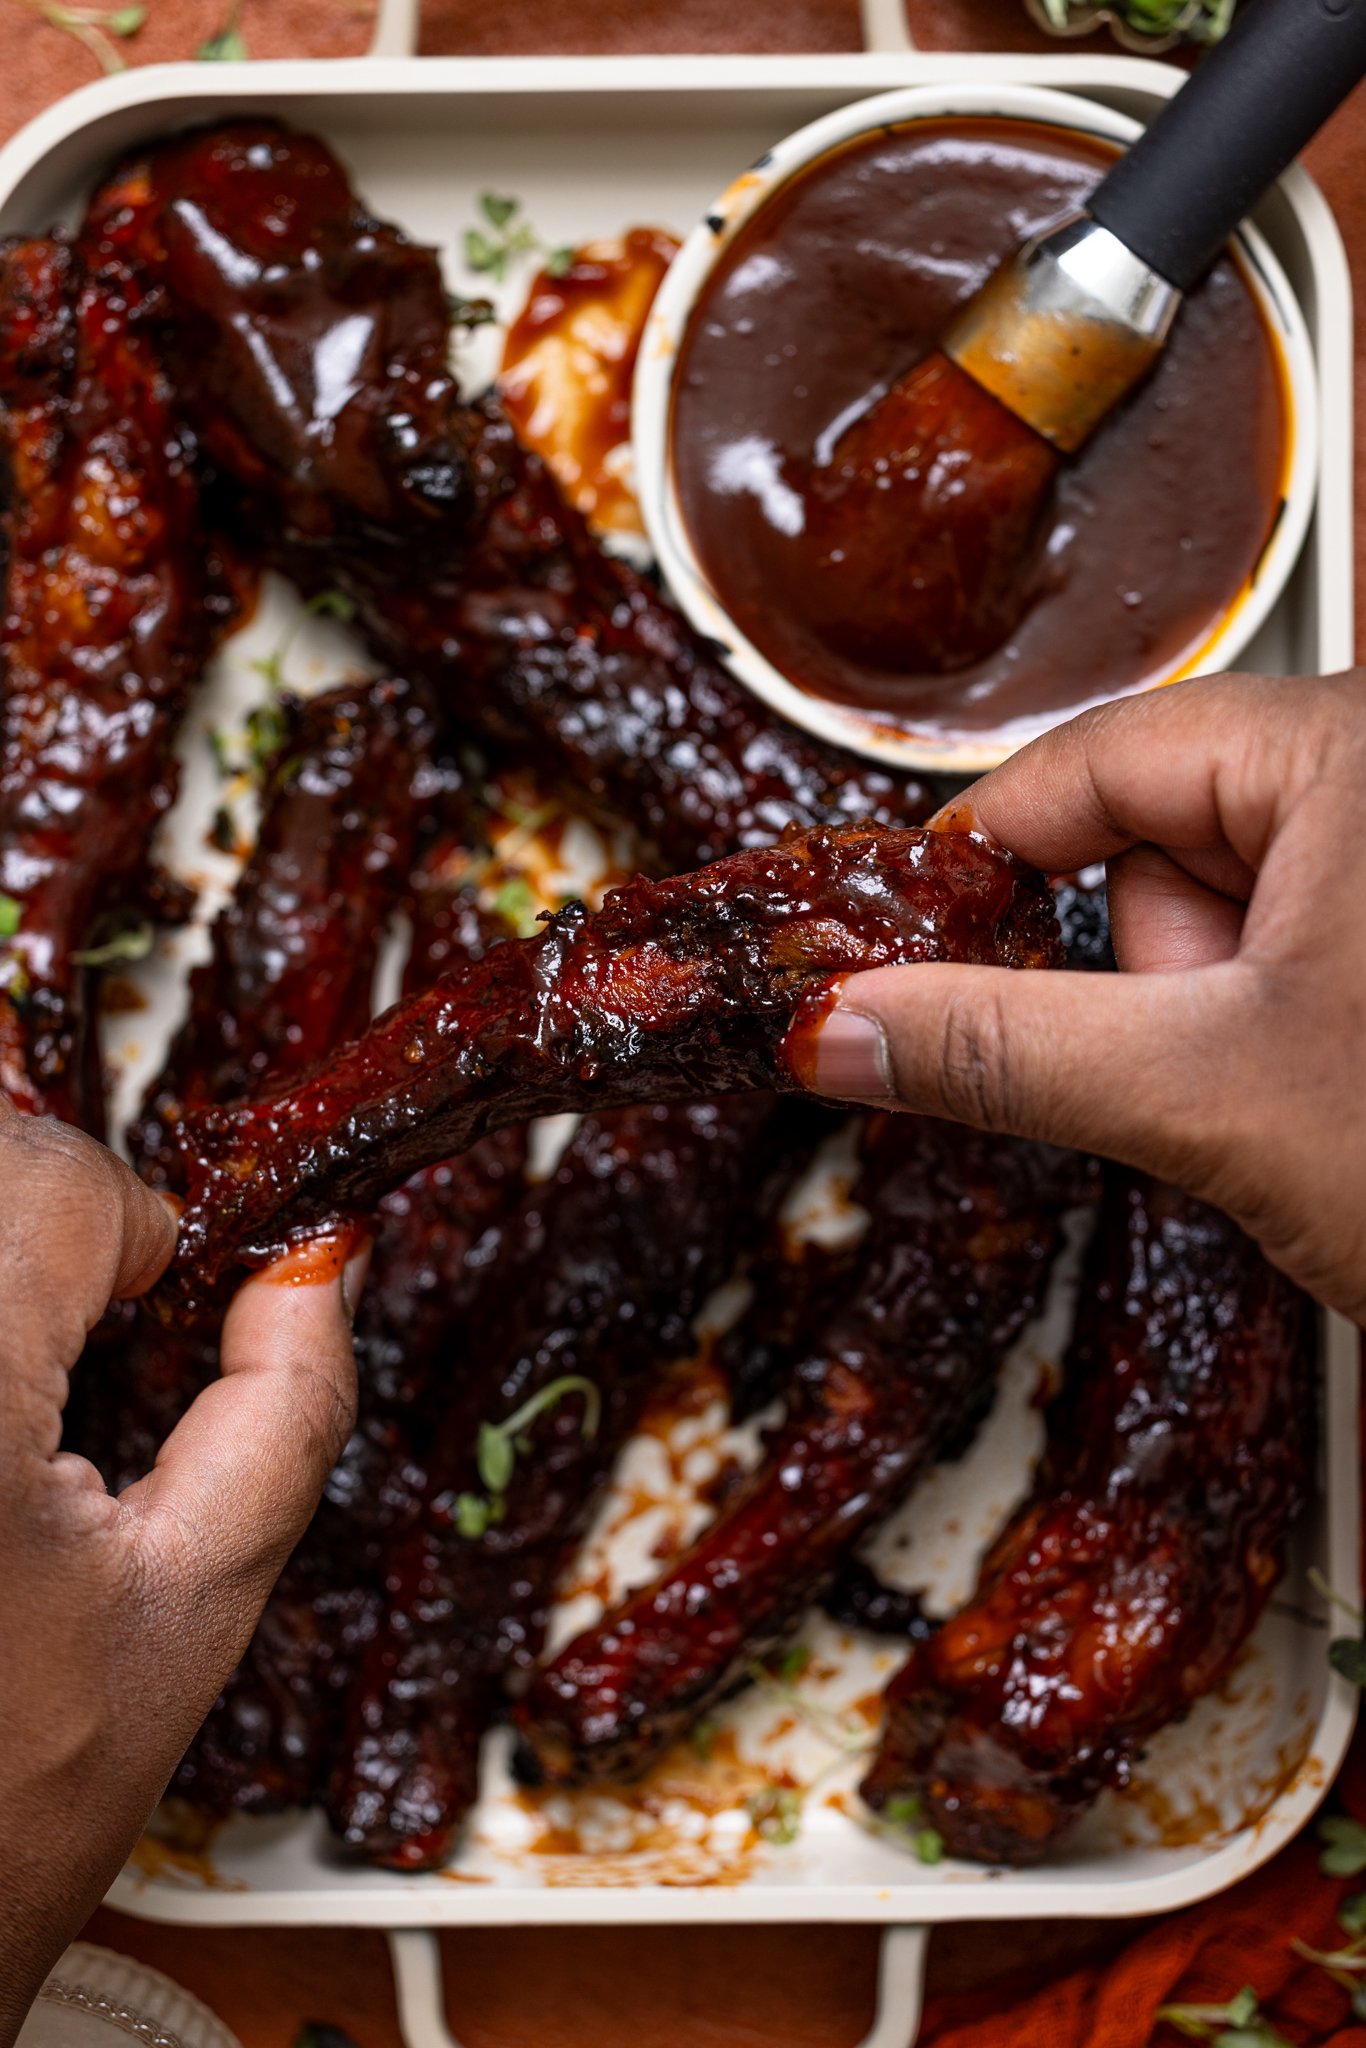
- Let them rest before slicing. Just like steak, ribs need a short resting period (about 5–10 minutes) to lock in the juices before handling them. Slice between the bones and serve with extra sauce and your favorite side for the best eating experience!

Air Fryer or Grill Options for Making BBQ Ribs
If you’re not using the oven, no problem! These BBQ ribs are versatile and are just as flavorful when made in the air fryer or on the grill for the perfect finish. Here's how to adapt the recipe with either options:
Air Fryer BBQ Ribs (Quick + Crispy Edges)
Yes—you can still make fall-off-the-bone ribs in the air fryer! This option is perfect when you’re short on time but still are a craving bold, saucy flavor and texture for these BBQ ribs.
How to Do It:
- Cut ribs into smaller sections (2–3 bones each) so they fit in the basket.
- Preheat air fryer to 375 degrees Fahrenheit.
- Season ribs with rub and brush with BBQ sauce.
- Air fry for 20–25 minutes, flipping halfway and brushing with additional BBQ sauce during the last 5 minutes.
- Let rest for 5 minutes before serving.
NOTE: For extra tenderness, you can steam or parboil the ribs for 15–20 minutes before air frying them.
Grilled BBQ Ribs (Smoky + Charred Finish)
Looking for that smoky, backyard BBQ feel instead of the oven finish? No worries----you can finish these ribs on the grill for a charred, caramelized crust that’s irresistible and what I grew up eating in the South for many years!
How to Do It:
- Season and prep the ribs and add to an aluminum foil pan along with 1 cup of beef stock or apple juice and cover and refrigerate until ready to grill.
- Preheat grill to medium-high heat (about 300 degrees Fahrenheit).
- Remove ribs from the fridge and place the aluminum pan (still covered) onto the grill grates and close grill, cooking for about 1 hour. NOTE: That for the best tenderness you may need up to 2 hours.
- Once the ribs are cooked through enough (internally reading between 180°F – 190°F using a thermometer), carefully remove the ribs from the pan and place them directly onto the grill.
- Grill for 5–7 minutes per side, turning and basting with BBQ sauce until edges are charred and sticky.
- Let rest for 5–10 minutes before slicing and serving.
NOTE: If you’re using a charcoal grill, toss in a handful of hickory or applewood chips for that classic smoky flavor.
Troubleshooting BBQ Ribs If Something Goes Wrong
In my years of making BBQ ribs, even the most flavorful ribs can miss the mark if the texture isn't right--trust me! Here’s how to troubleshoot the most common rib-cooking mistakes so your ribs turn out tender, juicy, and fall-off-the-bone perfect every time:
Ribs Came Out Tough or Chewy?
This usually means they didn’t cook long enough. Ribs are packed with connective tissue that needs slow, low heat over time to properly break down or a good amount of high heat for a shorter period of time.
How to Fix: Bake longer at 275 degrees Fahrenheit for at least 2.5 to 3 hours, or until the meat pulls back from the bones and is fork-tender. For a shorter period like this recipe, simply bake at 375 degrees Fahrenheit at first and then increase to 400 degrees Fahrenheit for the best results.
BBQ Ribs Are Too Dry?
Overcooked or uncovered ribs can dry out easily, especially if cooked at too high a temperature, which is why I suggest adding in beef broth to ensure a nice tender finish.
How to Fix: Always cover ribs tightly with foil for the initial bake to trap moisture (if skipping my step). You can also add a splash of broth or water to the baking dish before sealing to keep things juicy.
Ribs Didn’t Get a Caramelized Crust?
If they’re tender but missing that sticky, saucy finish, then the issue might be that you didn’t uncover and sauce them at the end. If you choose to cover them during the initial bake, it's important to uncover them during the final 30 minutes or so when saucing to get the desired results.
How to Fix: After baking, brush ribs generously with BBQ sauce and return them to the oven uncovered at 400 degrees Fahrenheit for 10–15 minutes—or broil them for 2–4 minutes for extra caramelization.
Membrane Was Left On?
If your ribs are chewy or rubbery even after a good bake, chances are the silver skin membrane on the back wasn’t removed like suggested.
How to Fix: See the section above on how to easily remove the membrane before baking for best texture and flavor absorption.
BBQ Ribs Taste Bland?
BBQ Ribs need time for the rub and sauce to penetrate in order to get that amazing flavor. Blandness usually comes from under-seasoning or skipping the dry rub altogether with a highly don't recommend.
How to Fix: Use a generous amount of dry rub, and give it time to rest on the meat before baking—at least 15–30 minutes, or overnight if possible. You can also season the BBQ sauce with dry rub for that "double layer" flavor.
What To Eat with Oven-Baked BBQ Ribs?
If you're excited to make my Hubby’s Favorite Oven-Baked BBQ Ribs, but aren't too sure on what to pair these with---I've got you covered! The following side dishes are great to mix and match with these BBQ ribs and they work for the entire fmaily:
- Copycat Olive Garden House Salad
- Grown-Up Baked Jerk Mac and Cheese
- Seasoned Creamed Corn
- Soft Honey Butter Dinner Rolls
- Homemade Flaky Cheddar Bay Biscuits
- My Childhood Velveeta Mac and Cheese
- Seasoned Fried Green Tomatoes
- Best Creamy Coleslaw
- Corn on the Cob
- Parmesan Herb Crusted Roasted Potatoes
- Southern Potato Salad
- Asparagus
- Seasoned Crinkle Cut French Fries or Crispy Cajun Sweet Potato Fries
Of course, you can always browse through my Side Dishes to find the perfect thing to enjoy these BBQ ribs with!
Common Q + A's for Hubby’s Favorite Oven-Baked BBQ Ribs
Any leftovers can be kept in a tightly sealed container and refrigerated for up to 3-4 days. To reheat, you can do this easily in the microwave, oven, or air fryer until warmed through and saucy (adding extra BBQ sauce if needed).
Yes! These ribs are perfect for meal prep or make-ahead entertaining. Simply bake them fully, let them cool, then store them in an airtight container in the fridge for up to 3 days. When ready to serve, reheat in the oven at 350 degrees Fahrenheit until warmed through, brushing with extra BBQ sauce for moisture.
Absolutely! Let the cooked ribs cool completely, then wrap tightly in foil or store in a freezer-safe container. Freeze for up to 2 months. To reheat, thaw ribs overnight in the fridge and warm in the oven at 325 degrees Fahrenheit, covered with foil to retain moisture. Add extra BBQ sauce, if needed.
They’re ready when the meat is tender and pulls back from the bones—usually after baking at 275 degrees Fahrenheit for about 2.5 to 3 hours or at 400 degrees Fahrenheit for at least 1 hour after the initial bake time. You can also check that the internal temp reaches 190–203°F for perfect fall-apart texture.
It's totally up to you! This recipe works with sweet, spicy, smoky, or even mustard-based BBQ sauces. Just be sure to check the label if you need it to be gluten-free or dairy-free. Personally, I love to make my own Homemade BBQ Sauce or for store-bought, hands down Sweet Baby Ray's, Stubb's BBQ, or Kraft (for traditional users).
You can, although I recommend using bone-in ribs because they offer better flavor and texture. However, if using boneless, reduce the bake time slightly and keep a close eye on the doneness to avoid drying out the ribs.
More Flavorful Recipes to Try Next!
Now that you're on a snacking kick with this Oven-Baked BBQ Ribs recipe, give these flavorful, bold recipes that your entire family will love a try next:
- Authentic Jamaican Curry Chicken
- Lemon Pepper Buffalo Wings
- Creamy Tuscan 'Marry Me' Chicken
- Flaky Jamaican Curry Chicken Patties
- Southern Baked Maple Citrus Chicken Legs
- Southern Creamy Parmesan Garlic Chicken Pasta
- Vegan Potato and Chickpea Curry
- Authentic Jerk Chicken Rasta Pasta
- Lemon Parmesan Kale Salad with Hot Honey Chickpeas
- Authentic Jamaican Brown Stew Chicken
- Cajun Seafood Gumbo
- Spicy Jamaican Beef Patties


MADE OUR RECIPE(S)?
If you tried my Hubby’s Favorite Oven-Baked BBQ Ribs recipe or any other recipe on my website, please please leave a 🌟 star rating and let me know how you go in the 📝 comments below. And don't forget to tag me @shanikagrahamwhite on Instagram. I love hearing from you!
Hubby’s Favorite Oven-Baked BBQ Ribs
Ingredients
RIBS:
- 1 rack pork or beef ribs, sliced or whole (About 3-4lbs. are great!)
- 1 tablespoon Extra virgin olive oil
- 2 Tbsps organic brown sugar
- 1-2 Tbsps On Everything All-Purpose Blend (You can purchase my On Everything All-Purpose Blend for authentic flavor or make your own blend----See Notes; You can also use my Homemade BBQ Dry Rub instead.)
- 1 tablespoon hickory liquid smoke
- 1 tablespoon Worcestershire sauce
- 1-2 cups BBQ sauce, store-bought or homemade (You can add up to 1 cup more if desired)
- 1 cup Beef broth/stock, optional
Instructions
SEASON + PREP THE RIBS:
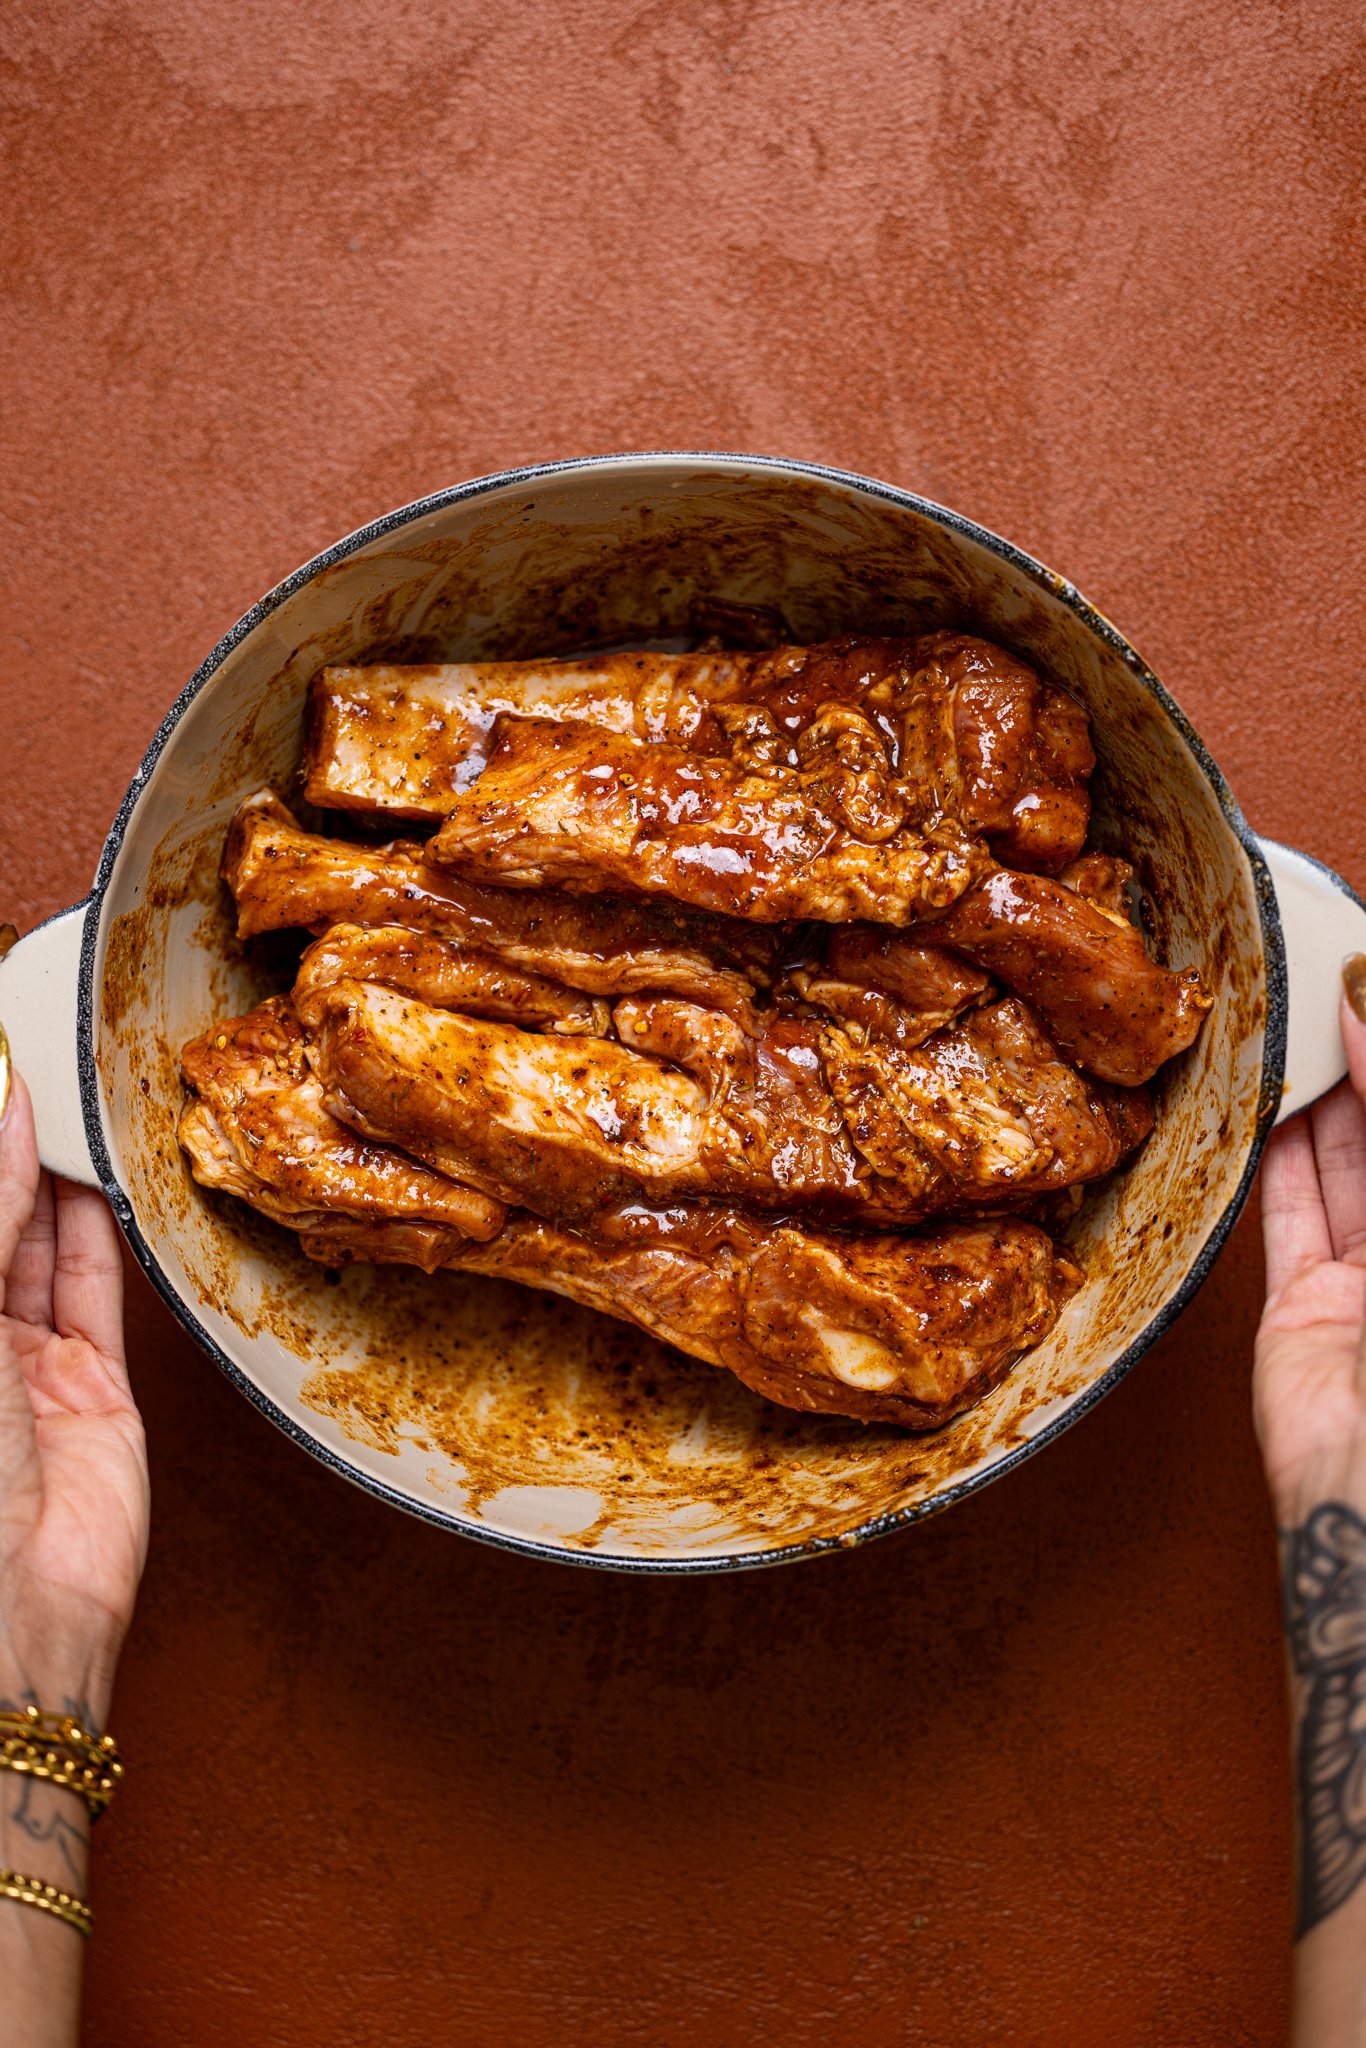
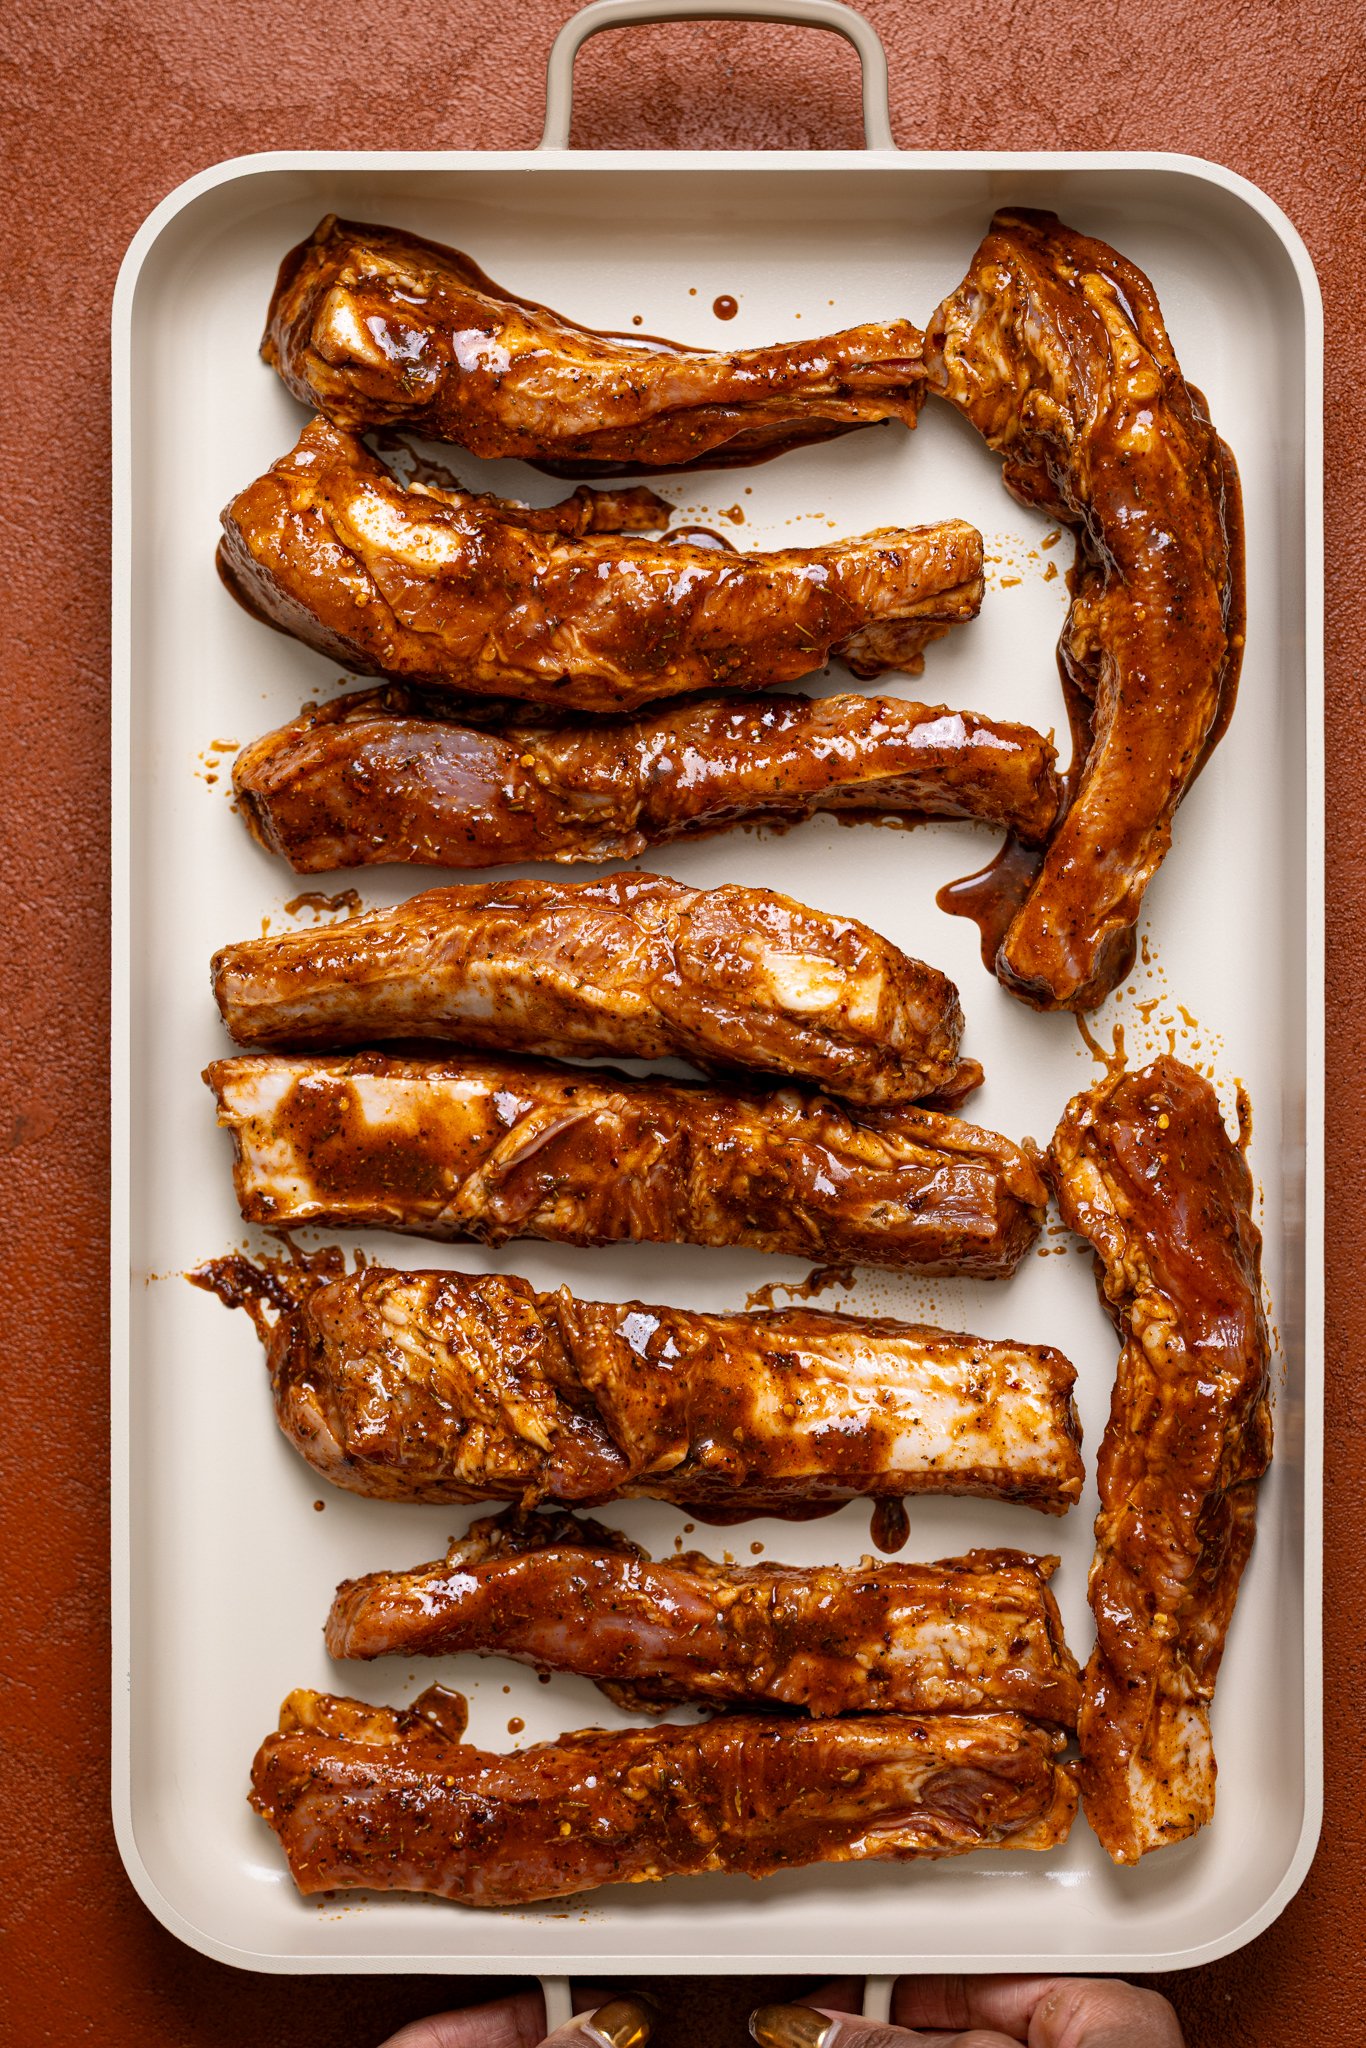
- In a large bowl, add your freshly cleaned + rinsed ribs along with olive oil, On Everything All-Purpose Blend, brown sugar, liquid smoke, Worcestershire sauce, and ½ cup of BBQ sauce, mixing everything together until ribs are fully coated. Let them sit for 10-15 minutes. NOTE: Add coated ribs to a securely sealed ziplock bag and place in the refrigerator for 3 hours or overnight (for best results, but not required). When ready to use after marinating in the fridge, let ribs sit at room temperature for 15-30 minutes before cooking.
TO BAKE THE RIBS:
- Preheat the oven to 375 degrees Fahrenheit and line a large baking sheet with non-stick foil paper. NOTE: You can also use a great non-stick griddle pan (as shown in photo) if desired----which doesn't need prepping.
- Add the seasoned ribs (as a whole rack or sliced) onto the baking sheet or griddle pan and bake uncovered for the first 30 minutes.
- After the 30 minute mark, increase the oven to 400 degrees and add 1 cup of beef stock/broth atop the ribs for a nice tender and moist finish. Not required. NOTE: The liquid will dry out as it continues to bake, so you'll get the best results.
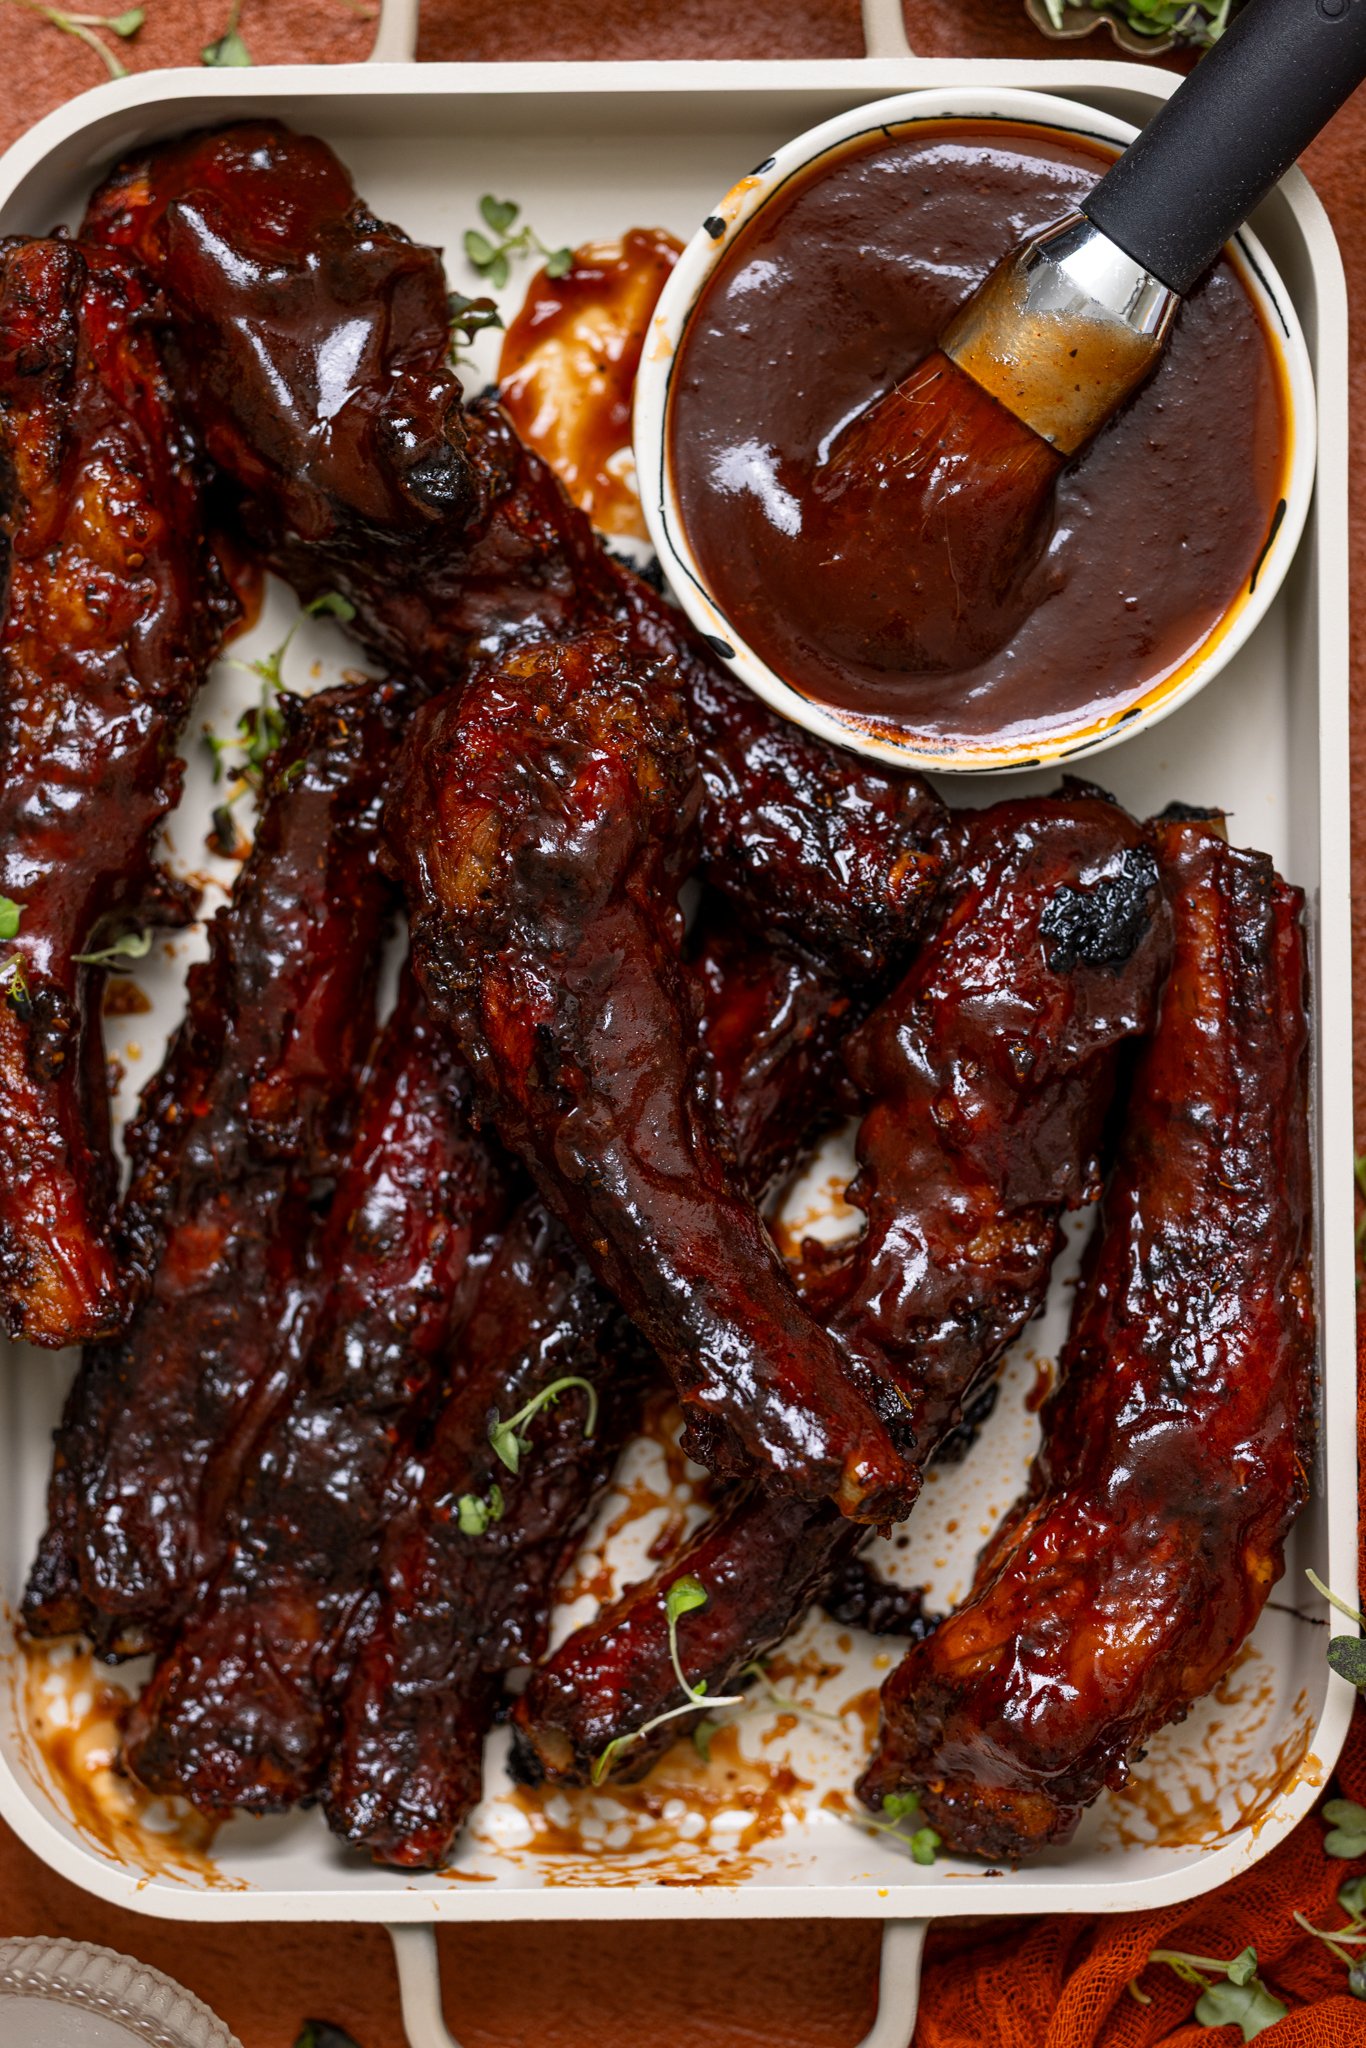
- Once the ribs have been baking for 1 hour-----generously brush on BBQ sauce until ribs are fully smothered and coated. Continue to bake for remaining 20 minutes or so.
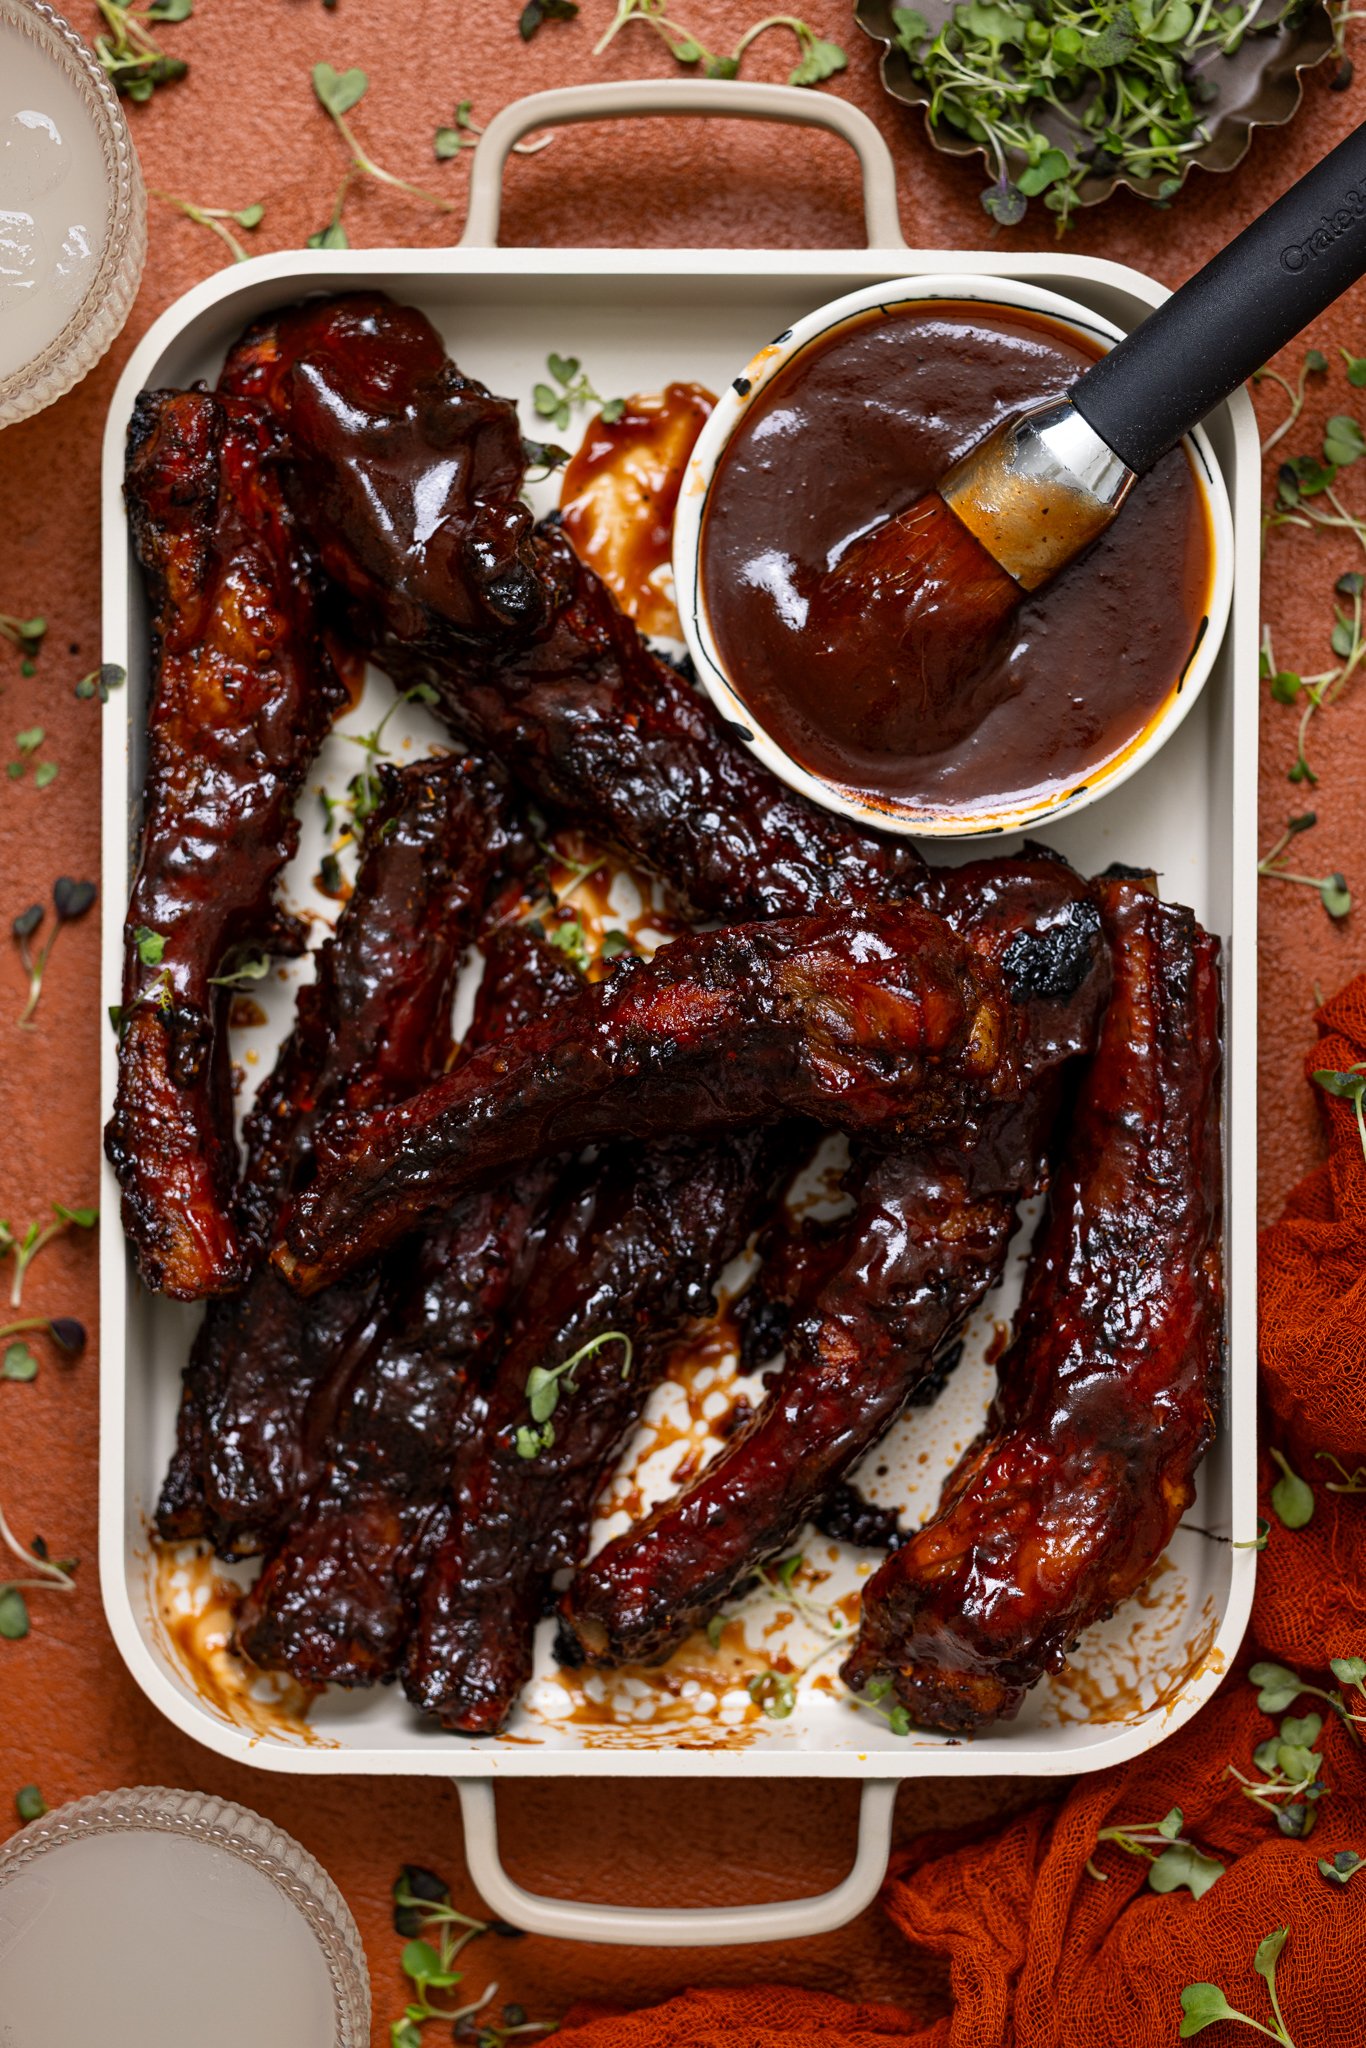
- Once done, remove from oven and brush more BBQ sauce if desired. Let ribs sit for 5 minutes before transferring to your favorite platter or dish.
- Enjoy alongside your favorite side dish! See post details for great options.
- Bon Appetit!
Tips & Tricks
- STORAGE: Any leftovers can be kept in a tightly sealed container and refrigerated for up to 3-4 days. To reheat, you can do this easily in the microwave, oven, or air fryer until warmed through and saucy.
- TIPS: Read blog post for best tips, suggestions, etc. to ensure the best results!
- HOMEMADE ALL-PURPOSE BLEND: 1 teaspoon sea salt, 1 teaspoon black pepper, 1 teaspoon garlic powder, 1 teaspoon dried oregano, 1 teaspoon dried thyme, + 1 teaspoon dried parsley.
- GLUTEN-FREE, MAKE AHEAD OPTIONS, ETC: See FAQ for details!
- AIR FRYER + GRILL OPTIONS: Read blog post for great steps on using these options for these BBQ ribs!
- FREEZER-FRIENDLY OPTION: See FAQ for details!
Nutrition
DID YOU MAKE THIS recipe?
Tag @orchidsnsweettea_ on Instagram and hashtag it #orchidsandsweettea

LOVE THIS RECIPE?
LET US KNOW!
Wow!!! Shanika you’ve out done yourself with this one!! These ribs gone hit everyday of the week!!!