
Bakery-Style Peppermint Oreo Cookies
DISCLAIMER: This post may contain affiliate links, which means that I make a small commission off items you purchase at no additional cost to you. Please read my policy page!
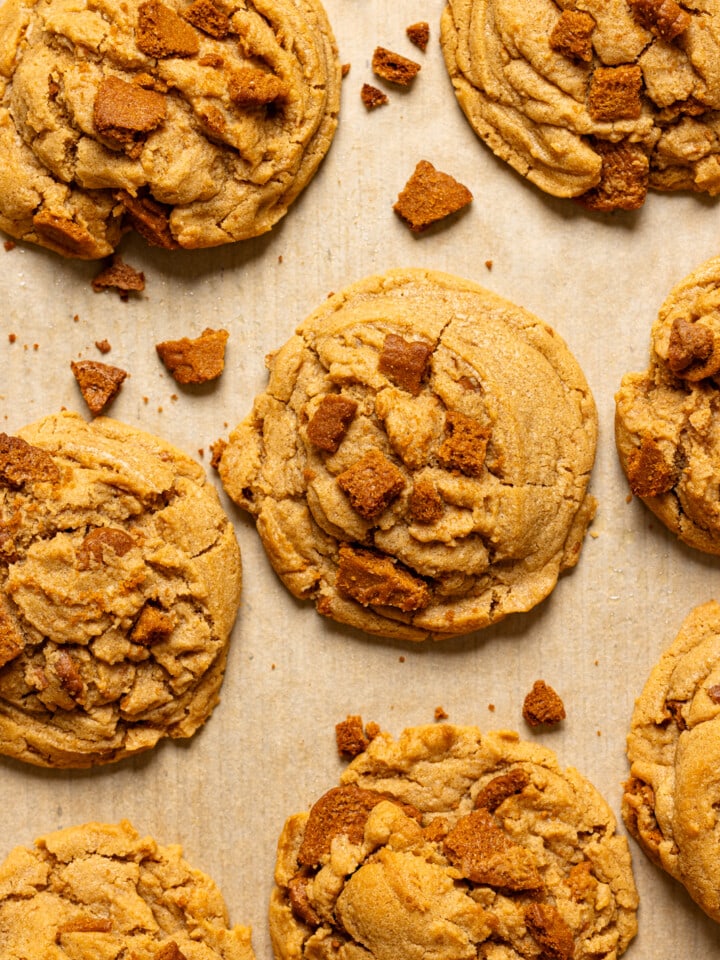
Bakery-Style Peppermint Oreo Cookies
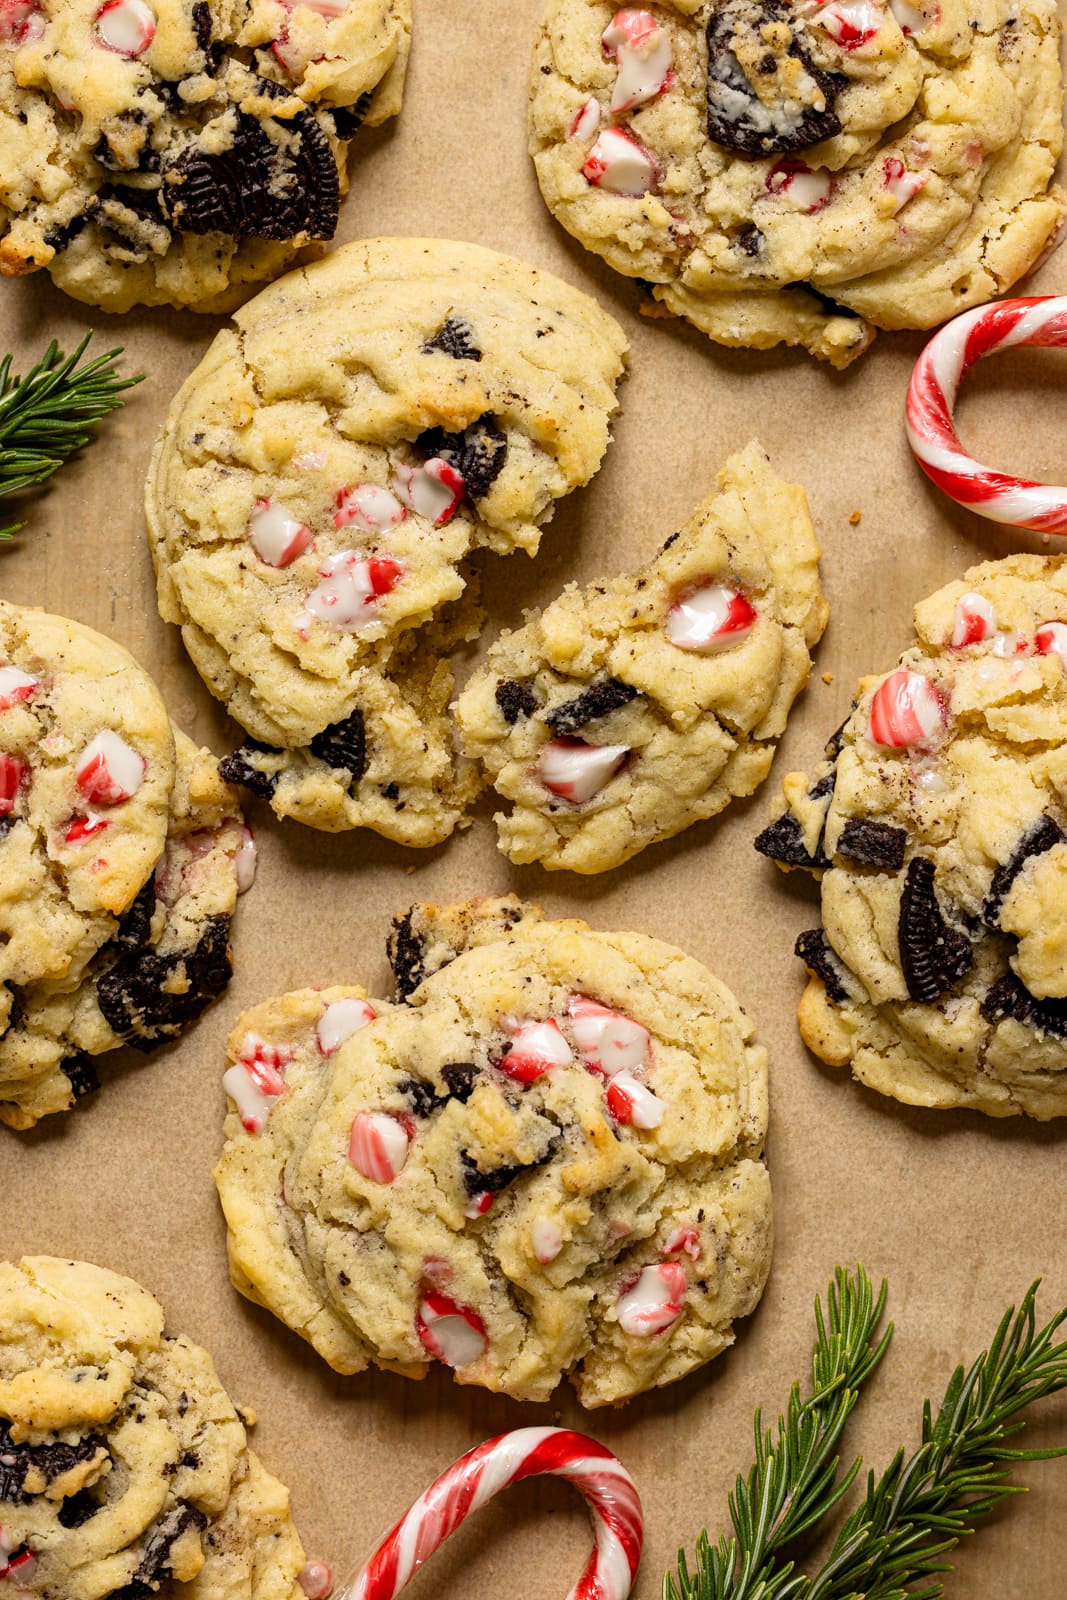
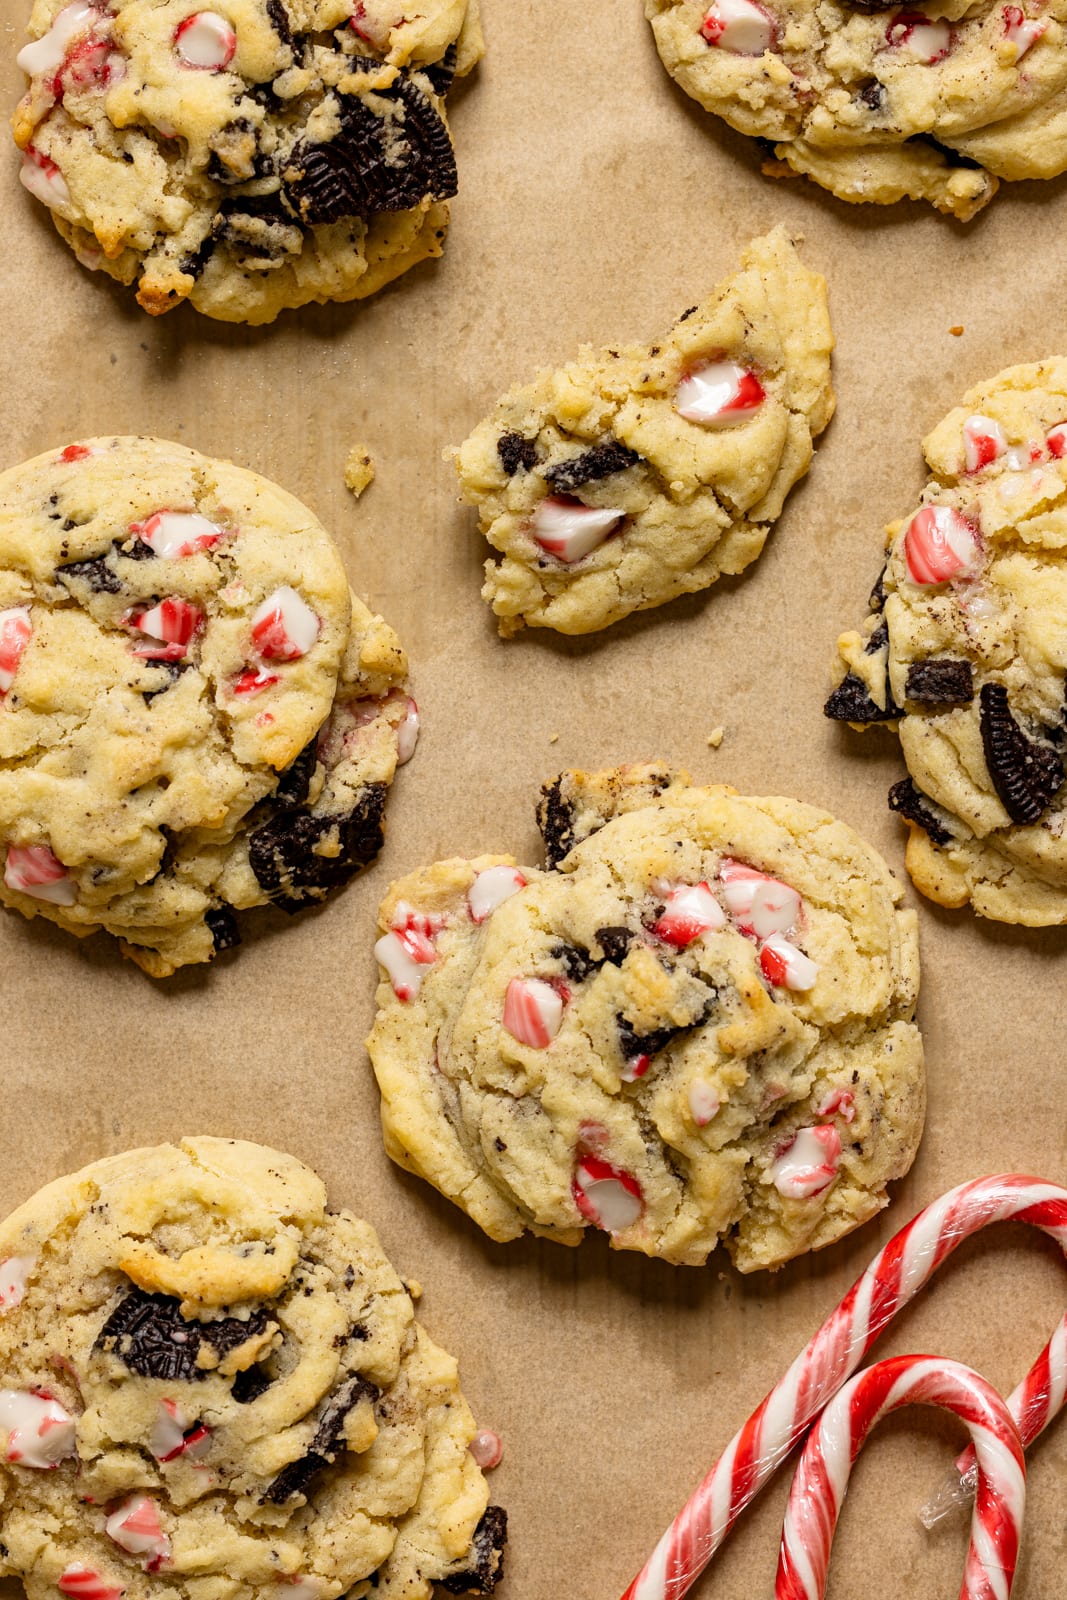
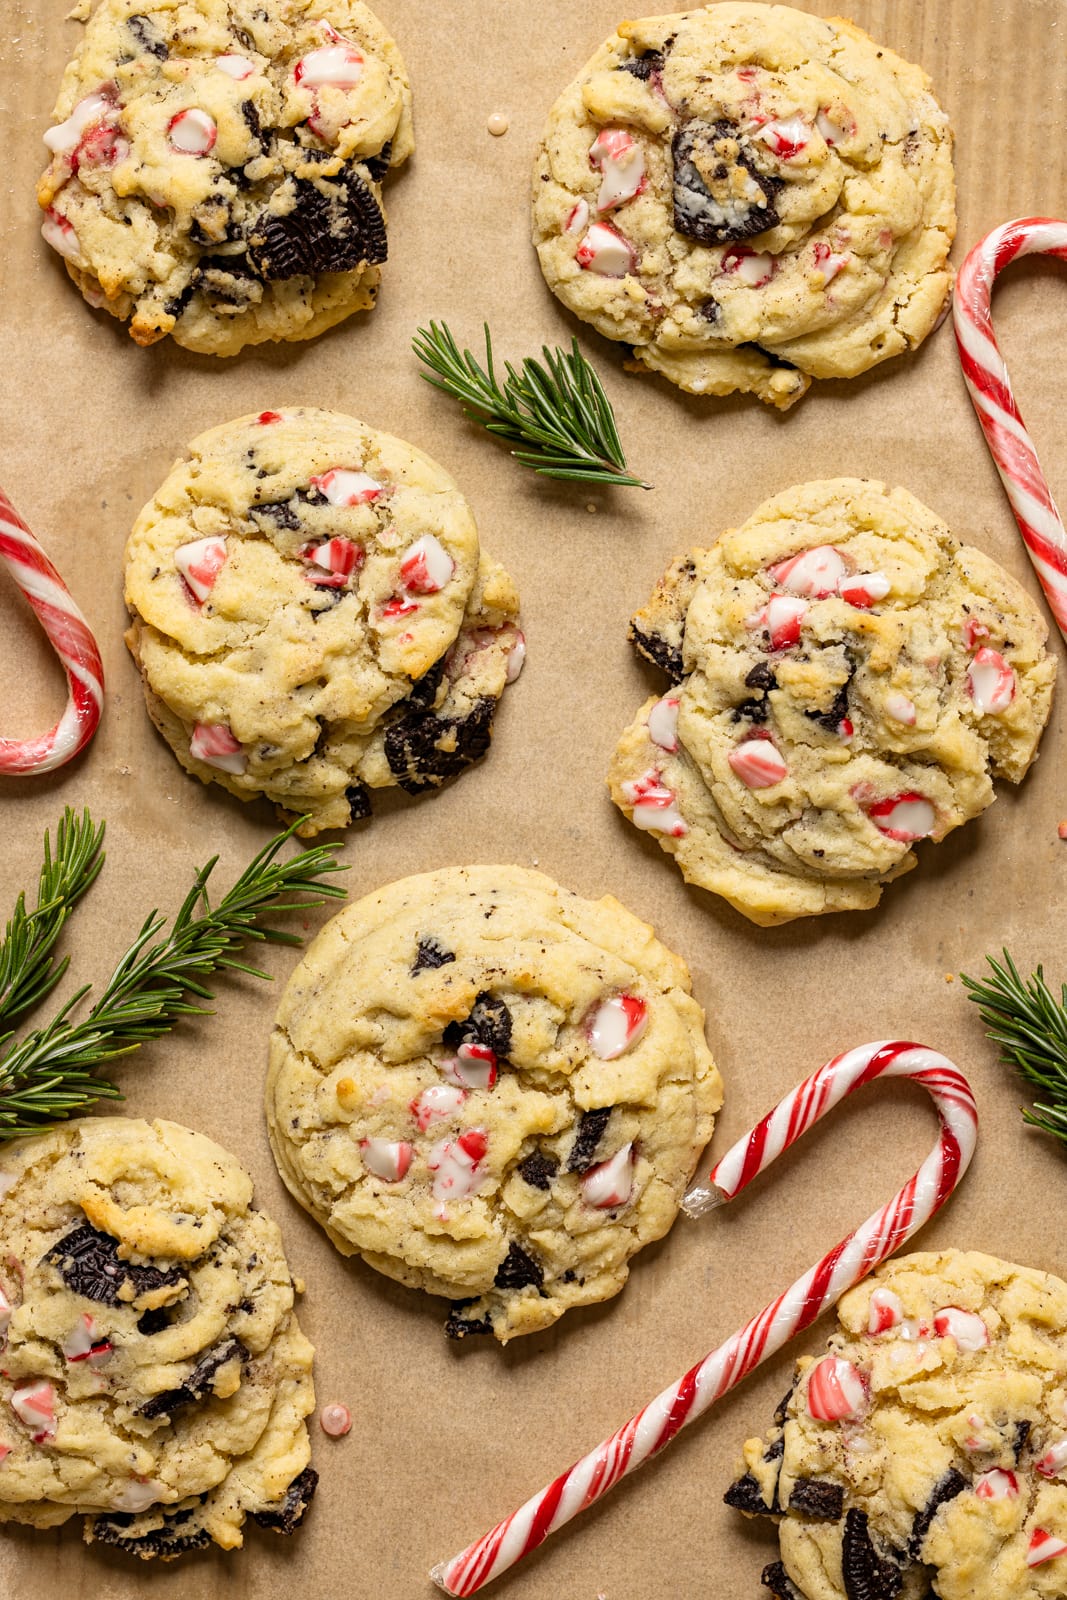
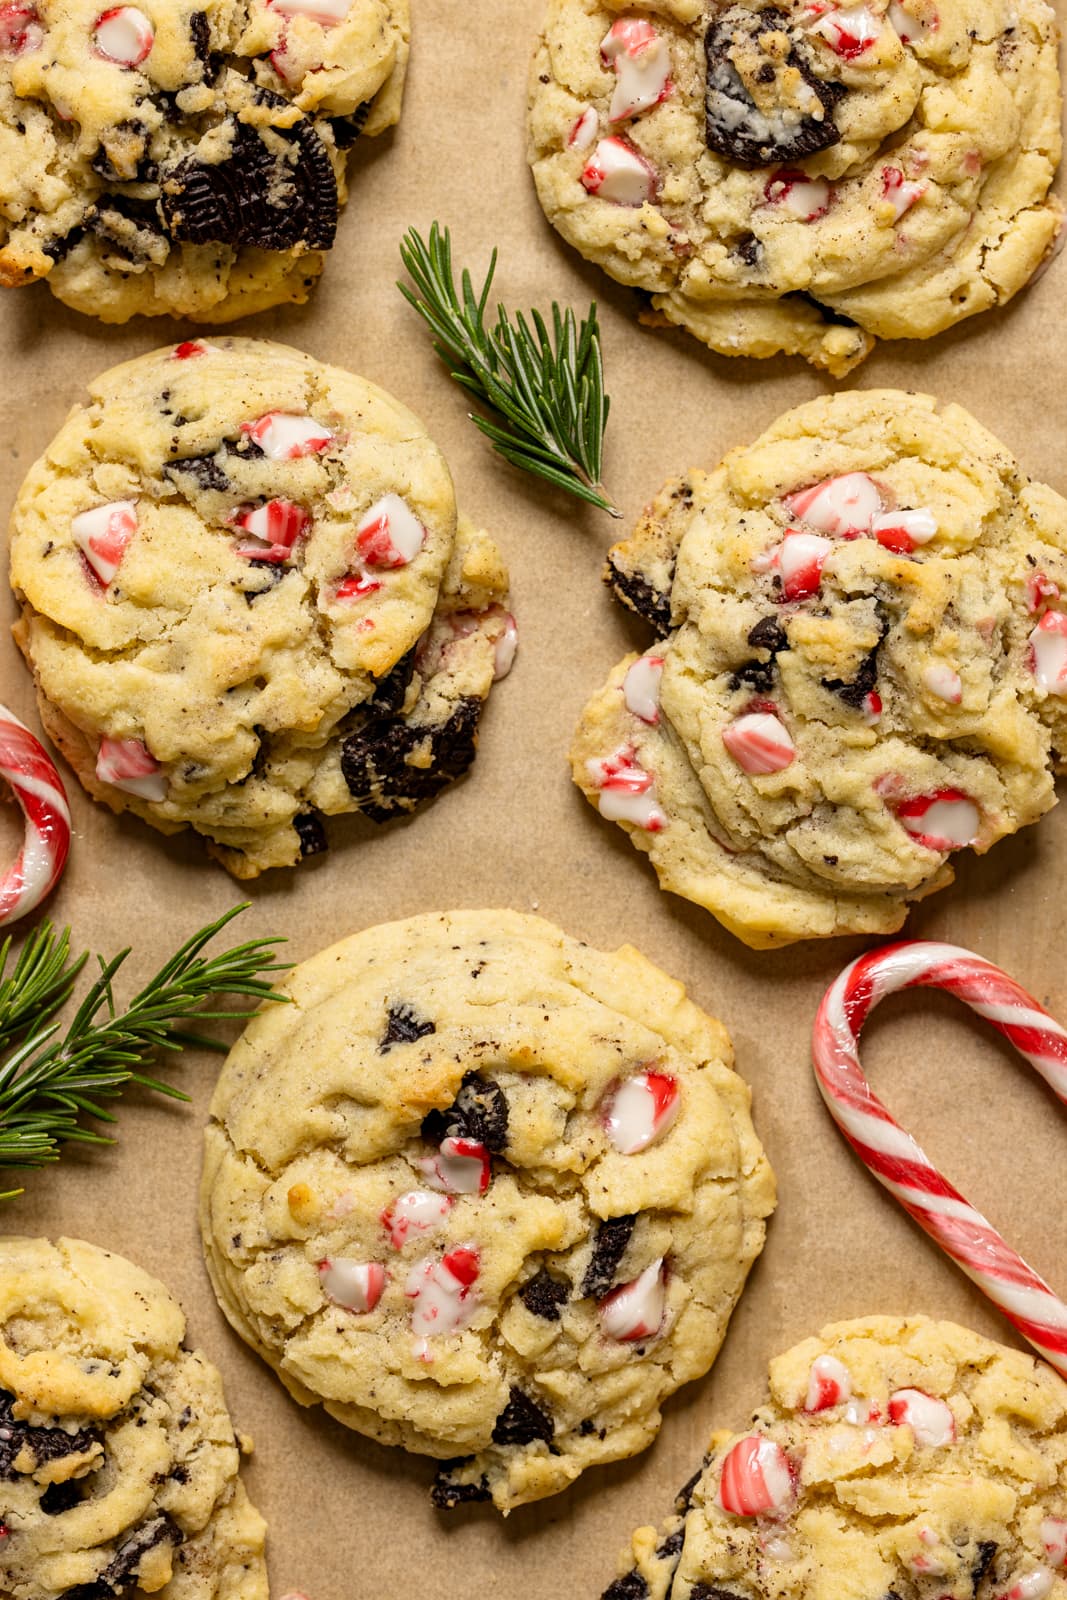
Bringing the bakery magic to your kitchen these Bakery-Style Peppermint Oreo Cookies— made with real Oreos—'a cookie within a cookie' are tender, chewy, and simply melt in your mouth. They're the perfect make-ahead cookie, guaranteed to be a hit at any holiday gathering! Infused with the festive essence of peppermint and the delightful crunch of candy canes! The perfect festive cookie for the holidays! Gluten-free option.
If you're an avid Orchids + Sweet Tea follower, y'all know I have a sweet spot for Oreos. Which means I couldn't help but create some delicious Oreo recipes over the years for you. And I have to say there is something extra special about " a cookie within a cookie" which is why I LOVE this Bakery-Style Peppermint Oreo Cookies recipe! Plus, there's nothing like a perfect dunk of soft, chewy cookies in your favorite glass of milk----hello, Almond milk or Oat milk [my two faves].
It's probably no surprise, but I have a soft spot for cookie recipes, and let's be honest, who can resist the classic charm of soft, chewy cookies, right? Whelp, if you're a major ooey, gooey cookie fan, then you need to try these Soft + Chewy Butterscotch Cookies, Loaded Lucky Charms Cornflakes Sugar Cookies, Oversized Crinkled Chocolate Chip Butterscotch Cookies, Chewy Brown Butter Pecan Cookies, and Big Bakery-Style Oatmeal Chocolate Chip Cookies next! They're family-favorite recipes.
But back to these Oreo cookies--- They will be your go-to for any occasion, especially during the holidays -- just the right amount of sweetness, chunkiness, softness, gooeyness, and includes real Oreo chunks! And is altogether easy to make—using simple ingredients. It’s a win, win situation—believe me! A flavor that's beyond mouthwatering – Perfect for beginner bakers, fool-proof + incredibly delicious. Ready in just 20 minutes!
Jump to:
- Why You Will LOVE Bakery-Style Peppermint Oreo Cookies
- How to Make Peppermint Oreo Cookies
- Ingredients
- The Secret To Chewy + Crisp Cookies
- What is the Banging Process?
- To Chill Or Not To Chill Cookie Dough?
- Tips for Making the Best Bakery-Style Cookies EVERYTIME
- How to Serve Bakery-Style Peppermint Oreo Cookies
- Bakery-Style Peppermint Oreo Cookies Q + A's
- More Delicious Family-Friendly Dessert Recipes
- MADE OUR RECIPE(S)?
- Bakery-Style Peppermint Oreo Cookies
Why You Will LOVE Bakery-Style Peppermint Oreo Cookies
- Super soft + chewy inside.
- The ultimate "cookie within a cookie"
- Minimal ingredients + GF option!
- Ready in just 20 minutes TOTAL!
- Melts in your mouth.
- Loaded with chocolatey Oreo flavor.
- Delicious with EVERY. SINGLE. BITE.
How to Make Peppermint Oreo Cookies
These Oero cookies take just about 20 minutes (in total) to whip up. I've already been through the learning curve for you, so fear not! You’ll need a few important ingredients to achieve the thick, chewy texture perfectly, with NO CHILL time required, then bake them to perfection!
Ingredients
Before we dive into this Bakery-Style Peppermint Oreo Cookies recipe, let me share the list of ingredients you'll need to achieve the thick, chewy texture perfectly:
Peppermint Oreo Cookies:
- All-purpose flour: I use Bob's Red Mill or King Arthur Flour all-purpose (organic). For GF, just substitute with GF all-purpose flour or 1-to-1 GF Baking flour.
- Baking soda: Acts as a leavening agent for a bit of rise.
- Baking powder: Adds additional leavening for a softer texture.
- Unsalted butter, softened: Contributes moisture and richness.
- Organic cane sugar: Sweetens the dough and aids in spreading.
- Large egg, at room temperature: Acts as a binding agent for the dough.
- Peppermint extract: Infuses the cookies with a delightful peppermint flavor.
- Oreo cookies, roughly chopped. The sweet, crunchy, crumbly star of the show. (Use Gluten-free Oreos for the GF option)
- Candy canes, crushed: Provides a festive peppermint crunch to the cookies.
SHOP MY FAVORITE TOOLS FOR BAKING, ESPECIALLY FOR THESE COOKIES!
Here, I’ve curated a list of baking essentials that I use to achieve my favorite baked goods, especially with these Peppermint Oreo Cookies. Everything from my fave loaf pan, wooden spoons, parchment paper, and more. SEE THEM HERE!
The Secret To Chewy + Crisp Cookies
Short answer: The banging process.
The trick about everything is in the banging. During the baking process, you have to bang the baking sheet with your cookies a few times before they are fully baked. Therefore, the “crinkling” comes as a result of the center of the cookies falling inward, pushing the rest of it outward. I know, it sounds pretty crazy, but it’s so cool!
Combining this “crinkling” process with the flavor combo of cookie butter and Biscoff cookies is like "Heaven on Earth" with each bite.
What is the Banging Process?
The trick with how beautiful these bakery-style cookies look is in the banging. While this process is optional (and you prefer chunky, dome-like cookies), I definitely like doing it a bit to flatten them and have them spread out a bit more.
WHO CREATED THIS BANGING METHOD, EXACTLY?
I originally saw the “crinkled” cookie recipe about 2-3 years ago in the New York Times, which was originally by Sarah Keiffer, a baker and blogger of The Vanilla Bean Blog.
To Chill Or Not To Chill Cookie Dough?
OK, so I know this Oreo cookie recipe doesn't call for chilling... But if you have extra time when it comes to making the best cookies, chilling your dough or not chilling it makes a difference in the results of the actual cookie once it's baked! Here are the benefits -
BETTER TEXTURE
- The #1 reason why you should chill your dough is to prevent your cookies from spreading too much---which results in a thinner, more crispy cookie. If you want a chewy on the outside soft on the inside cookie then chilling is key!
MORE FLAVOR
- Chilled cookie dough creates more flavor (and a more beautiful color) based on it becoming more hydrated----- This happens from the dry ingredients gaining moisture from the wet ingredients.
So, if you're thinking of chilling your dough, you can do so in as little as 30 minutes and as much as 2 hours (the best results).
Tips for Making the Best Bakery-Style Cookies EVERYTIME
Baking the best 'Bakery-Style' cookies as I stated before is kind of like a science, however, I've gathered a few tips that have helped me to master them over the years:
TIP 1: SOFTEN YOUR BUTTER.
This is a must! In the past, I never understood how important this step was, but I've now realized that it is. I like to let my butter sit out for at least 1-2 hours so that it's the softest it can get without melting. If you forget to leave your butter out, I sometimes add hot water to a glass, pour it out, and then add the butter to that heated glass for a few minutes and it works!
TIP 2: CREAM THE BUTTER.
Yet another step that I often overlooked, however, creaming your butter with a mixer until pale and fluffy, helps to make the most softest cookies ever!
TIP 3: ALWAYS, ALWAYS USE PARCHMENT PAPER!
I can't stress this enough. Lining your baking sheet with parchment makes things seamless and prevents your cookies from browning too quickly and sticking to the pan.
TIP 4: ADD IN THE FLOUR IN BATCHES.
We might think that dumping in all the dry ingredients to the wet ingredients at once might seem right, but it's not the best thing to do. I definitely recommend adding in the flour/dry ingredients in increments, mixing as you add to create a nicely combined batter without having to over-mix.
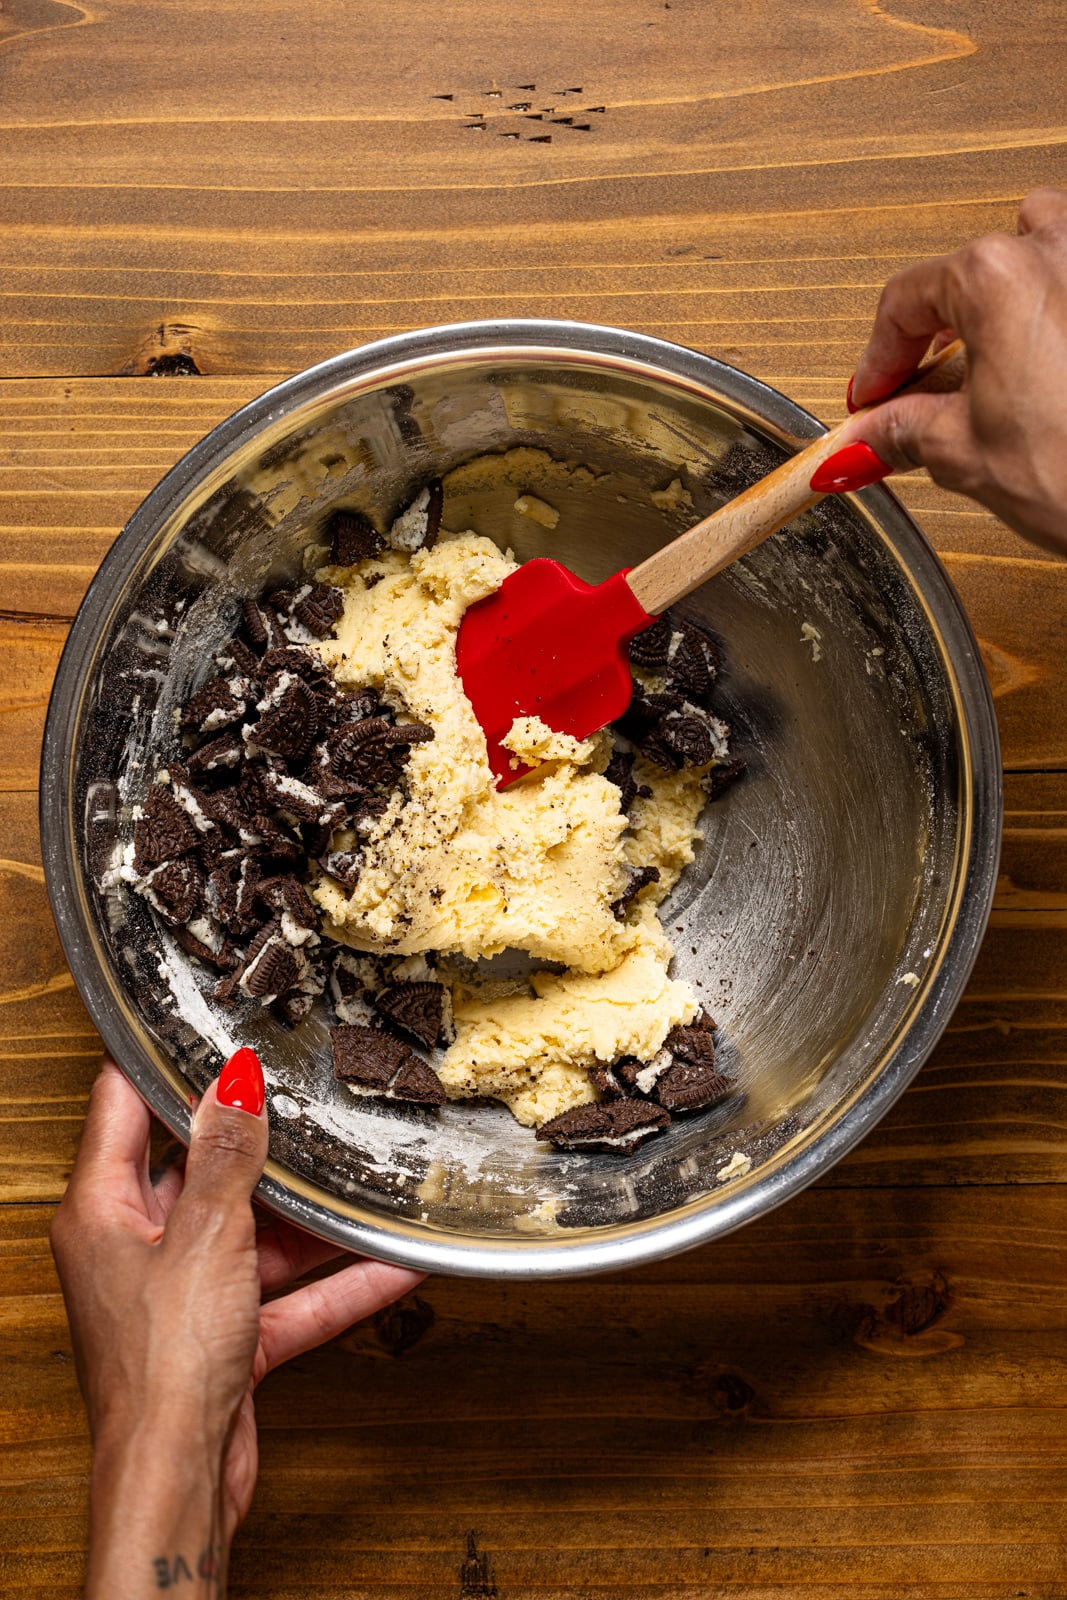
TIP 5: FOLD IN ADDITIONAL INGREDIENTS.
Never use a mixer when adding in the additional ingredients like the chopped/crushed Oreo cookies, chopped chocolate, chocolate chips, etc. For one----you risk breaking the ingredients up into small pieces while mixing and two----again, you end up making the chocolate melt (if using in a cookie) or get a little moist, which affects the batter. Simply fold in any added ingredients by hand a few times and you're done!
How to Serve Bakery-Style Peppermint Oreo Cookies
I personally think fresh + warm is always the absolute best-- not to mention the delicious smell wafting through the house. They are also AMAZING with ice cream, either in a bowl or as an ice cream sandwich (It will be the ultimate giant Oreo situation Haha.)
Try with No-Churn Vanilla Ice Cream for my vanilla lovers or my No-Churn Chocolate Oreo Ice Cream for all the Oreo indulgence! These cookies are also perfect for topping atop delicious lattes like this Iced Vanilla Latte or Homemade Peppermint Mocha Latte for that extra chocolate fix!
Bakery-Style Peppermint Oreo Cookies Q + A's
Once properly stored in an air-tight container, cookies last for 3-4 days at room temperature or in the refrigerator for a little longer. Reheat slightly (a few seconds) in the oven, toaster oven, or microwave when ready to serve.
Yes! To make these cookies GF, simply substitute flour with all-purpose GF flour or 1-to-1 Baking flour. And just use Gluten-free Oreos in place of the original variety.
Yes! To make more cookies, simply double or triple the amount of ingredients!
Any unused cookie dough batter can be refrigerated for up to 3 days or frozen for up to 1 month and then thaw overnight in the fridge, if you choose not to use it right away!
More Delicious Family-Friendly Dessert Recipes
Now that you've fallen in love with Bakery-Style Peppermint Oreo Cookies, put your baking skills to good use with these other amazing dessert recipes:
- Maple Chocolate Chip Banana Bread
- Salted Caramel Apple Crisp
- Vegan Orange Cranberry Bread
- Biscoff Banana Pudding with Caramel
- Southern-Style Carrot Cake Cinnamon Rolls
- Iced Lemon Loaf Pound Cake
- Olive Oil Cake
- Oversized Crinkled Chocolate Chip Butterscotch Cookies
- Chewy Brown Butter Pecan Cookies
MADE OUR RECIPE(S)?
If you tried this Bakery-Style Peppermint Oreo Cookies recipe or any other recipe on my website, please please leave a 🌟 star rating and let me know how you go in the 📝 comments below. And don't forget to tag @orchidsnsweettea_ on Instagram and hashtag it #orchidsandsweettea! I love hearing from you!
Bakery-Style Peppermint Oreo Cookies
Ingredients
COOKIES:
- 1 ½ cups organic all-purpose flour
- 1 teaspoon baking soda
- ½ teaspoon baking powder
- ½ cup unsalted butter, softened at room temp.
- ¾ cup organic cane sugar
- 1 large egg, at room temp.
- 1 teaspoon peppermint extract
- 8 Oreo cookies, roughly chopped
- 2 candy canes, crushed into medium pieces
Instructions
TO MAKE THE COOKIES:
- Preheat the oven to 375 degrees Fahrenheit and line a baking sheet with parchment paper.
- In a large bowl, add in the softened butter and sugar, beating them together using a hand mixer (or electric stand mixer)until the mixture looks smooth and fluffy. Add in the egg and peppermint extract, and continue to mix until combined.
- In a bowl, add together the flour, baking soda, and baking powder, whisking together until combined.
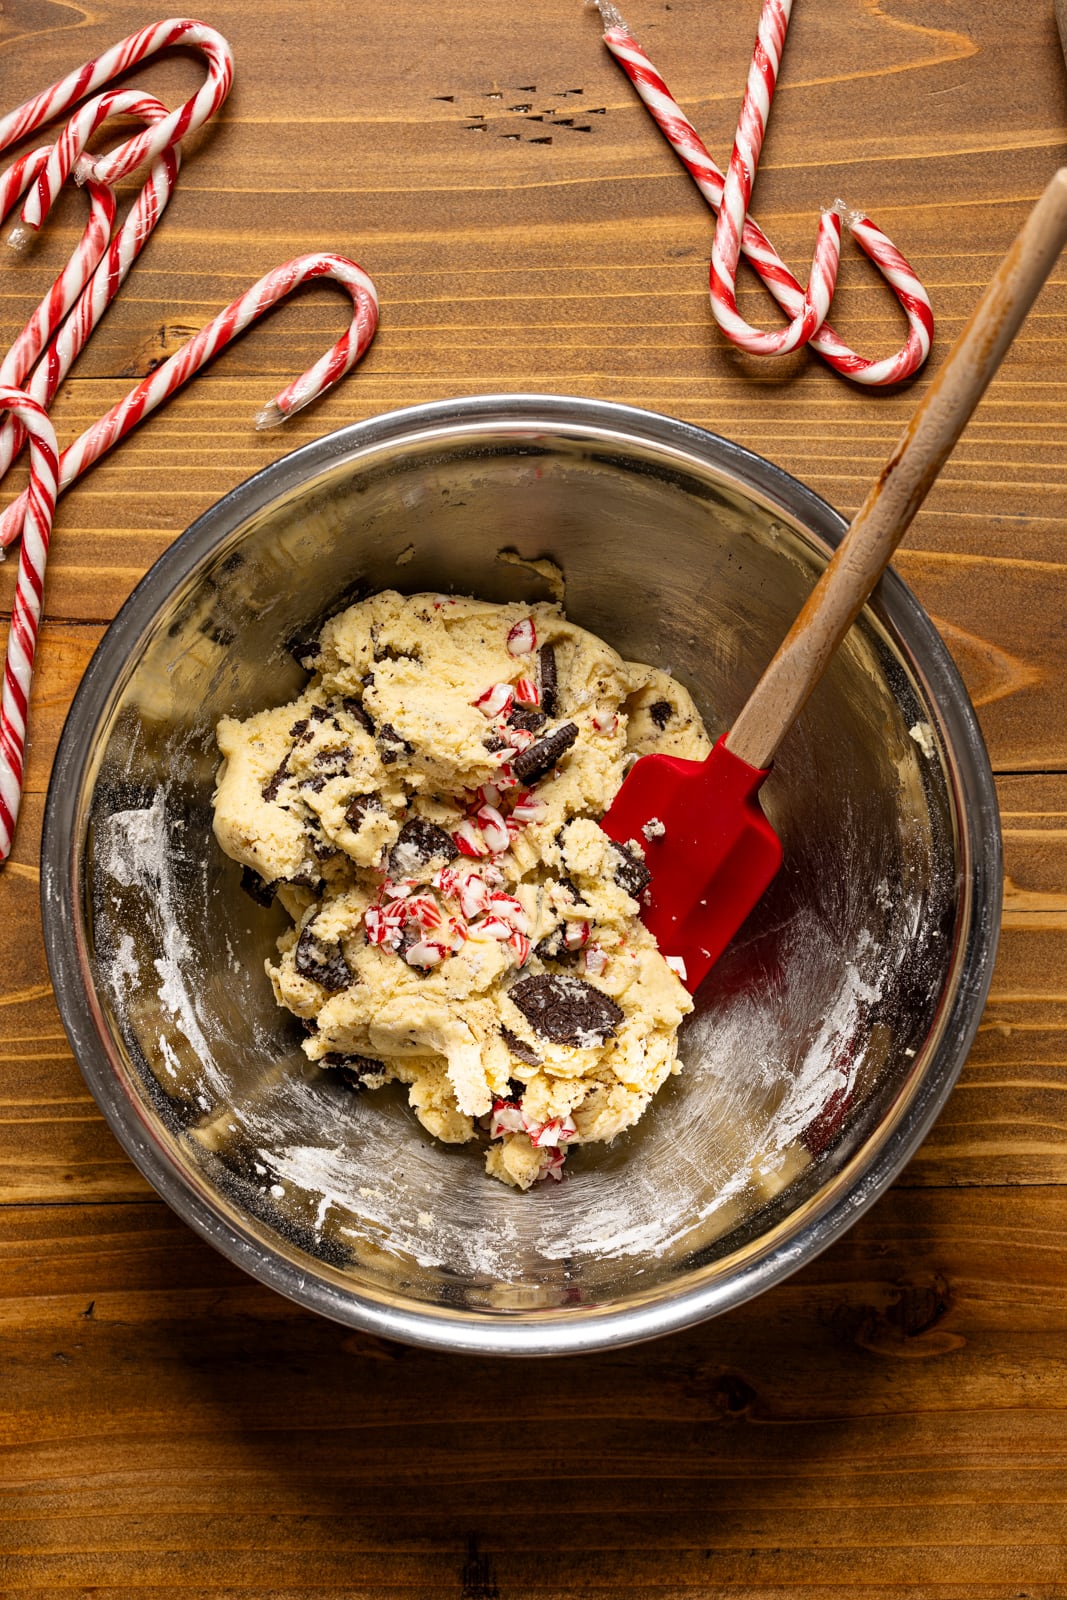
- With the mixer on low-speed, add in the dry ingredients to the wet ingredients, mixing until the mixture becomes smooth, moistened, and holds together well. Fold in candy cane pieces and Oreo cookies.
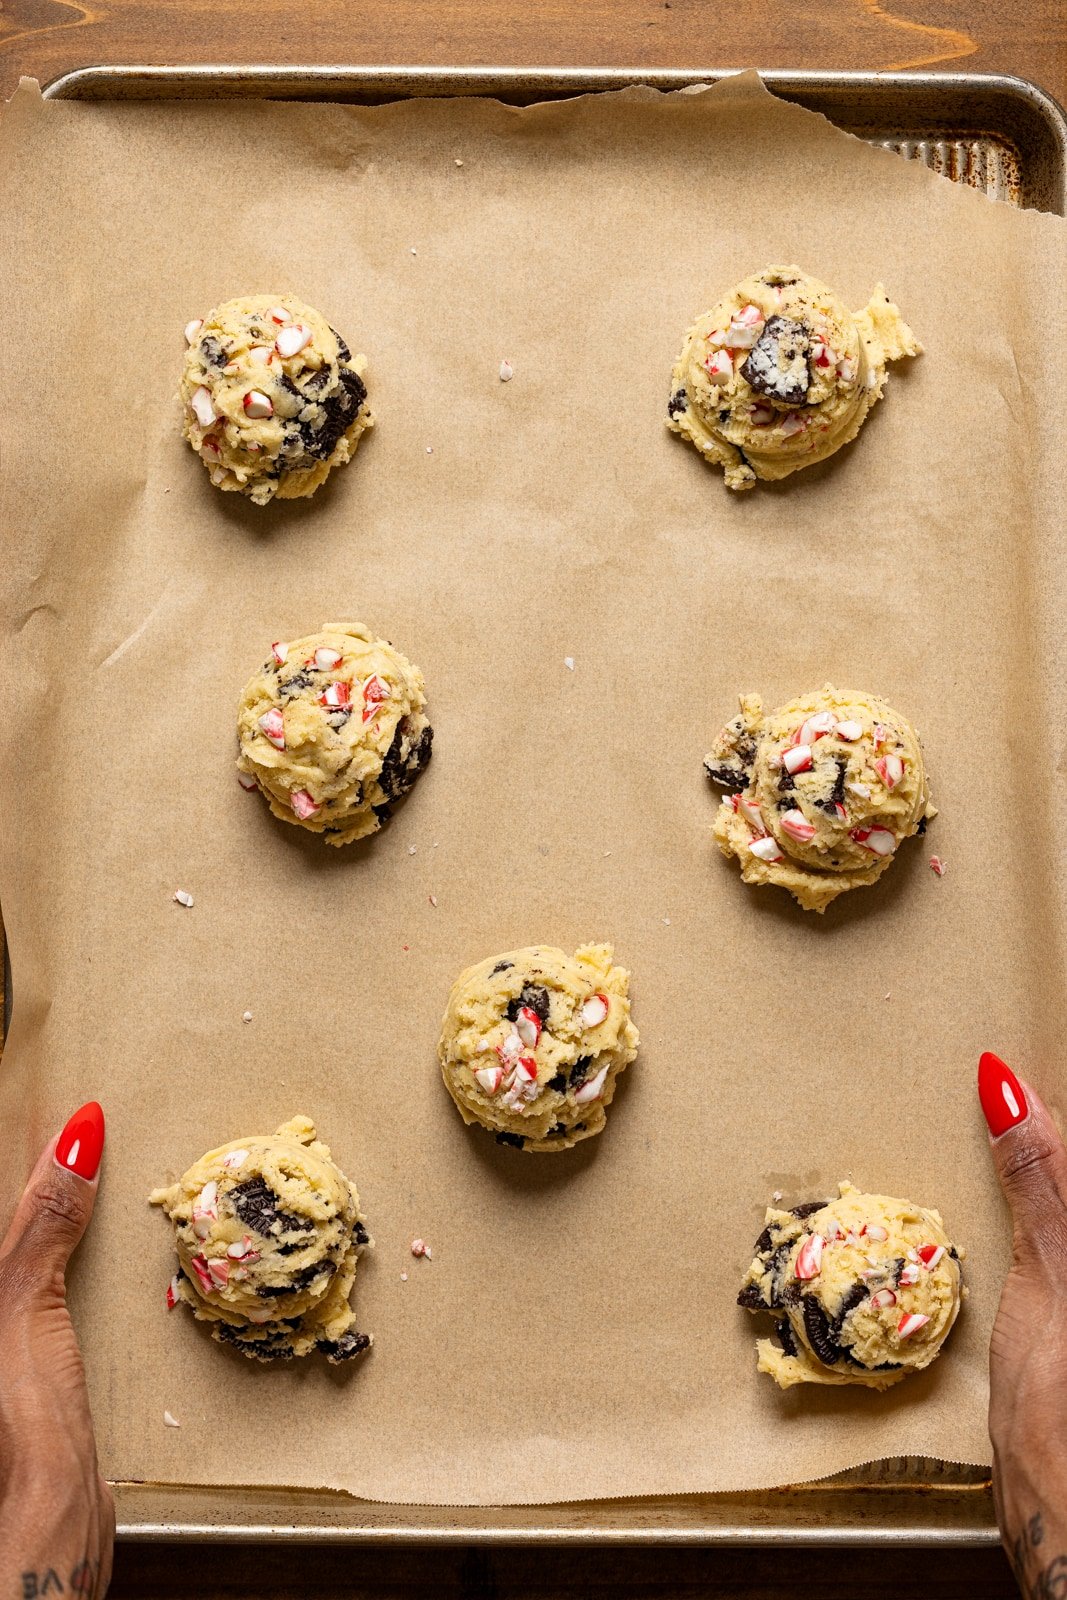
- Using a medium-size scoop, scoop (about 3 Tbsps or so) each cookie dough onto the prepared baking sheet, leaving 1-2 inches between each cookie for spreading when they bake. For a bit of extra pizazz, add a few more pieces of of crushed candy cane + Oreo cookies, pressing them in each cookie slightly, if desired. NOTE: See notes for the "banging method" for a nice crinkled, flatter look.
BAKE THE COOKIES:
- Bake for 13 to 15 minutes (checking it after about 10 minutes), or until the edges are golden brown.
- Remove the cookies from the oven and cool cookies onto the baking sheet for a few minutes before transferring them unto a cooling rack to cool completely.
- Enjoy with your favorite glass of milk, tea, or eggnog.
- Bon Appetit!
Tips & Tricks
- STORAGE: Once properly stored in an air-tight container, cookies last for 3-4 days at room temperature or in the refrigerator for a little longer. Reheat slightly (a few seconds) in the oven, toaster oven, or microwave when ready to serve.
- FREEZE: You can also freeze your cookie dough (once formed into a ball) so that you can store them longer and bake as needed.
- BANGING METHOD: I love making my cookies chunky, however, if you chose to use the “banging method” in this recipe to avoid cookies from being too puffy, it’s definitely optional-----this is only needed if you decide to chill the dough prior to baking.
- LARGER BATCHES: To make more cookies, simply double or triple the amount of ingredients!
Nutrition
DID YOU MAKE THIS recipe?
Tag @orchidsnsweettea_ on Instagram and hashtag it #orchidsandsweettea

LOVE THIS RECIPE?
LET US KNOW!